README files
Last updated on 2026-03-31 | Edit this page
Overview
Questions
- Where can I give proper installation instructions?
- What licenses can I add for text, figures, and data?
- How do I generate a citation for my project?
- How can I increase the visibility of community guidelines?
Objectives
- Recognise good practices for
READMEfiles. - Complement the rcompendium
READMEtemplate. - Identify your project features related to Open science.
README files
README files can include a whole range of information
from an overview of the project, installation
instructions and licensing details to information on how to
contribute to the code and cite the software. With modern text markup
and formatting through Markdown, README files
can also be rendered in a much more accessible and
appealing manner than traditional plain-text
README files. (Cohen
and Crouch, 2023)
Good practices
There is no standard for README files, but we can use
some widely used approaches. Here we list some README good
practices collected by Cohen
and Crouch, 2023:
- Consider a formatting, layout, or structure.
- Ensure clear and concise descriptions.
- Avoid overloading the
READMEwith content that could be hosted elsewhere. - Consider including a table of contents if you have many sections.
-
Know your audience - Is your
READMEaimed at other developers or end-users of your software/code?
Structure
Using an online editor called readme.so, we selected some typical sections frequently found in R packages:
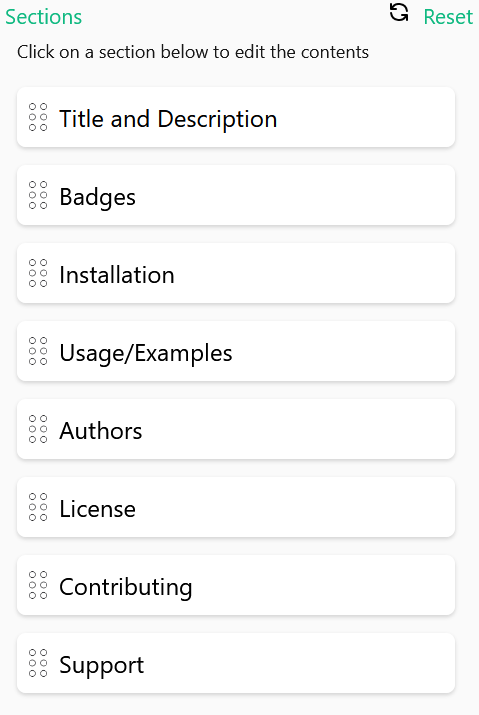
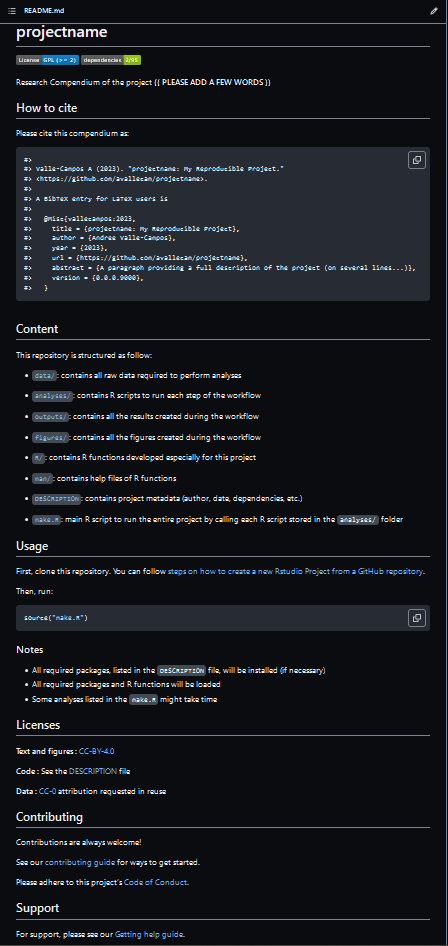
This selection generates this README file preview
template:
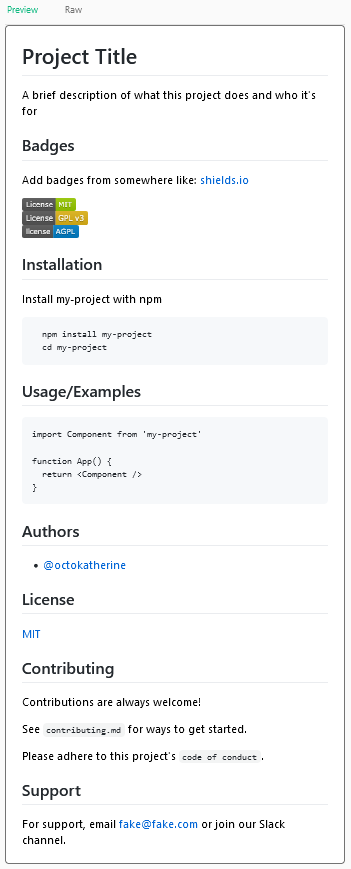
We can find room for improvement if we compare this readme.so template with the
README file from the rcompendium
template.
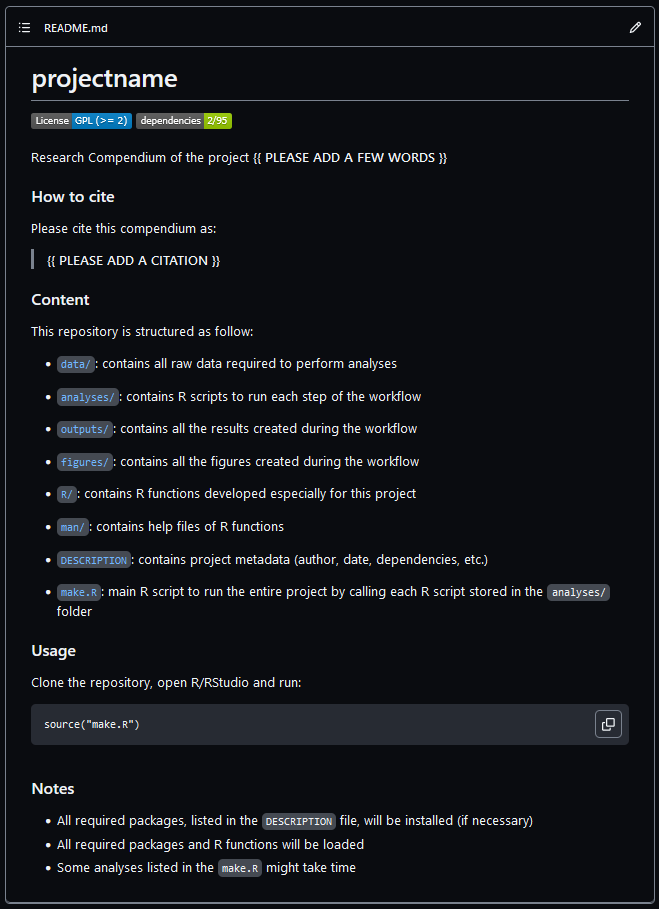
In this episode, we will complement this template with some key sections.
Callout
We invite you to edit your README as you prefer! You can
also use this simple readme.so editor to
generate more section templates than the ones we will cover
here.
Let’s code
First, let’s Knit the README.Rmd.
We must remember that our README.md is generated from
the README.Rmd file. So we need to edit that file and
Knit it after any update. This step is not done
automatically for this template.
Installation
The Usage section includes the installation steps
of:
- Clone a repository, and
- Use R/Rstudio.
We can assess our target audience and adapt this content to our projects.
Let’s assume that the following personas are examples of the types of people that are your target audience:
Patricia is a PhD student. She uses R to analyse infectious disease data and wants it to be reproducible. She is unfamiliar with GitHub and the terminal window.
Lucia is a Field epidemiologist. She uses R to clean data and create plots for outbreak response. She wants to communicate her doubts and ideas with package maintainers. She does not track the versions of her code with Git.
If we want to add external guides to facilitate the
git clone step, we can complement our installation steps
with external resources.
Copy, edit as you prefer, and paste it to your README
file:
### Usage

First, clone this repository. You can follow [steps on creating a new Rstudio Project from a GitHub repository](https://www.epirhandbook.com/en/version-control-and-collaboration-with-git-and-github.html?q=clone#clone-from-a-github-repository).

Then, run:
Checkpoint
Knit the README.Rmd file.
Callout
Notes are not part of the structure but information
about the Usage step. We can add one more # to
its heading.
Citation
We can take advantage of the DESCRIPTION file to
generate a CITATION file.
First, open the DESCRIPTION file.
Note that in the 5th line, the Authors@R section is
already filled with your details. You set this up when running the
Configuration steps with
rcompendium::set_credentials().
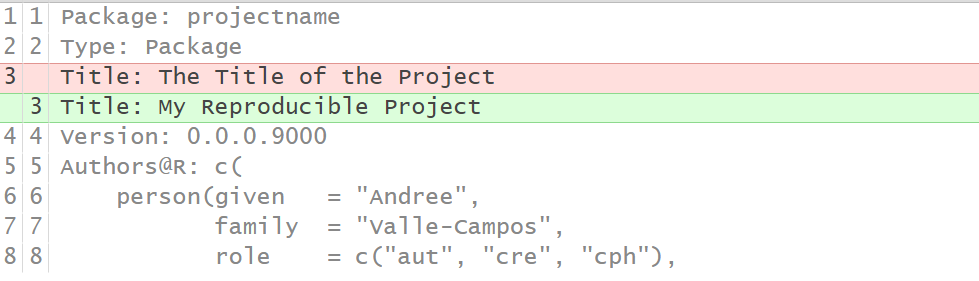
Second, write a Title for the Project in the 3rd line.
The Title
should be written in sentence case, not ending in a full stop.
Callout
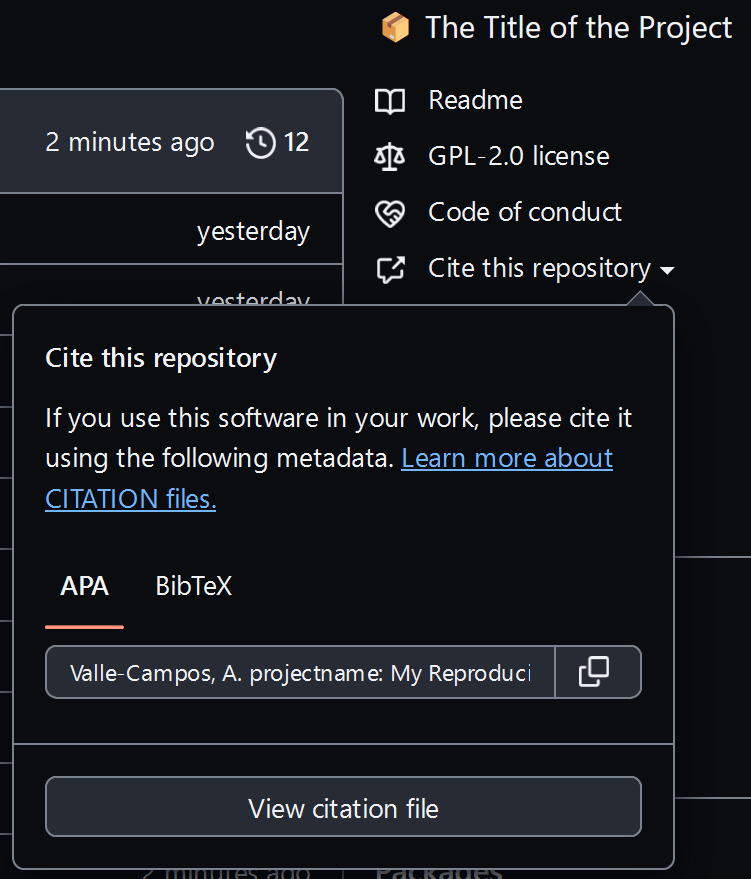
CITATION.cff
is file format that facilitates software citation in ecosystems like
GitHub, Zenodo and Zotero.
Third, to generate a CITATION.cff file from the DESCRIPTION file, we can install the cffr package:
R
install.packages("cffr")
Fourth, create a .cff file:
R
cffr::cff_write(dependencies = FALSE)
Commit and Push your changes. Identify that GitHub has built-in support for this citation.
How can I paste the CITATION in the README file?
First, open the CITATION.cff file:
R
usethis::edit_file(path = "CITATION.cff")
Our default CITATION.cff does not record the
year of creation. To solve it, we can add this extra line
at the end:
date-released: '2023-04-23'Second, to read the CITATION.cff in the
README.Rmd, as in this
other tutorial README file:
- Paste this template text in the
README.Rmdat the Citation section
See [CITATION.cff](CITATION.cff) for citation information,
including a list of authors.
([Read more about the Citation File Format and how to use it](https://citation-file-format.github.io/).)

To cite these tutorials in publications use:- Add this chunk using following chunk options
eval=TRUE, echo=FALSE, comment="":
R
cffr::as_bibentry(x = "CITATION.cff")
- To include a BibTeX entry for LaTeX users, paste this chunk with
options
eval=TRUE, echo=FALSE, comment="":
R
utils::toBibtex(cffr::as_bibentry(x = "CITATION.cff"))
Lastly, Knit the README.Rmd file. If you
get an error, try installing
the latest version of {evaluate} R package.
Licenses
Our project has a GPLv2
license registered in the LICENSE.md file and in the
DESCRIPTION file as a GPL
(>=2).
We adapted text generated by the {rrtools}
package template.
Copy, edit as you prefer, and paste it to your README
file:
### Licenses

**Text and figures :**  [CC-BY-4.0](http://creativecommons.org/licenses/by/4.0/)

**Code :** See the [DESCRIPTION](DESCRIPTION) file

**Data :** [CC-0](http://creativecommons.org/publicdomain/zero/1.0/) attribution requested in reuse
Checkpoint
Knit the README.Rmd file.
Contributing
We adapted this format from the template generated from readme.so. We added hyperlinks to redirect
to the Community files in the .github/ folder.
Copy, edit as you prefer, and paste it to your README
file:
### Contributing

Contributions are always welcome!

See our [Contributing guide](/.github/CONTRIBUTING.md) for ways to get started.

Please adhere to this project's [Code of Conduct](/.github/CODE_OF_CONDUCT.md).

### Support

Please see our [Getting help guide](/.github/SUPPORT.md) for support.
Checkpoint
Knit the README.Rmd file.
Markdown
In Markdown, the Header 2 generates an underline that
can help isolate sections of our chosen structure.
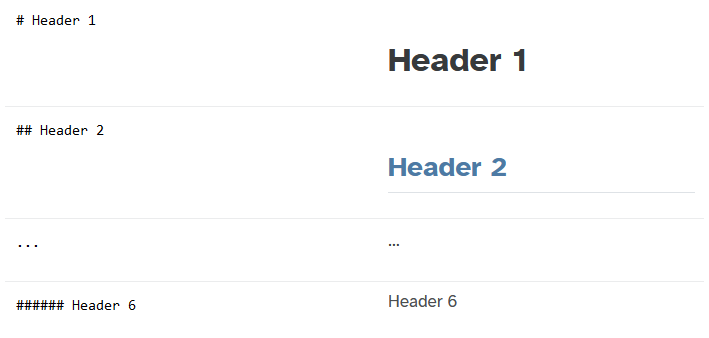
Remove one # from all the main headers. This edit
generates a final README file that looks like this:
Discussion
Consider your research project:
- Would you add or remove any section from the
READMEtemplate above? Why?
Explore the online editor called readme.so to identify more sections that could suit your research project.
Testimonial
We recommend you to listen to the Code for Thought podcast episode on the
READMEfile. They also have a few links that you might find helpful.For Badges, we recommend reading a Blog post on Communicating development stages of open-source software at the Epiverse-TRACE website.
Checklist
Open science features
We define Open science as making software, data inputs and outputs freely available by publishing all of them with open licences to facilitate project reuse.
A vital feature of this practice is the Licenses. Explicit licenses that include the software and the specific license for text and figures and data, in particular, are also relevant.
Key Points
- Complement the
READMEtemplate with Installation steps, Citations, Licenses and Contributing guides. - Use different types of licenses of text and figures, software code, and data.
- Licenses is a feature related to Open Science.