Creating a Repository
Last updated on 2025-04-11 | Edit this page
Estimated time: 25 minutes
Overview
Questions
- Where does Git store information?
Objectives
- Create a local Git repository.
- Describe the purpose of the
.gitdirectory.
The Git jargon
Git is a topic that contains a lot of words to do
version control.
We will locate them using this workflow bellow as template. We will
relate Version control actions that we can perform with
specific git verb commands. These verbs will
record your changes between Git spaces associated
to your folder.

git verb commands, and spaces.In this episode, we are going to learn how to initialize Git to create a Local Repository in our folder, also known as Working directory or Workspace.
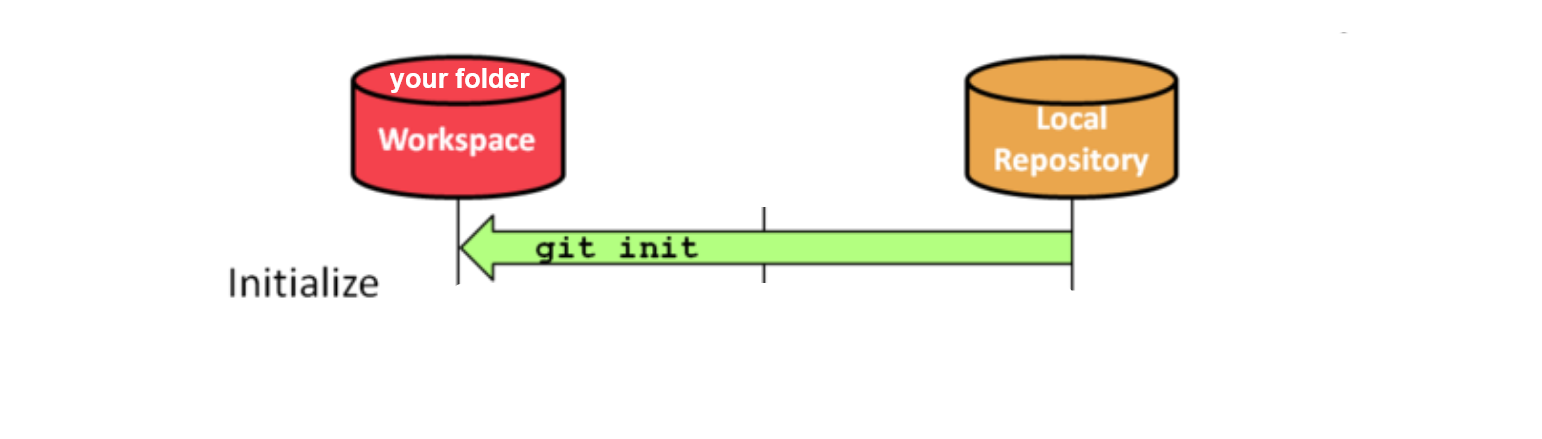
git init command verbLet’s start with a new R project in RStudio.
PREREQUISITES
To start, you need to be out of any R project. In RStudio, close you
Project from File > Close Project. You can
confirm this in the upper right corner Project: (None).
Create a local repository
Once Git is configured, we can start using it.
We will continue with the story of Wolfman and Dracula who are investigating a disease outbreak and build a situational report.

First, let’s create a new project folder for our work. Create a new project as you like. Here we are going to use functions from the usethis package.
If using RStudio desktop, the project is opened in a new session. Otherwise, the working directory and active project is changed:
R
usethis::create_project(path = "cases")
OUTPUT
✔ Creating 'cases/'
✔ Setting active project to 'C:/~/cases'
✔ Creating 'R/'
✔ Writing 'cases.Rproj'
✔ Adding '.Rproj.user' to '.gitignore'
✔ Opening 'C:/~/cases/' in new RStudio session
✔ Setting active project to '<no active project>'
Then we tell Git to make cases a repository -- a place where Git can
store versions of our files:
R
usethis::use_git()
OUTPUT
✔ Setting active project to 'C:/~/cases'
✔ Initialising Git repo
✔ Adding '.Rhistory', '.Rdata', '.httr-oauth', '.DS_Store', '.quarto' to '.gitignore'
There are 2 uncommitted files:
* '.gitignore'
* 'cases.Rproj'
Is it ok to commit them?
Remember that each record of change can be commit. So, you can make these two
files, .gitignore and cases.Rproj, part of it.
Select that Yes, you agree!
OUTPUT
✔ Adding files
✔ Making a commit with message 'Initial commit'
• A restart of RStudio is required to activate the Git pane
Restart now?
Agree to restart your session to activate the Git pane in RStudio:
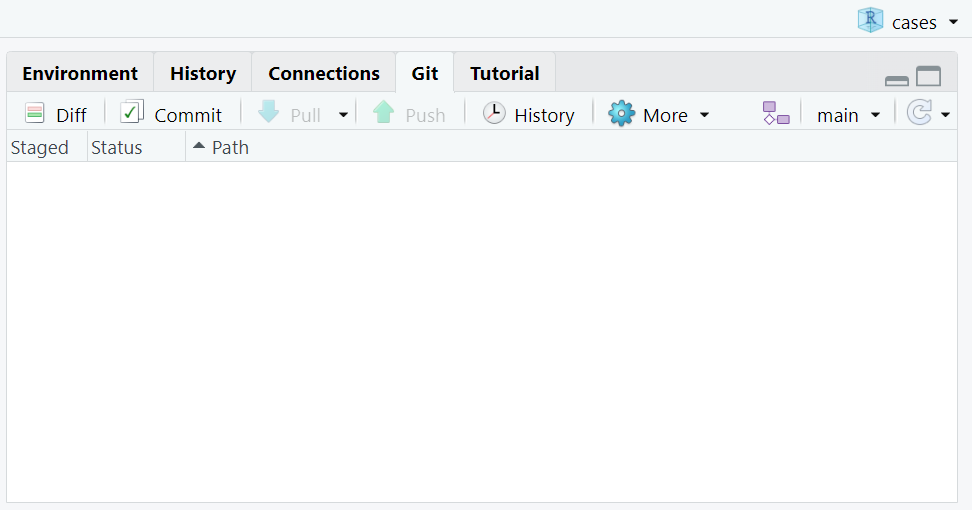
status of your repository.The Git tab is in the Environments pane, usually in the upper right corner of the RStudio IDE.
In this and next episodes you’ll learn the function of all those buttons on the top of the Git tab!
It is important to note that usethis::use_git() will
create a repository that can include subdirectories and their
files—there is no need to create separate repositories nested within the
cases repository, whether subdirectories are present from
the beginning or added later. Also, note that the creation of the
cases directory and its initialization as a repository are
completely separate processes.
This step is known as git init because it initialise
your Git repository.
Checklist
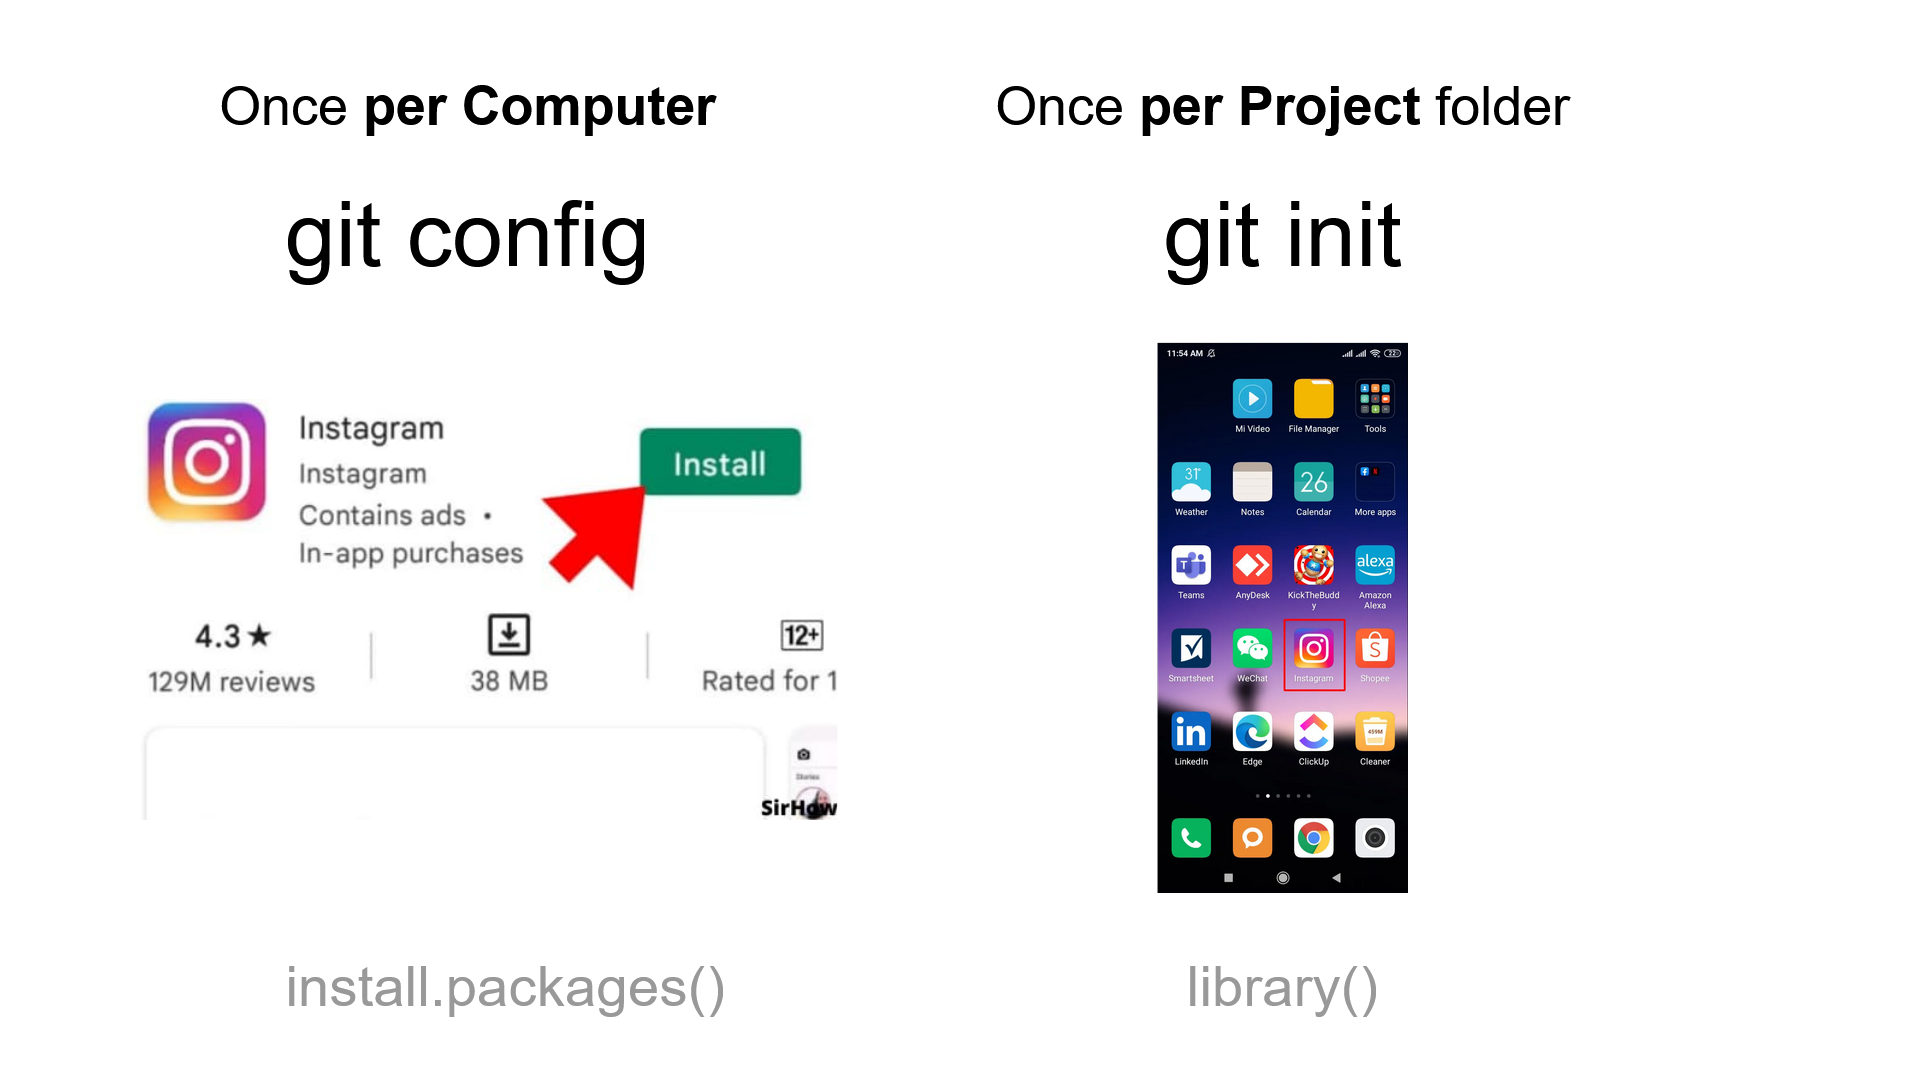
Git once per computer.
Initialize Git once per project.Find the new files of a local repository
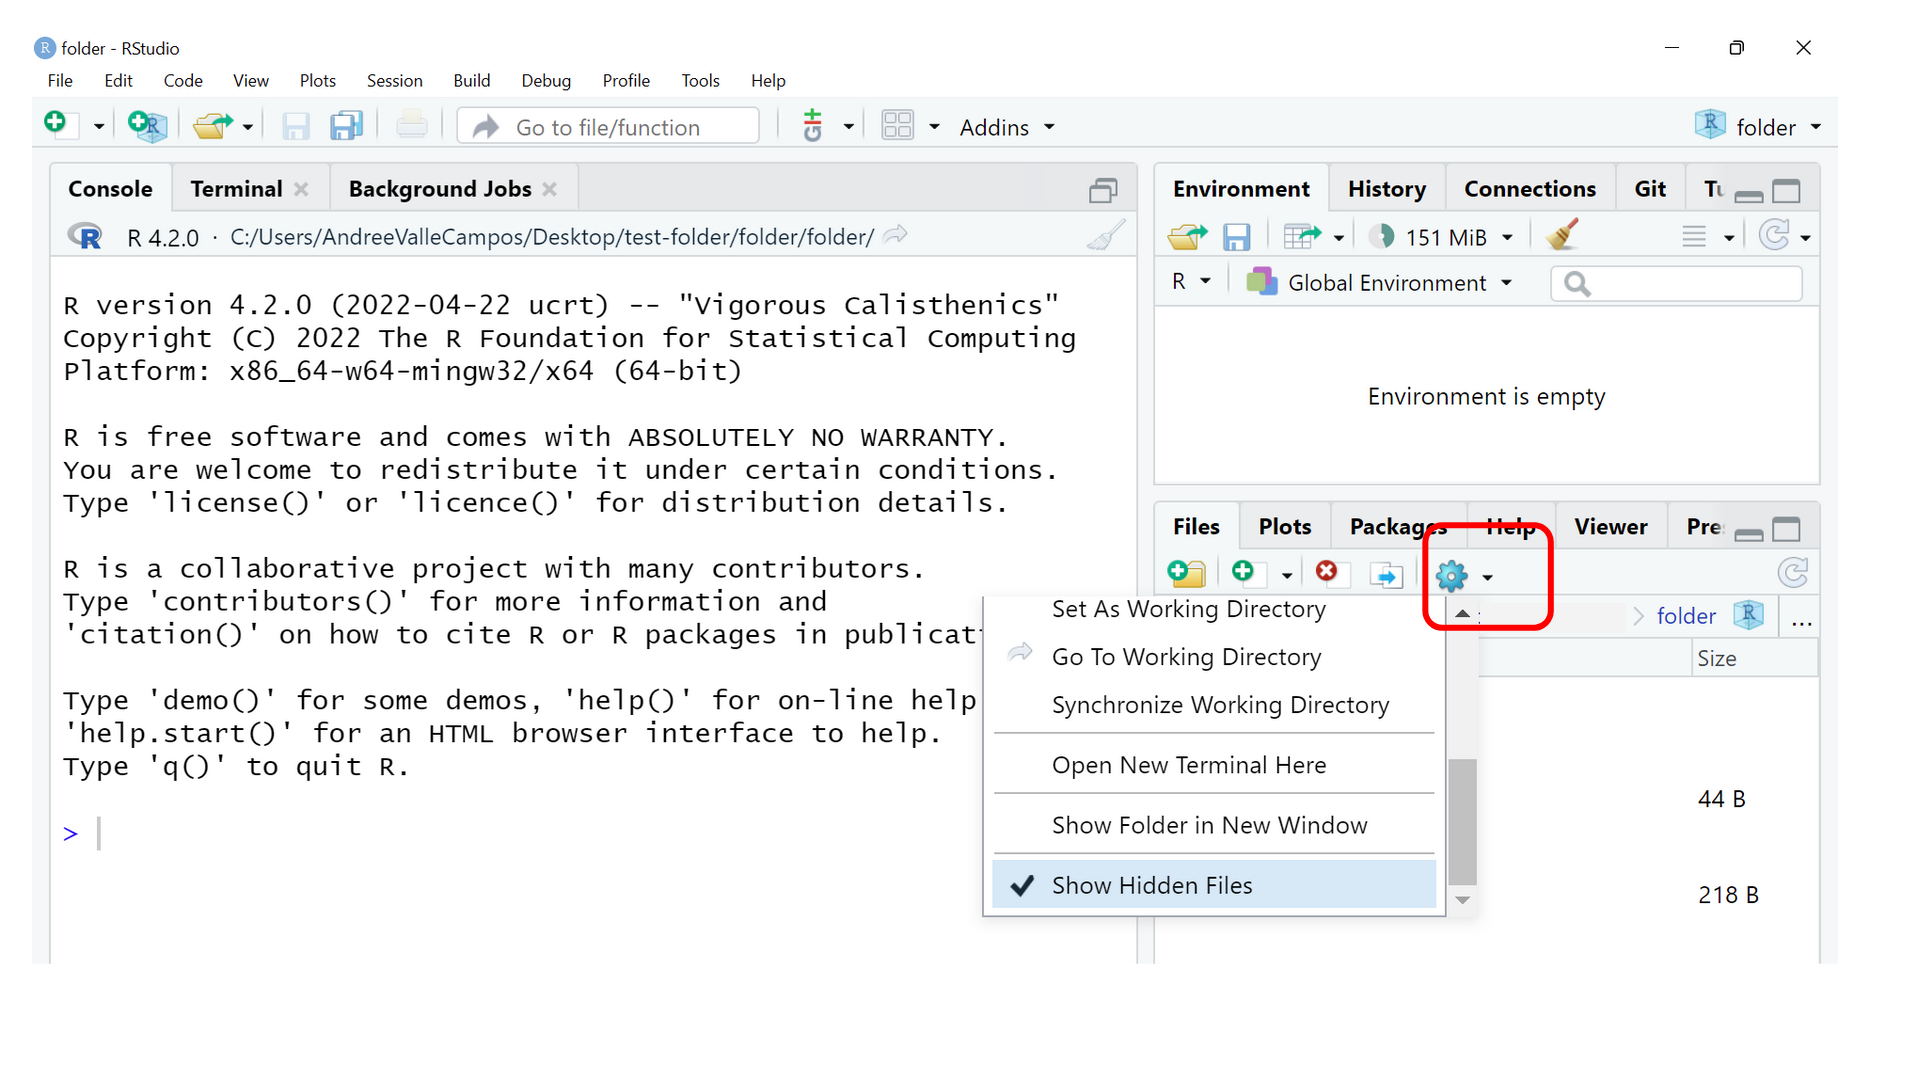
If we look at the Files tab in the Output pane to show the directory’s contents, it appears that nothing has changed.
But under the “cogwheel” button we get access to the “More file
commands”. Click to the Show hidden files to show
everything. We can see that Git has created a hidden directory within
cases called .git:
The .git file gives the identity to the
.git repository also known as the Local Repository “Local
Repo”.
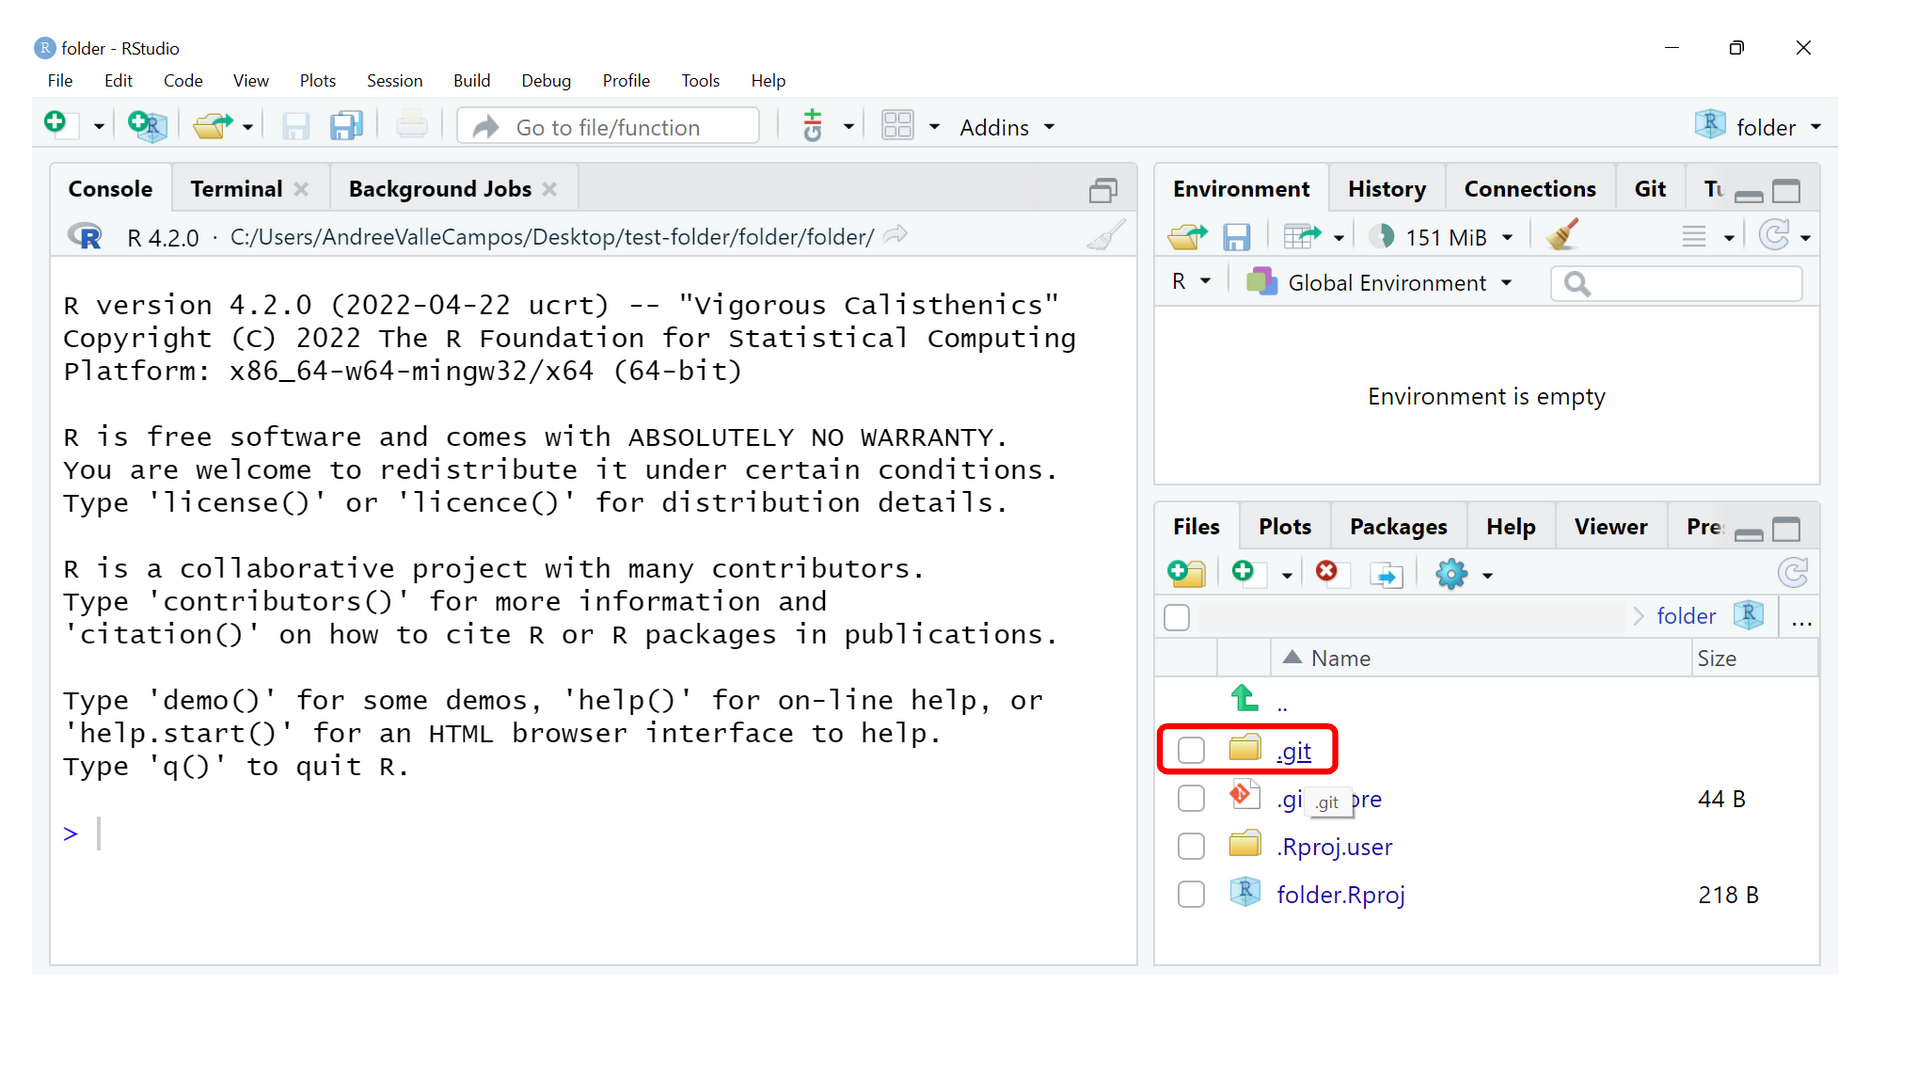
.git folder is a hidden folder
in a Local repository.Git uses this special subdirectory to store all the information about
the project, including the tracked files and sub-directories located
within the project’s directory. If we ever delete the .git
subdirectory, we will lose the project’s history.
From the Console to the Terminal
Now, we are going to use the RStudio Terminal. The Terminal tab is next to the Console tab.
Click on the Terminal tab and a new terminal session will be created (if there isn’t one already).
Alternatively, in the RStudio Terminal, with the ls -a
command we can see the hidden directory called
.git/:
OUTPUT
./   .git/       .Rhistory     cases.Rproj
../  .gitignore  .Rproj.user/  R/
Important!
The .git directory is the Local
Repository. This is the one of the Git spaces
we talk about in the introduction of this episode!
Git stores all of its repository data (and your coming changes!) in
the .git directory.
git init command verbCheck the status
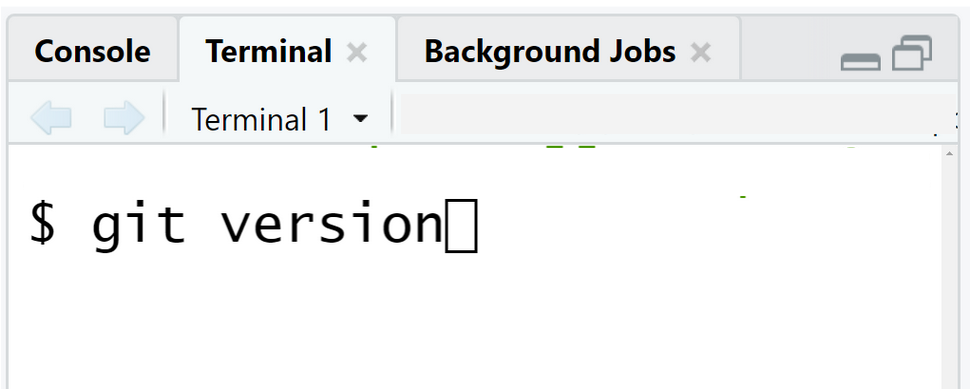
To interact with Git, we can also use the RStudio Terminal.
In the RStudio Terminal, we can check that everything is set up
correctly by asking Git to tell us the git status of our
project:
OUTPUT
On branch main

nothing to commit, working tree clean
If you are using a different version of git, the exact
wording of the output might be slightly different.
Checklist
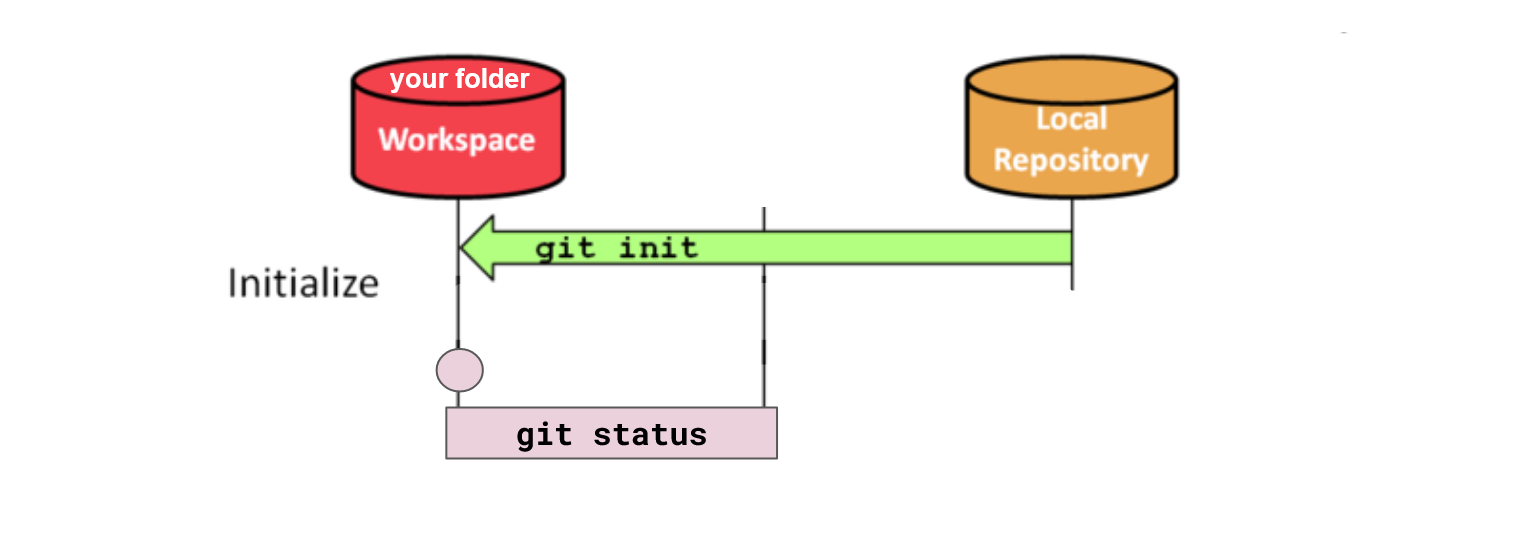
git init command to
initialize a Local Repository in your Workspace. Use
git status to check the status of the repository.The steps done with usethis can also be done with
commands in the Terminal. For example, instead of
usethis::use_git() in the Console you can use
git init in the Terminal. However, we prefer using the
first one given their explicit messages, interactivity, and warnings to
prevent errors!
Git has a verb command similar to the
help() function in R.
Always remember that if you forget the subcommands or options of a
git command, you can access the relevant list of options
typing git <command> -h or access the corresponding
Git manual by typing git <command> --help, e.g.:
While viewing the manual, remember the : is a prompt
waiting for commands and you can press Q to exit the
manual.
More generally, you can get the list of available git
commands and further resources of the Git manual typing:
For complementary resources, refer to the Git Cheatsheets for Quick Reference inside this tutorial website.
Places to Create Git Repositories
Along with tracking information about cases (the project we have
already created), Dracula would also like to track information about
interventions. Despite Wolfman’s concerns, Dracula
creates a interventions project inside his
cases project and initialize Git. Dracula uses a sequence
of commands in the RStudio Console:
R
usethis::create_project(path = "interventions")
usethis::use_git()
Is the usethis::use_git() command, run inside the
interventions subdirectory, required for tracking files
stored in the interventions subdirectory?
No. Dracula does not need to make the interventions
subdirectory a Git repository because the cases repository
can track any files, sub-directories, and subdirectory files under the
cases directory. Thus, in order to track all information
about interventions, Dracula only needed to add the
interventions subdirectory to the cases
directory.
Additionally, Git repositories can interfere with each other if they
are “nested”: the outer repository will try to version-control the inner
repository. Therefore, it’s best to create each new Git
repository in a separate directory. To be sure that there is no
conflicting repository in the directory, check the output of
git status from the Terminal. If it looks like the
following, you are good to go to create a new repository as shown
above:
OUTPUT
fatal: Not a git repository (or any of the parent directories): .gitActually, if you try to create a new project using
usethis within the cases repository, you
will get this message:
R
usethis::create_project(path = "interventions")
OUTPUT
New project 'interventions' is nested inside an existing project './', which is rarely a good idea.
If this is unexpected, the here package has a function, `here::dr_here()` that reveals why './' is regarded as a project.
Do you want to create anyway?
Using the R functions from the usethis package can be less error-prone!
Lastly, Dracula used a Bash commands in the Terminal to create a subdirectory.
$ mkdir interventions # make a subdirectory cases/interventionsIf you are interested to learn more about Bash commands, we invite you to read this tutorial on Bash commands!
Key Points
- Use
usethis::use_git()to initialize a repository. - Git stores all of its repository data in the
.gitdirectory. - Use
git statusin the Terminal to check the status of a repository.