Automated Version Control
Figure 1
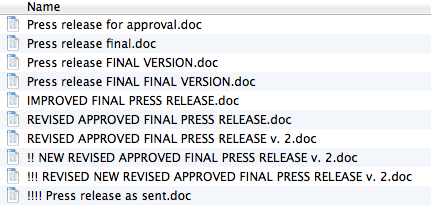
Tracking changes for the
Press release.doc file. Never
use the word “final” in a filename.Figure 2
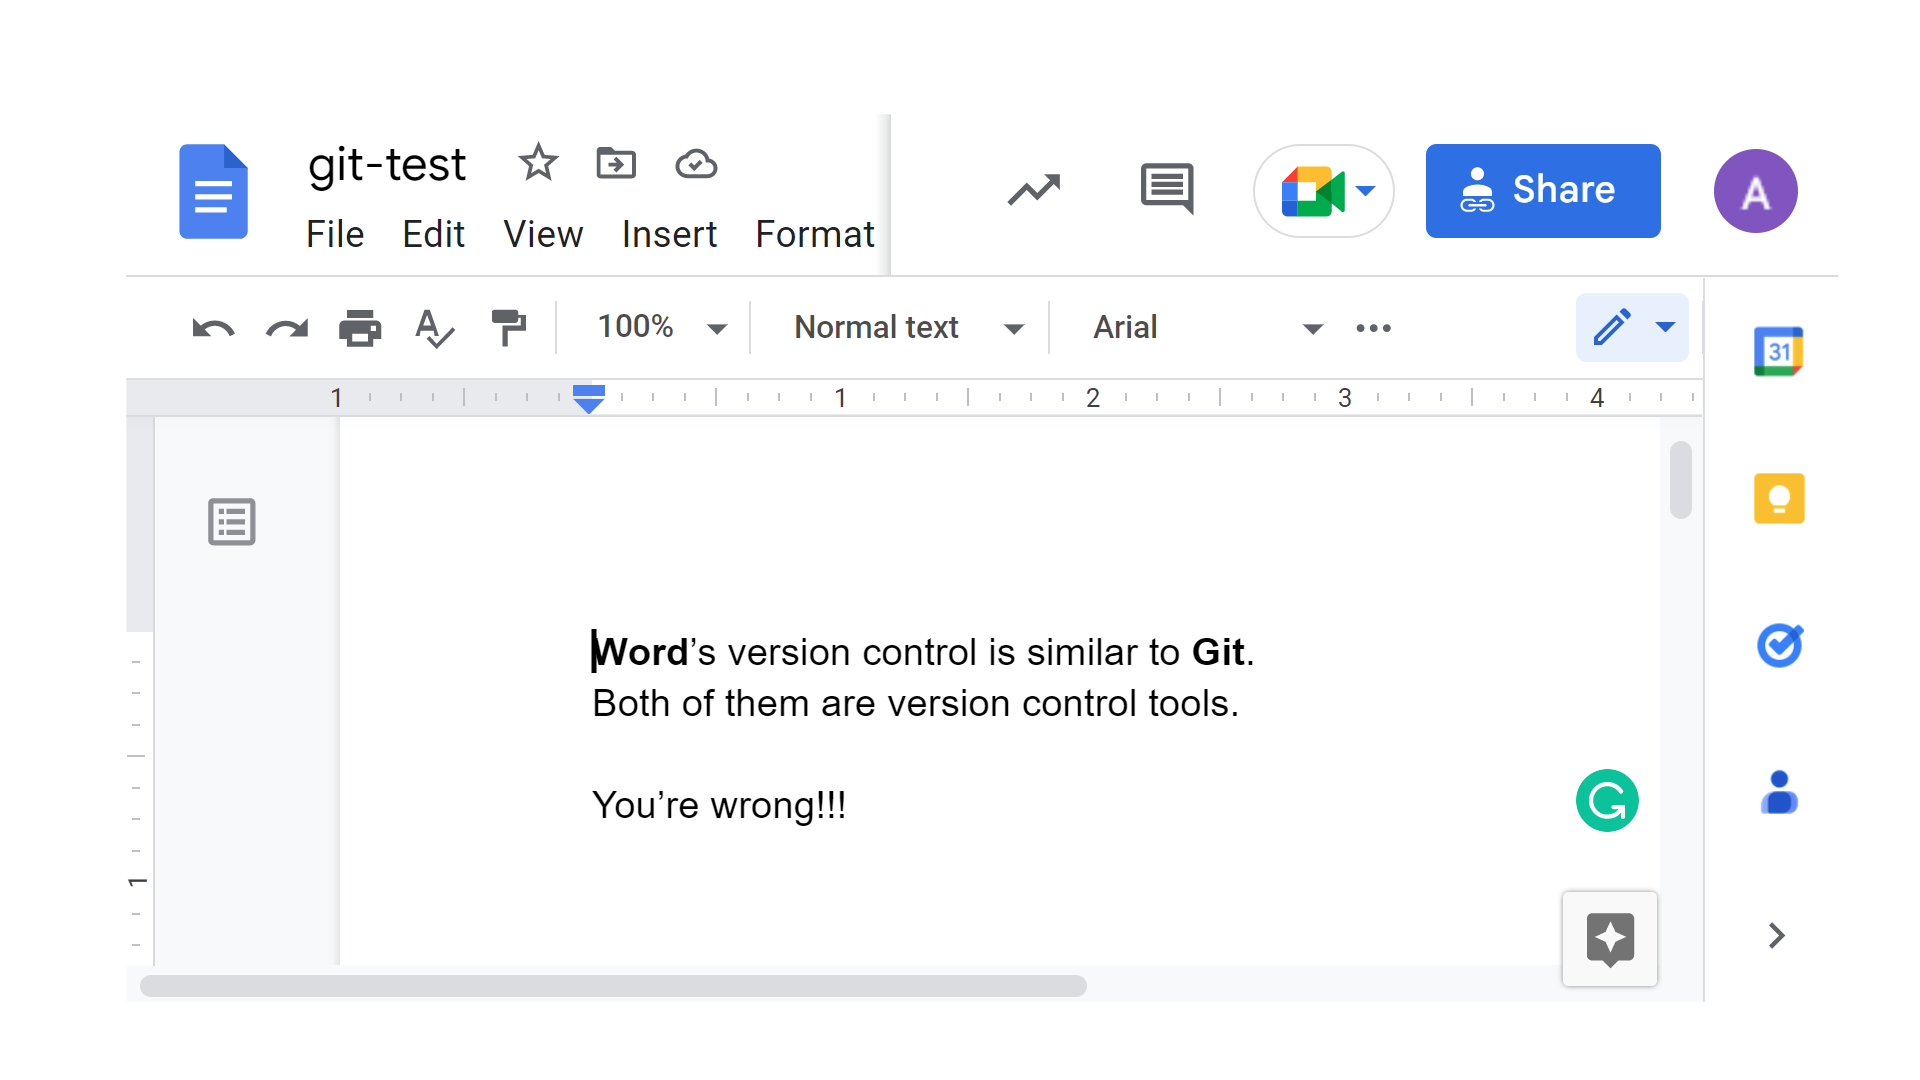
Tracking changes for the
git-test
file.Figure 3
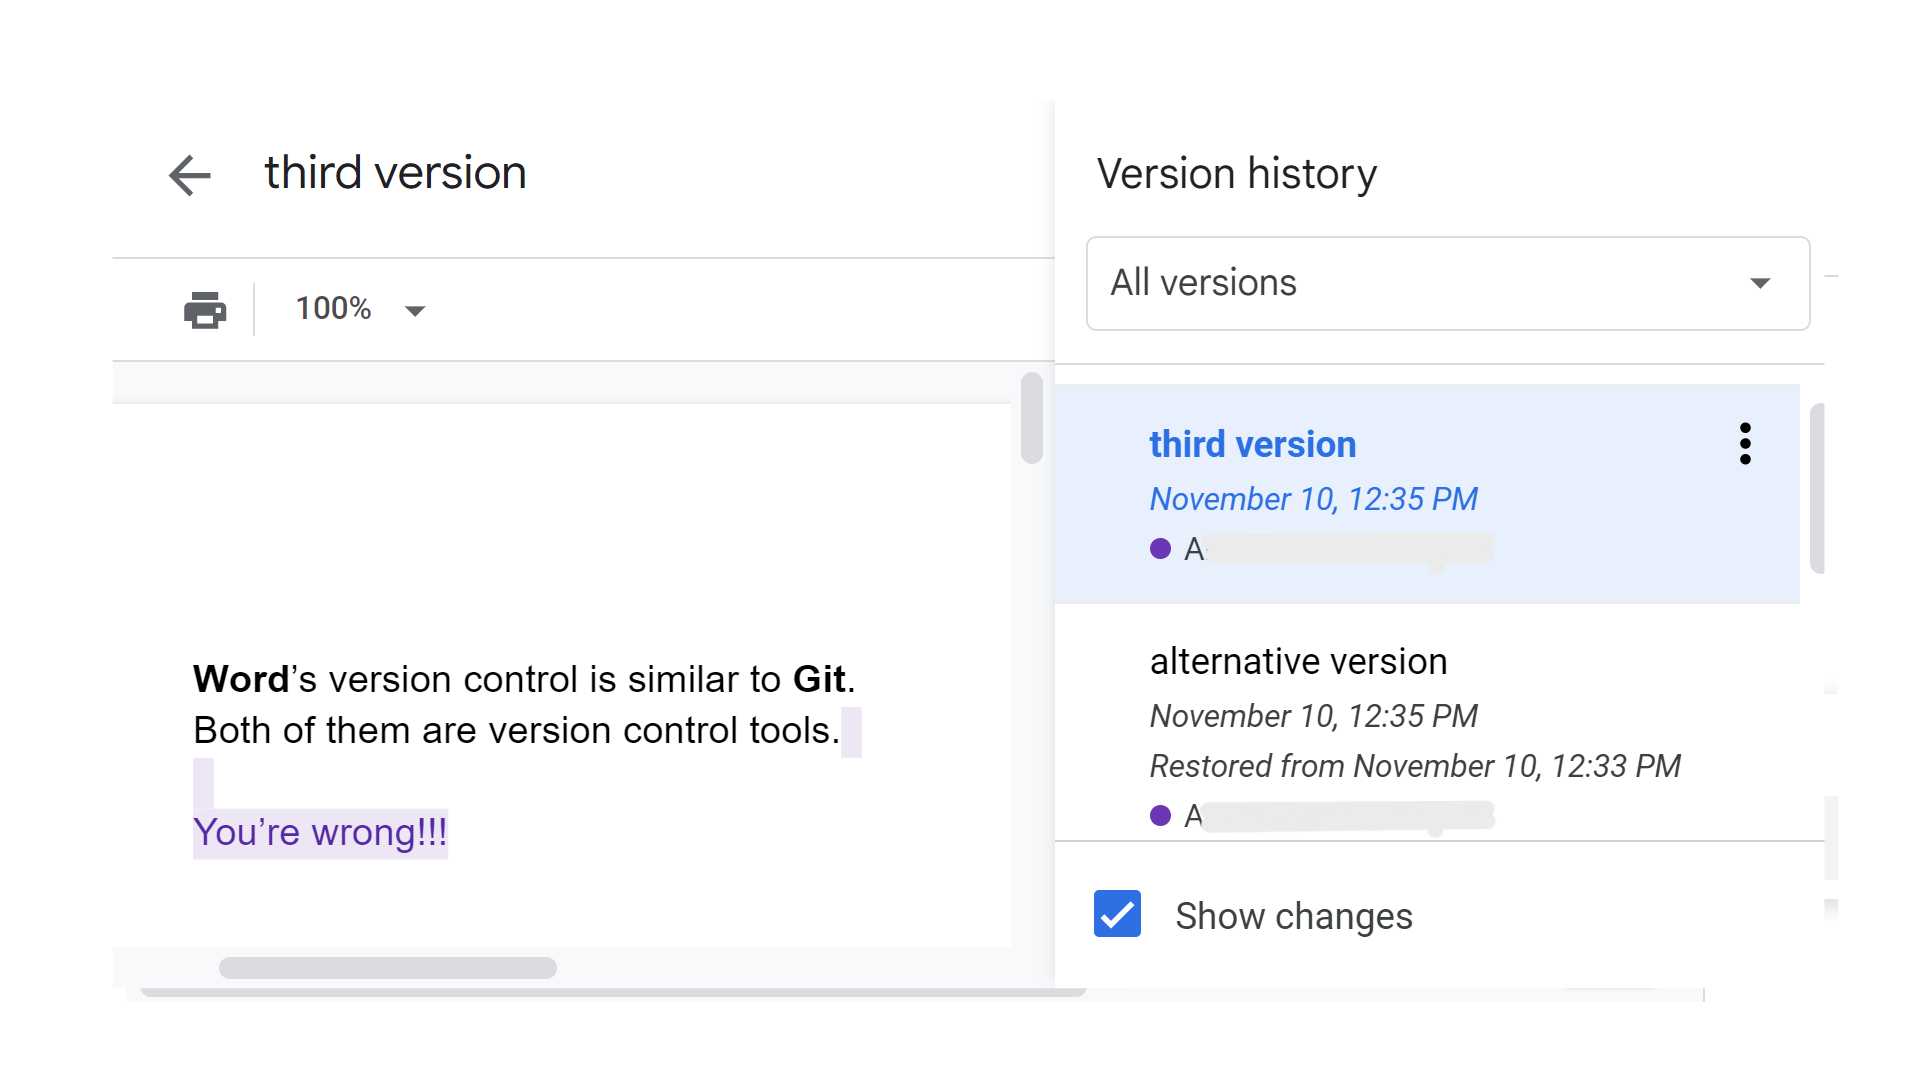
The most recent version of the
git-test file is called “third version”.Figure 4

We can view the “first version” of the file
git-test. We can also restore it with the
Restore this version button.Figure 5
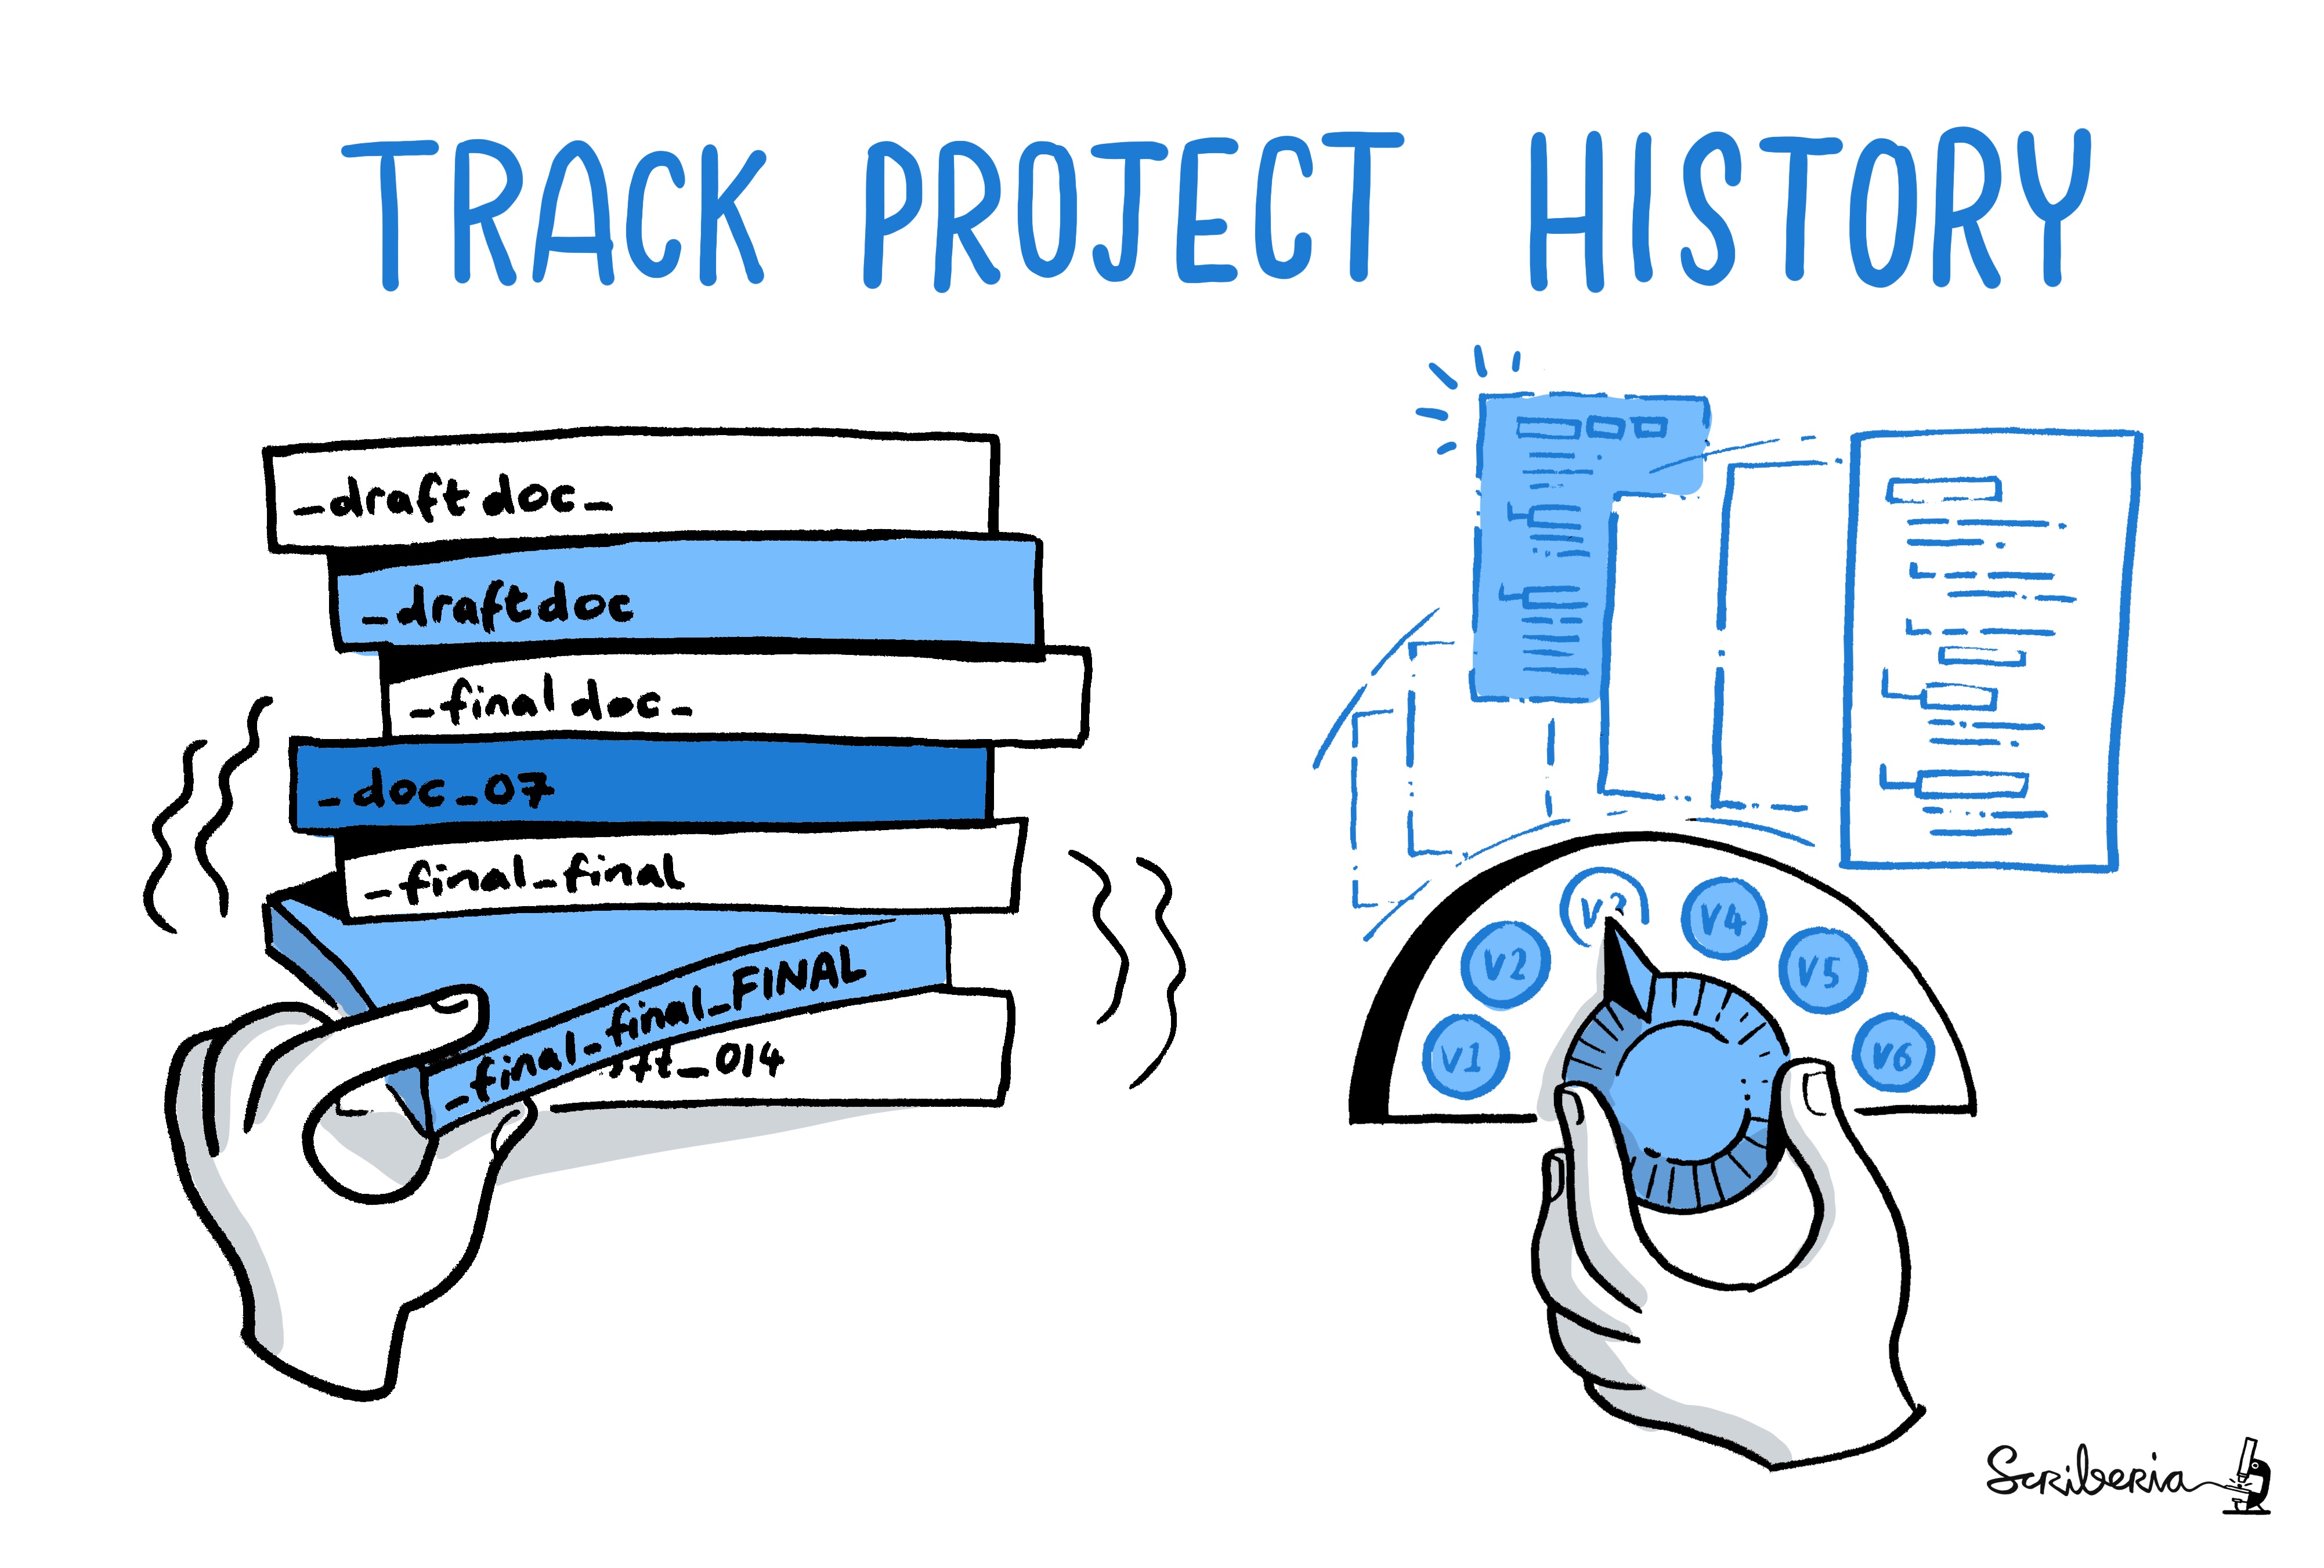
The Turing Way project illustration by
Scriberia. Used under a CC-BY 4.0 licence. DOI: https://zenodo.org/doi/10.5281/zenodo.3332807.
Figure 6

Figure 7
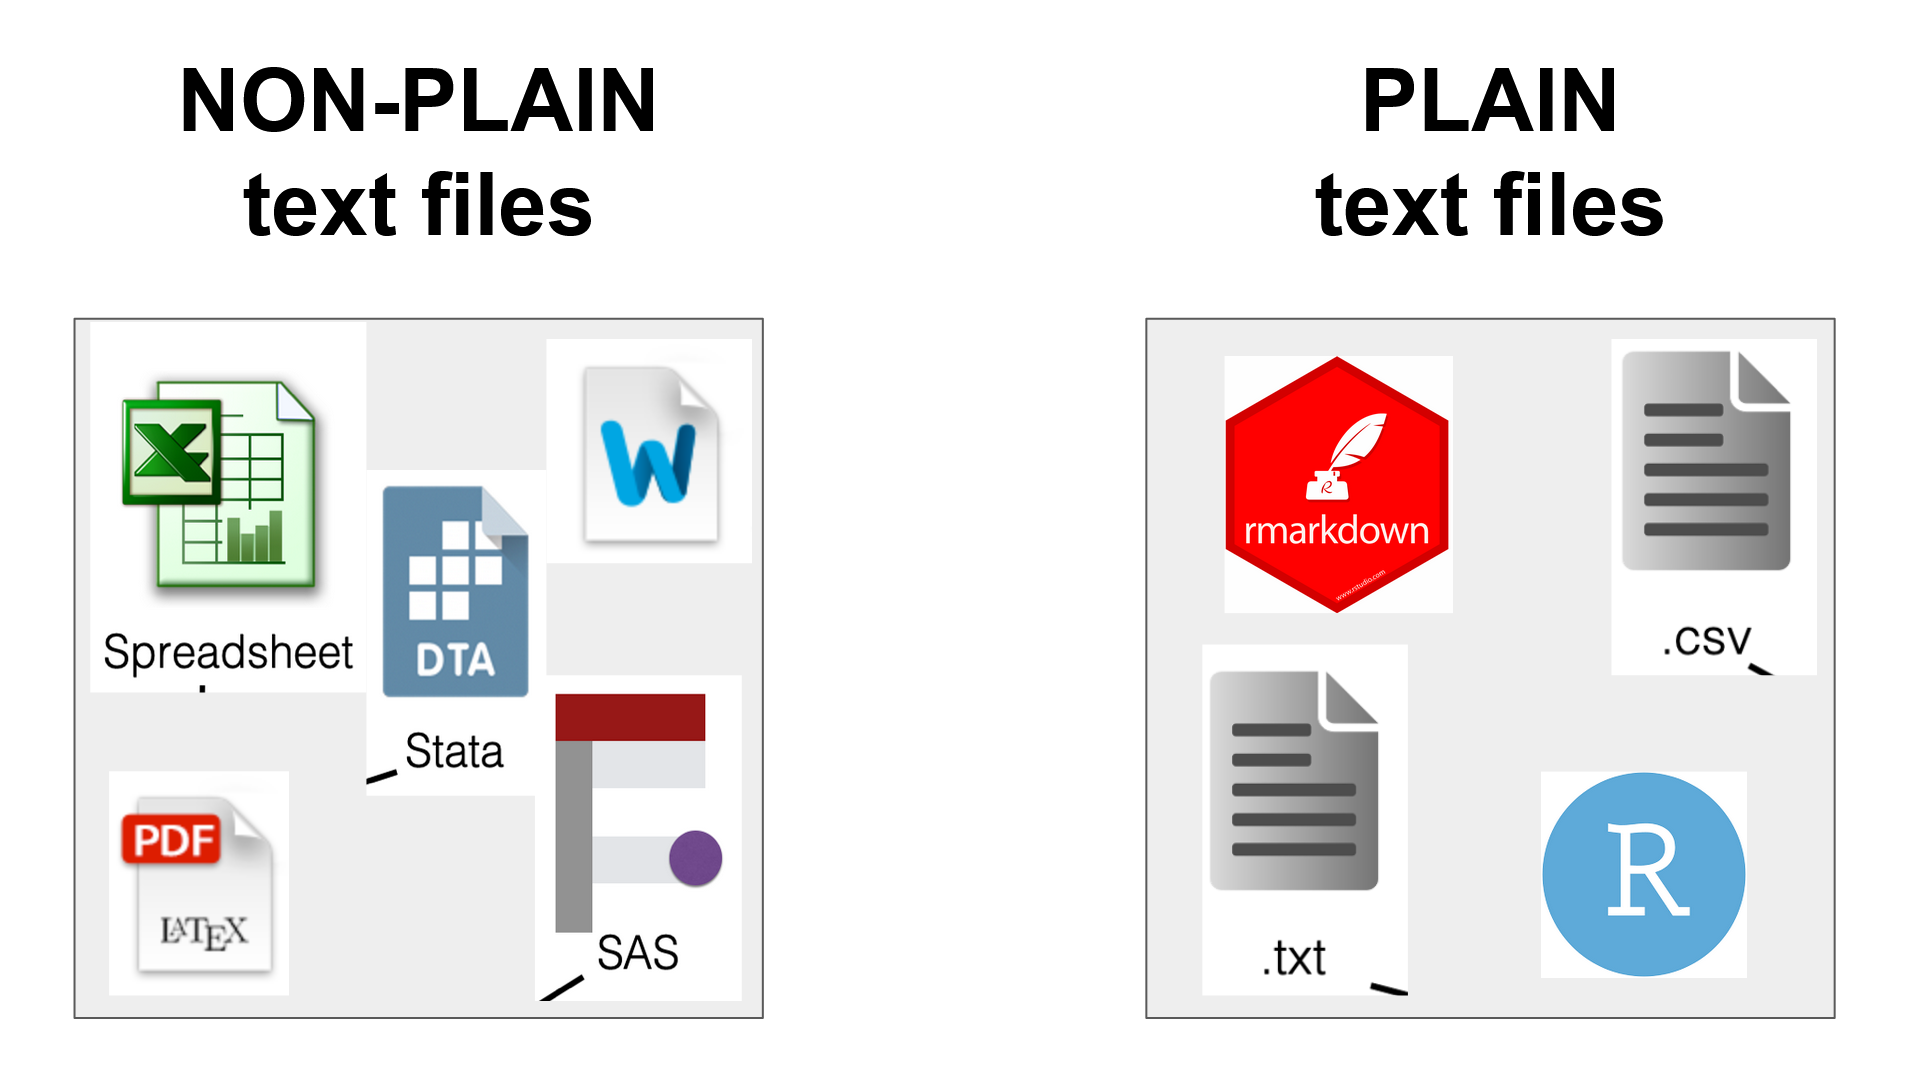
Examples of non-plain and plain text
files.
Figure 8

We can increase the reproducibility of our Open
science projects with version control sytems like
Git. Text
and final results can be connected and executable by Data and code.
From: “Ciencia reproducible: qué, por qué, cómo” https://www.revistaecosistemas.net/index.php/ecosistemas/article/view/1178
Figure 9
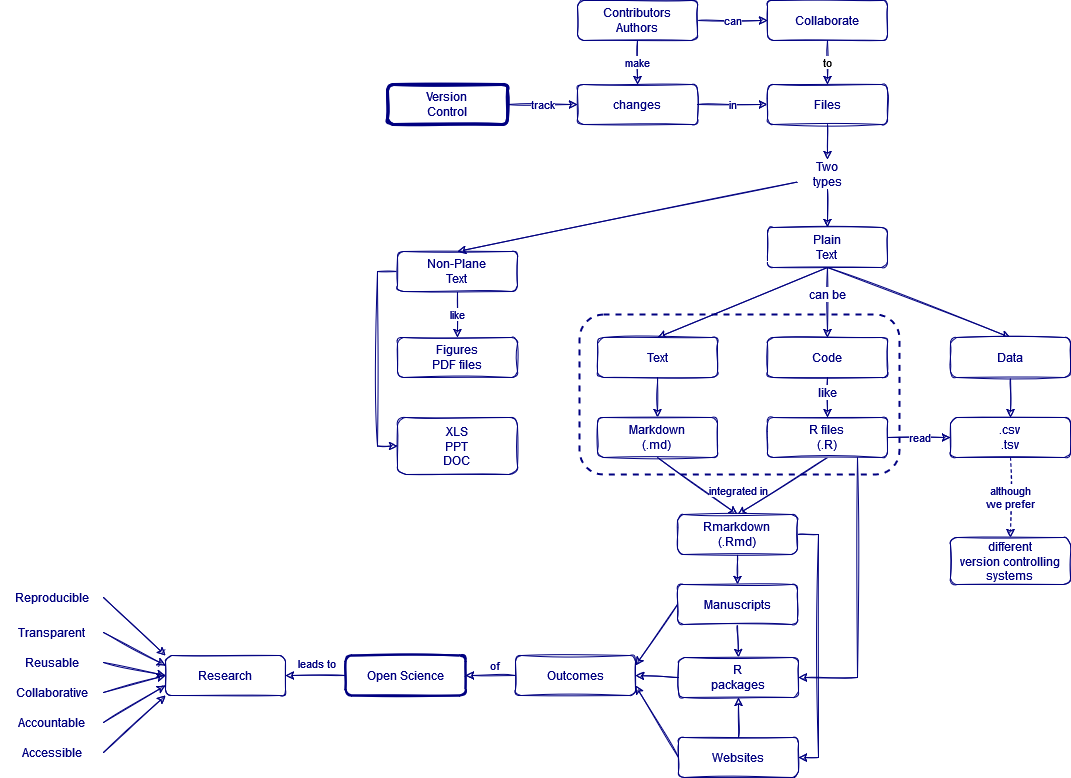
Concept map for automatic version control.
Setting Up Git
Figure 1
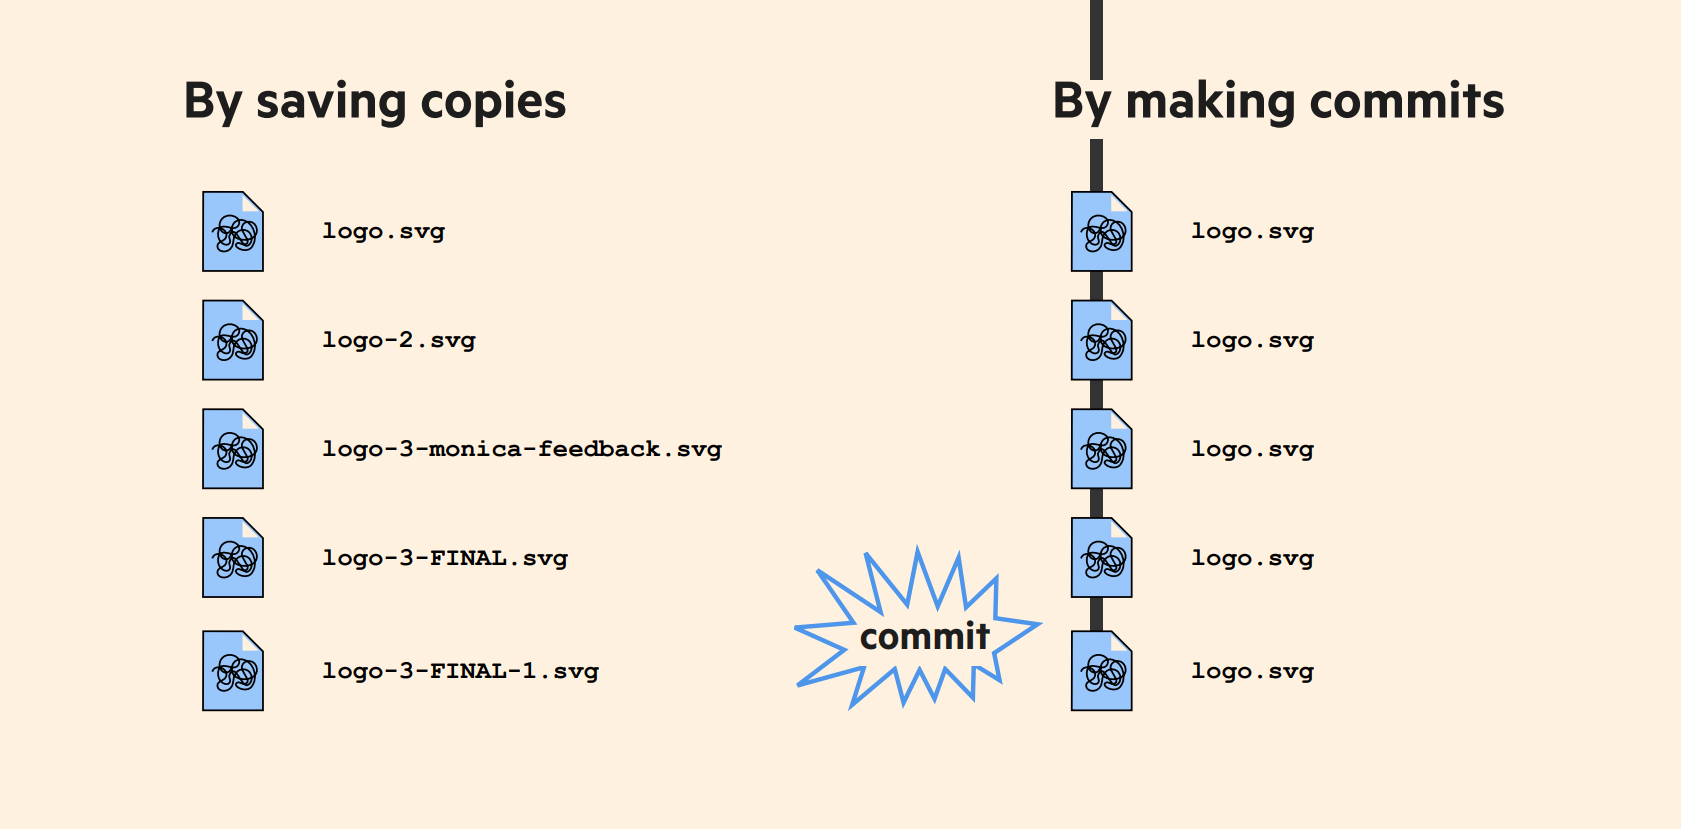
Each record of changes is called a
commit. From: https://speakerdeck.com/alicebartlett/git-for-humans
Figure 2
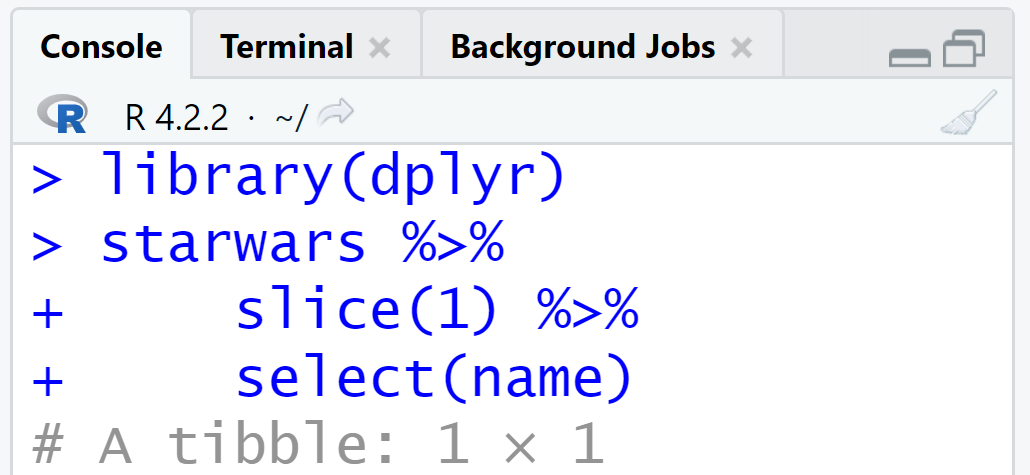
Visual appearance of the Console.
Figure 3

Visual display with the recommended scopes
selected. Optional scopes are “gist” and “delete_repo” to create a gist
and delete repositories.
Figure 4
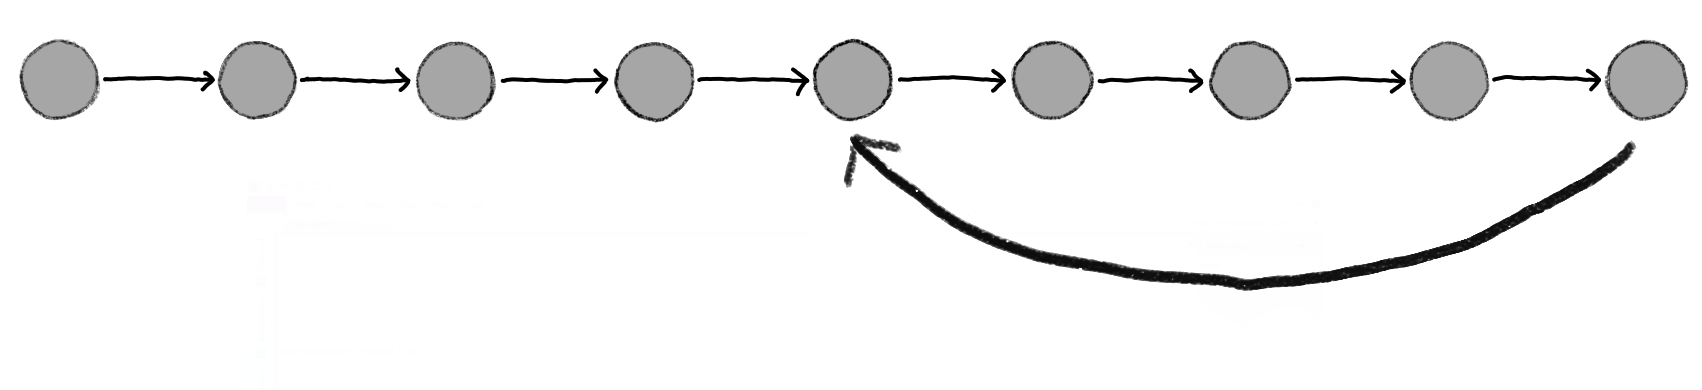
Version history within a single branch.
Creating a Repository
Figure 1
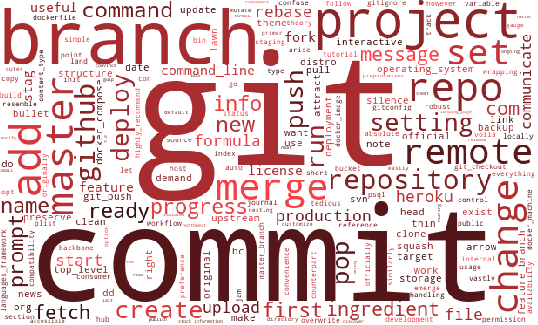
Word cloud for Git from https://thoughtbot.com/blog/recommending-blog-posts
Figure 2
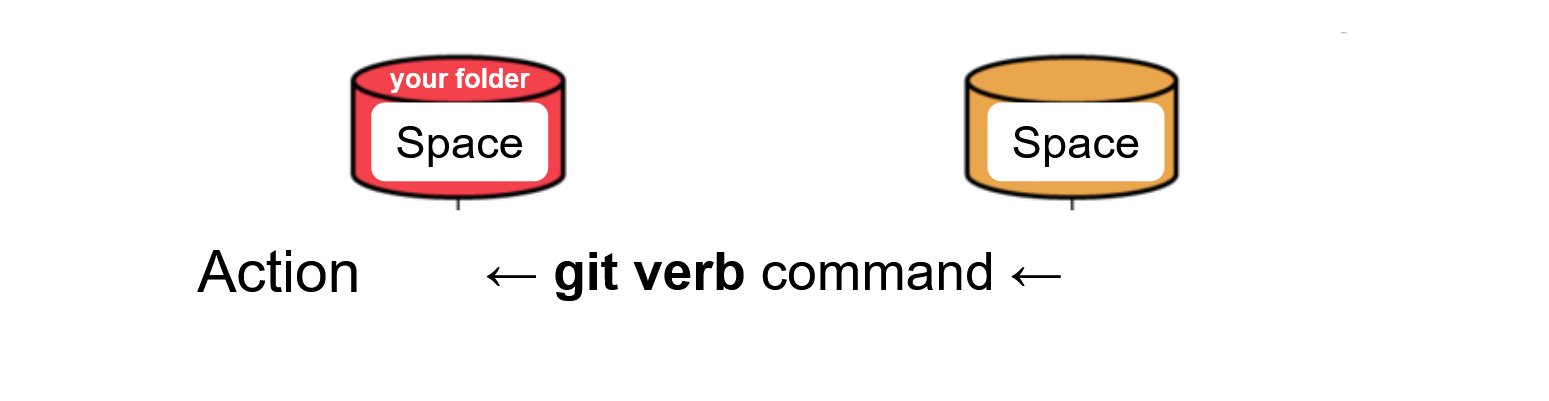
Workflow will show actions,
git verb commands, and spaces.Figure 3
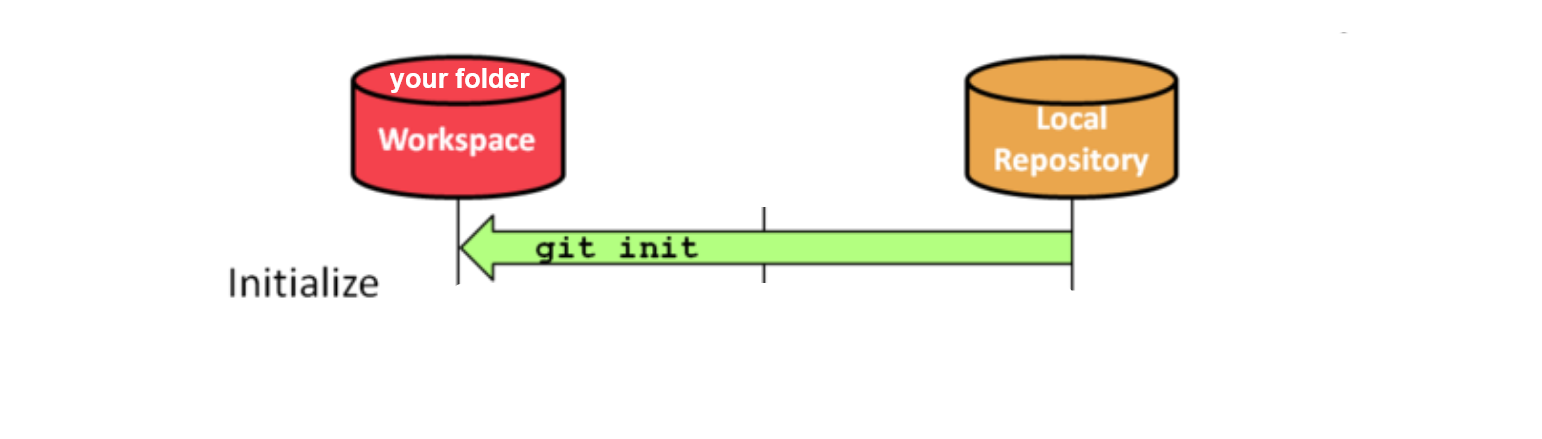
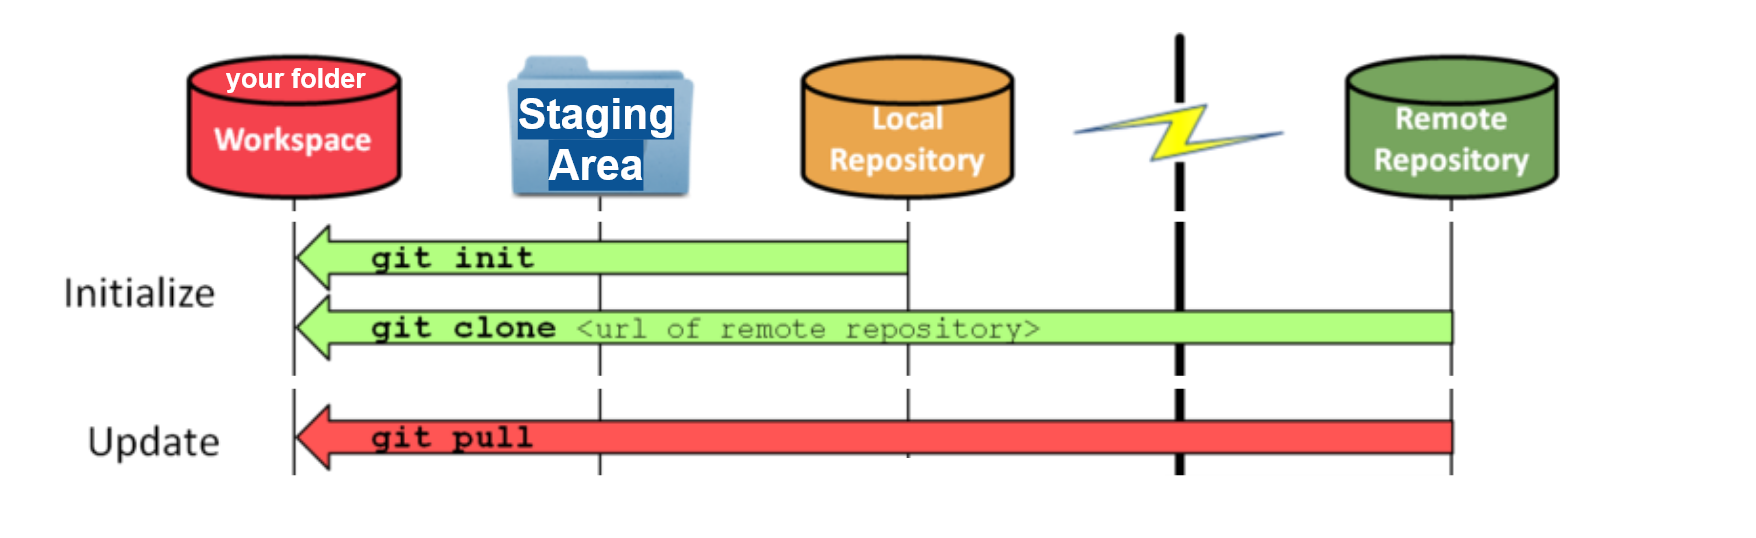
Initialize a Local Repository in your Workspace
with the
git init command verbFigure 4

Image by Bing, 2023, CC BY 4.0,
created with Bing Image Creator
powered by DALL·E 3
Figure 5
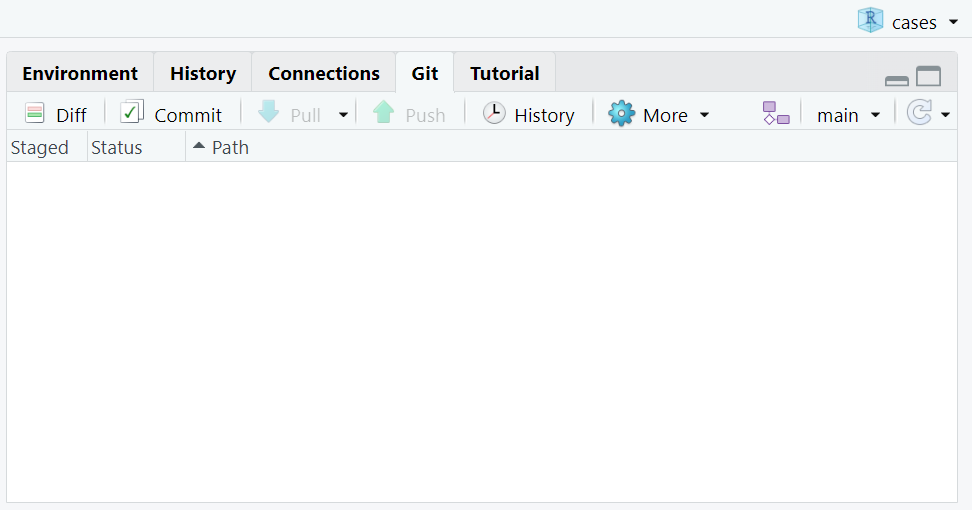
The Git tab in the Environments pane shows the
status of your repository.Figure 6
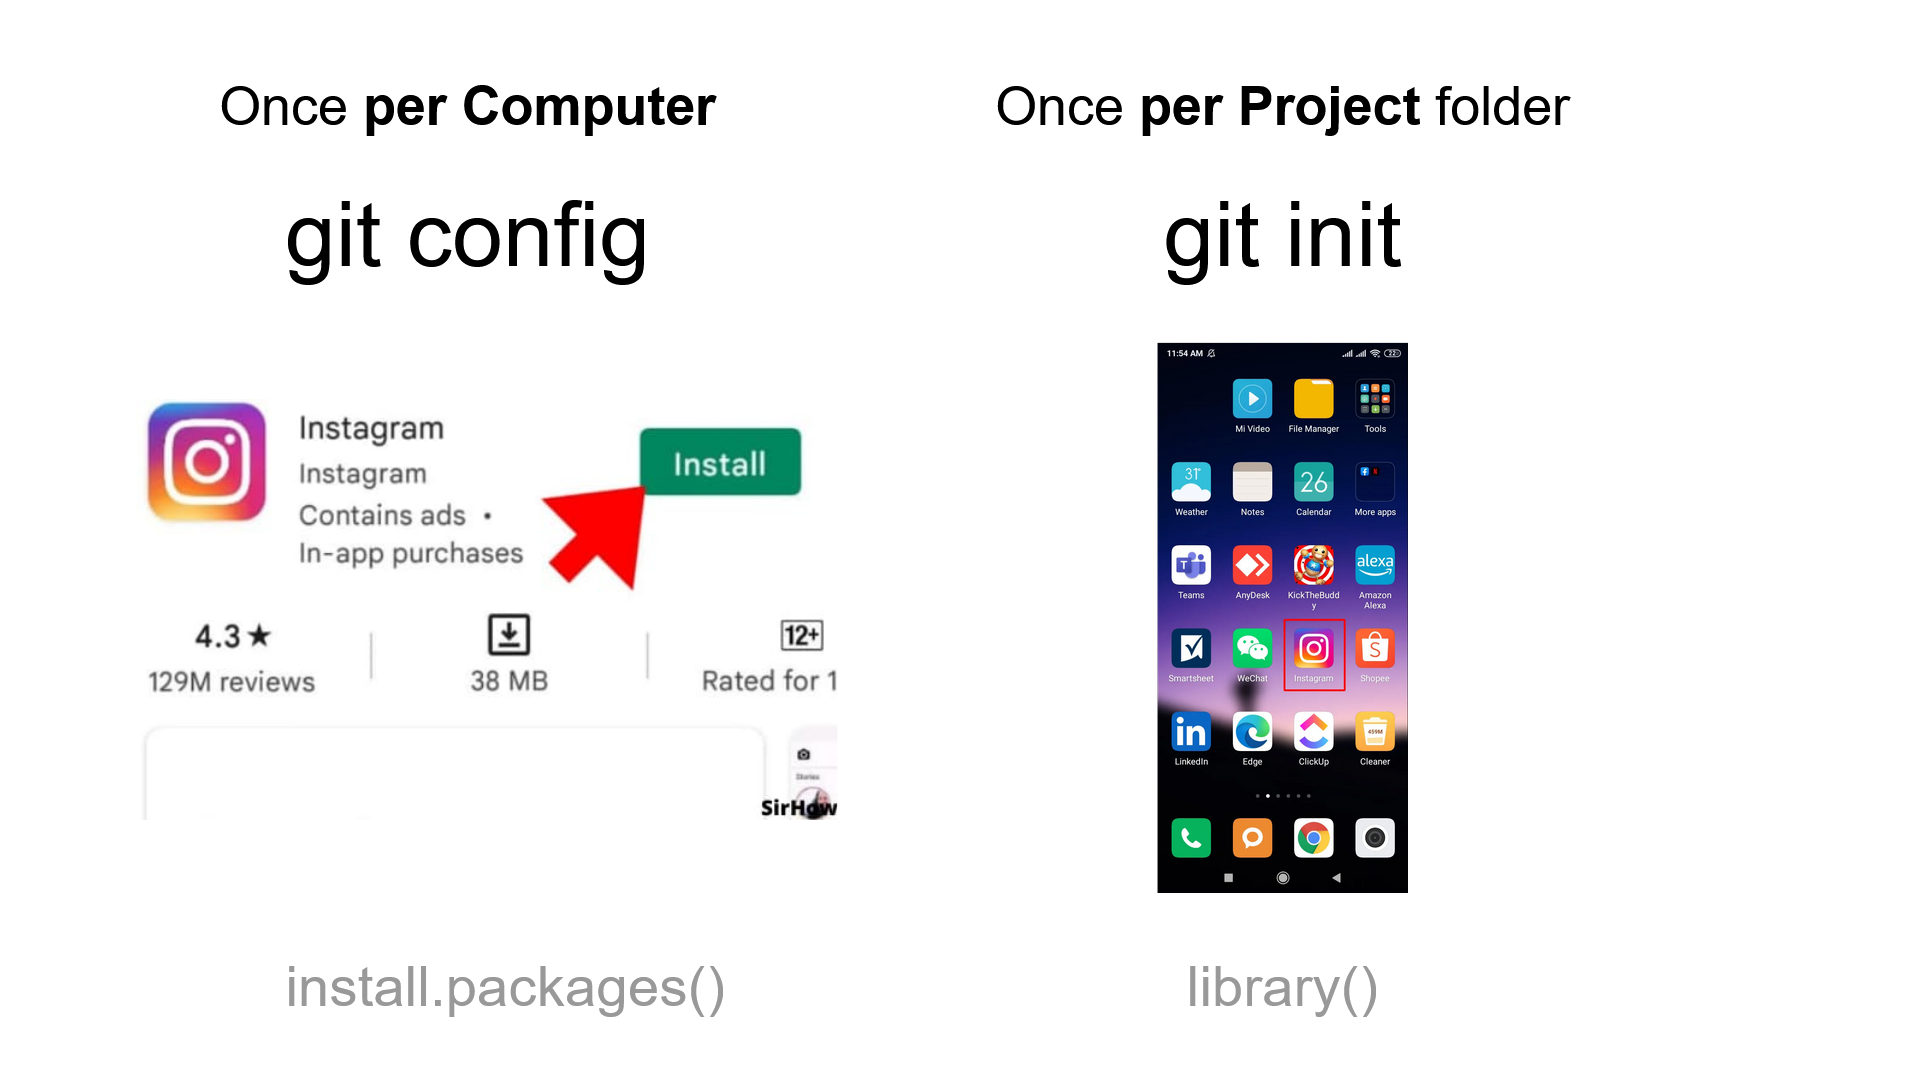
Set up
Git once per computer.
Initialize Git once per project.Figure 7
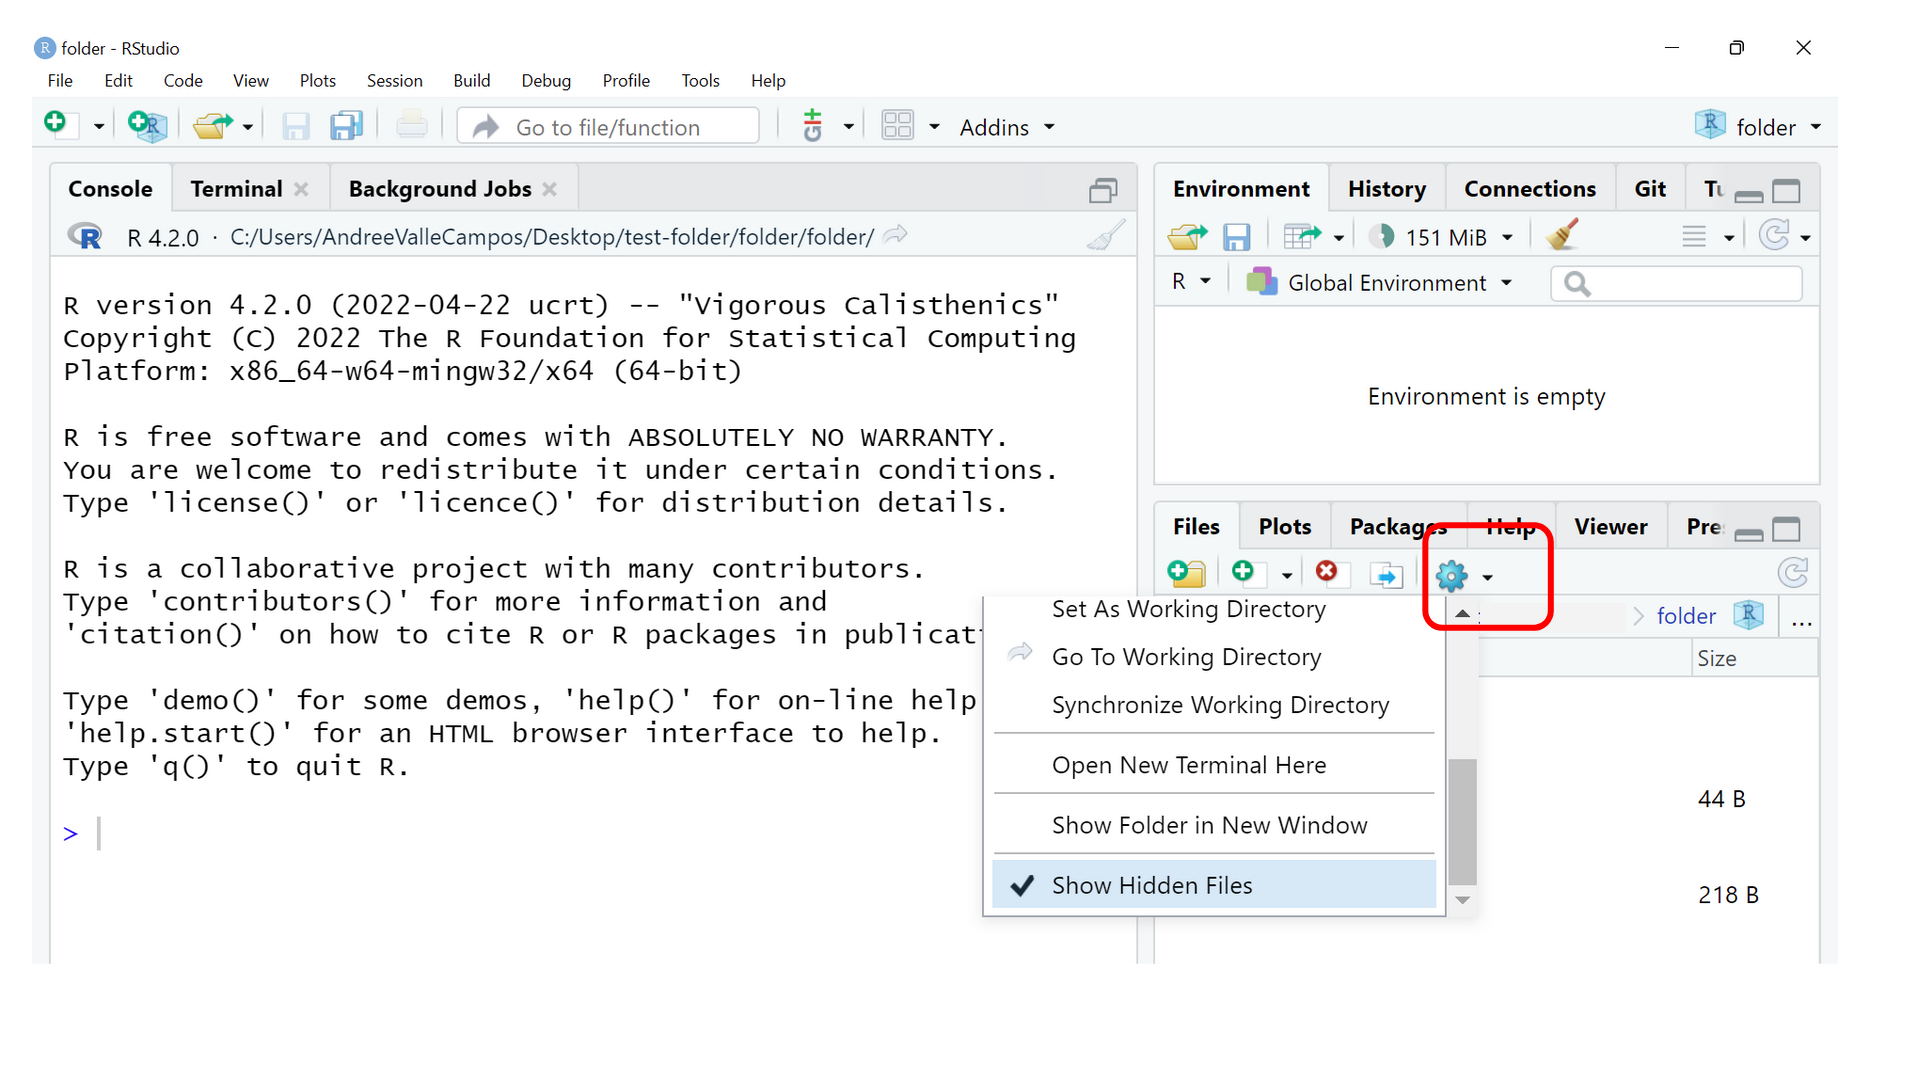
Show hidden files in an Local repository.
Figure 8
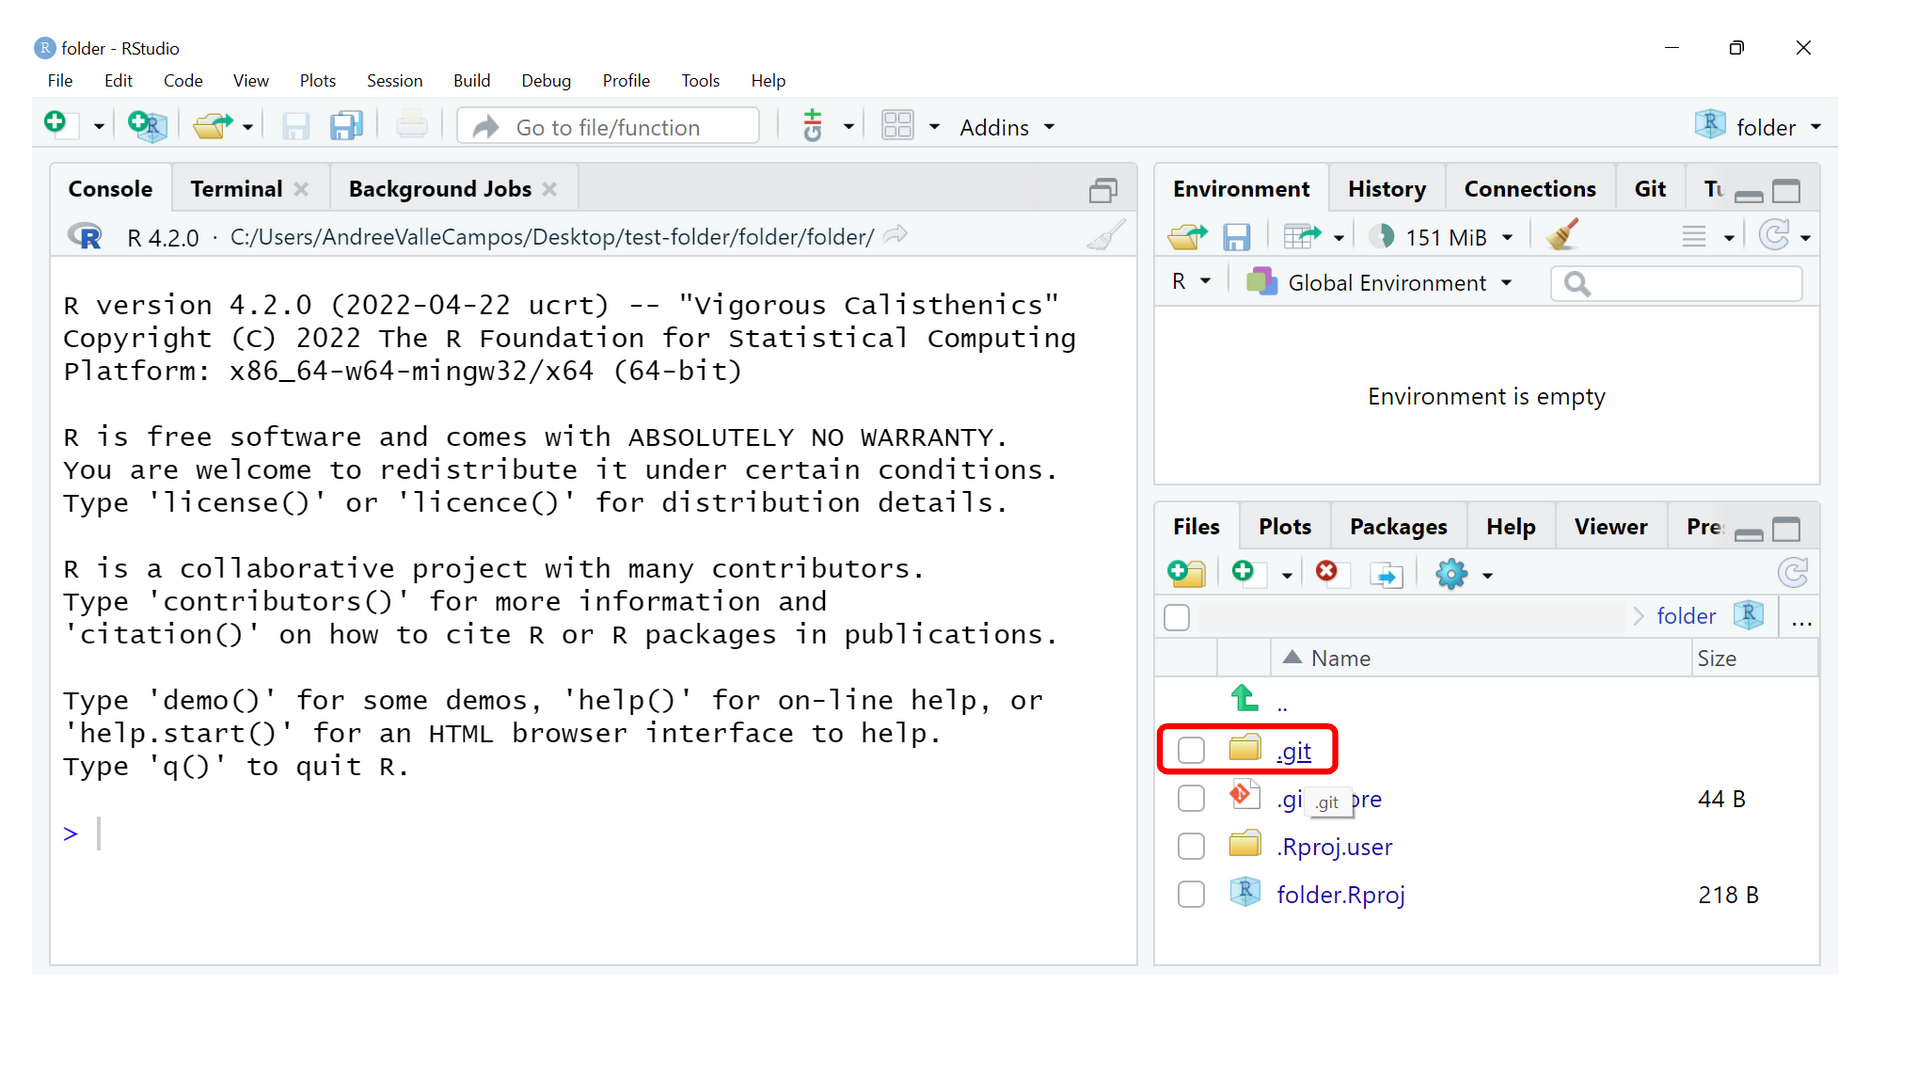
The
.git folder is a hidden folder
in a Local repository.Figure 9
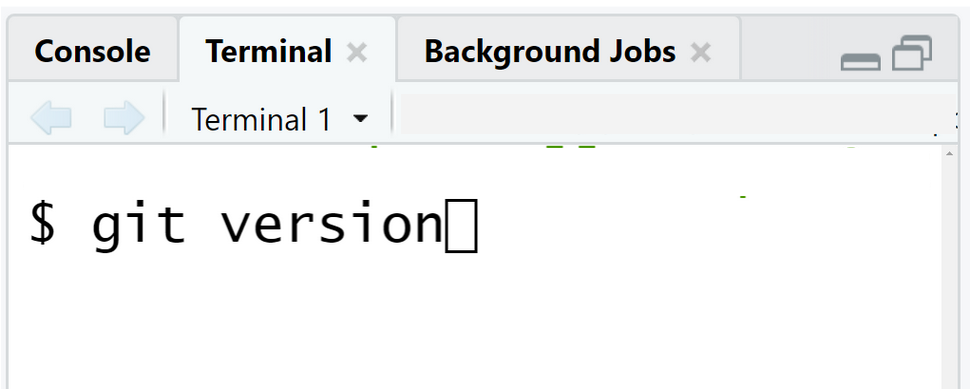
Visual appearance of the Terminal.
Figure 10
Initialize a Local Repository in your Workspace
with the
git init command verbFigure 11
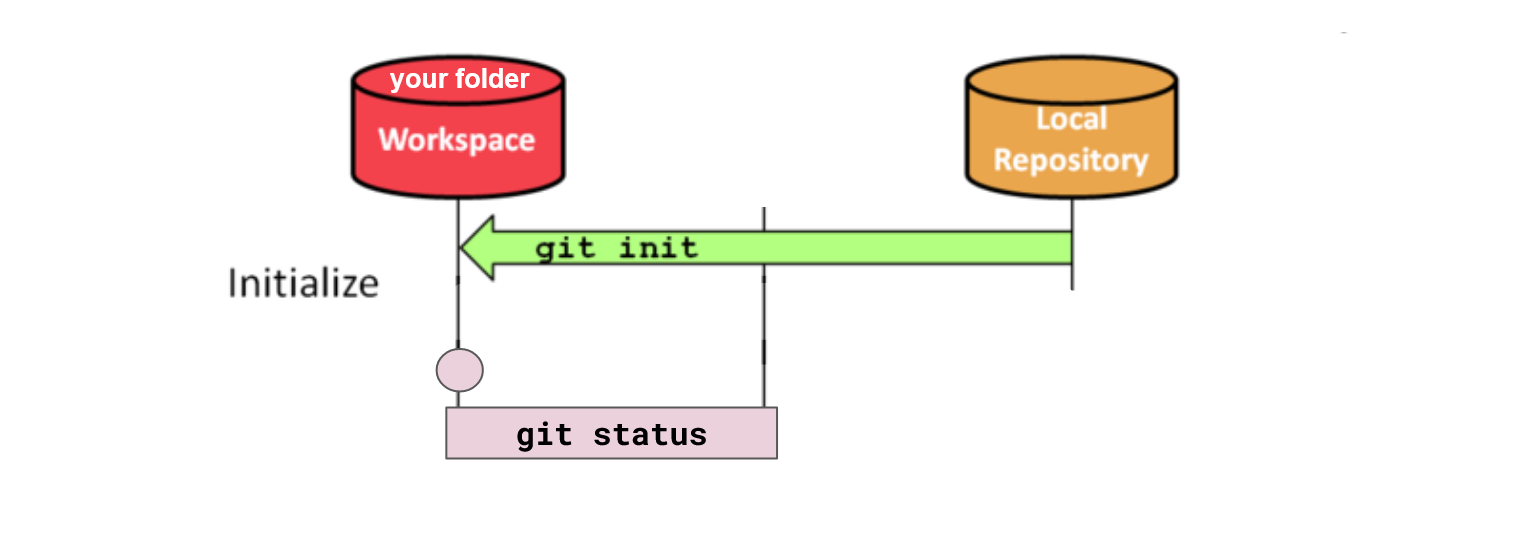
Use the
git init command to
initialize a Local Repository in your Workspace. Use
git status to check the status of the repository.Tracking Changes
Figure 1

Figure 2

Use
git status to display the state
of the working directory and the staging area. git add your
changes before you git commit them to the Local repository.
Use the git log to get the history of changes in it. Use
git diff to compare these changes.Figure 3

Ignoring Things
Remotes in GitHub
Figure 1
Figure 2

Figure 3

Figure 4
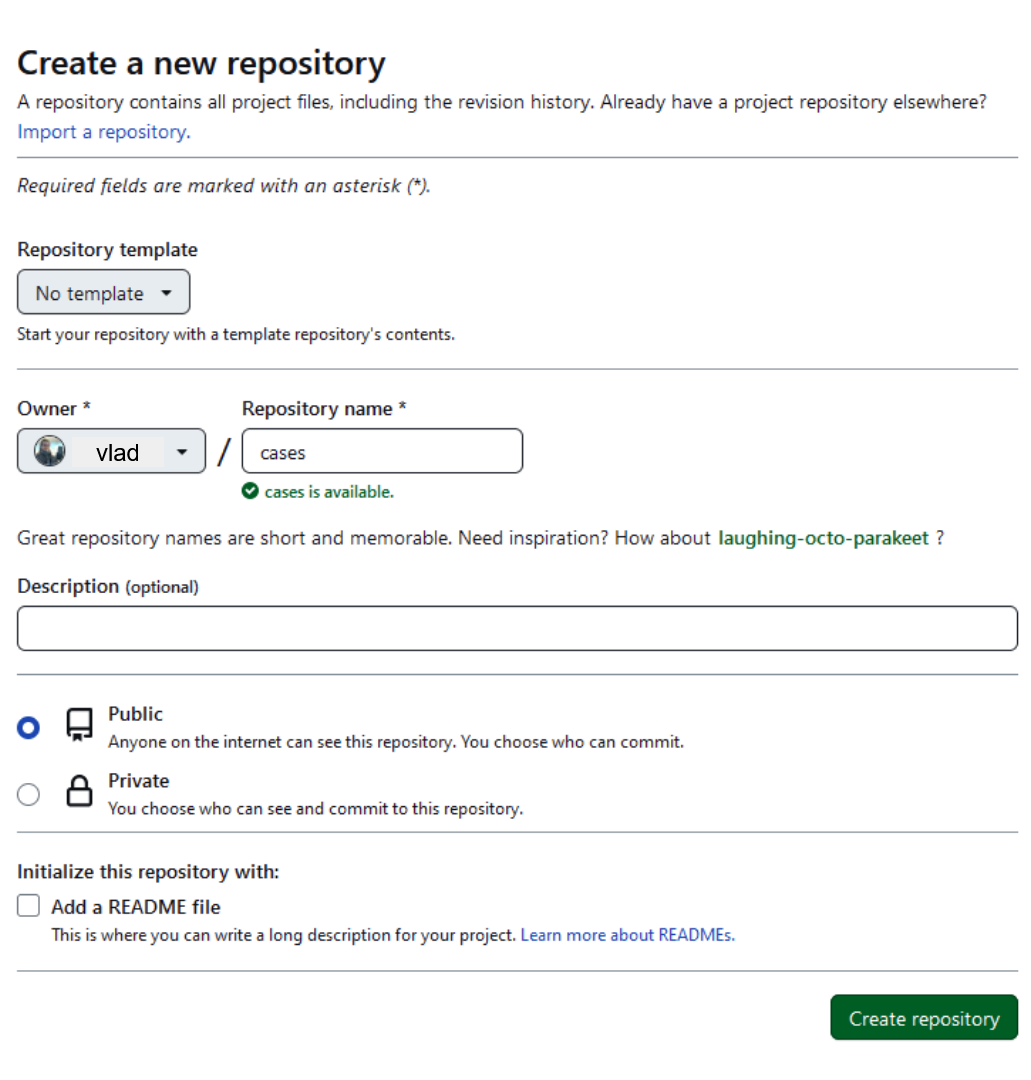
Figure 5
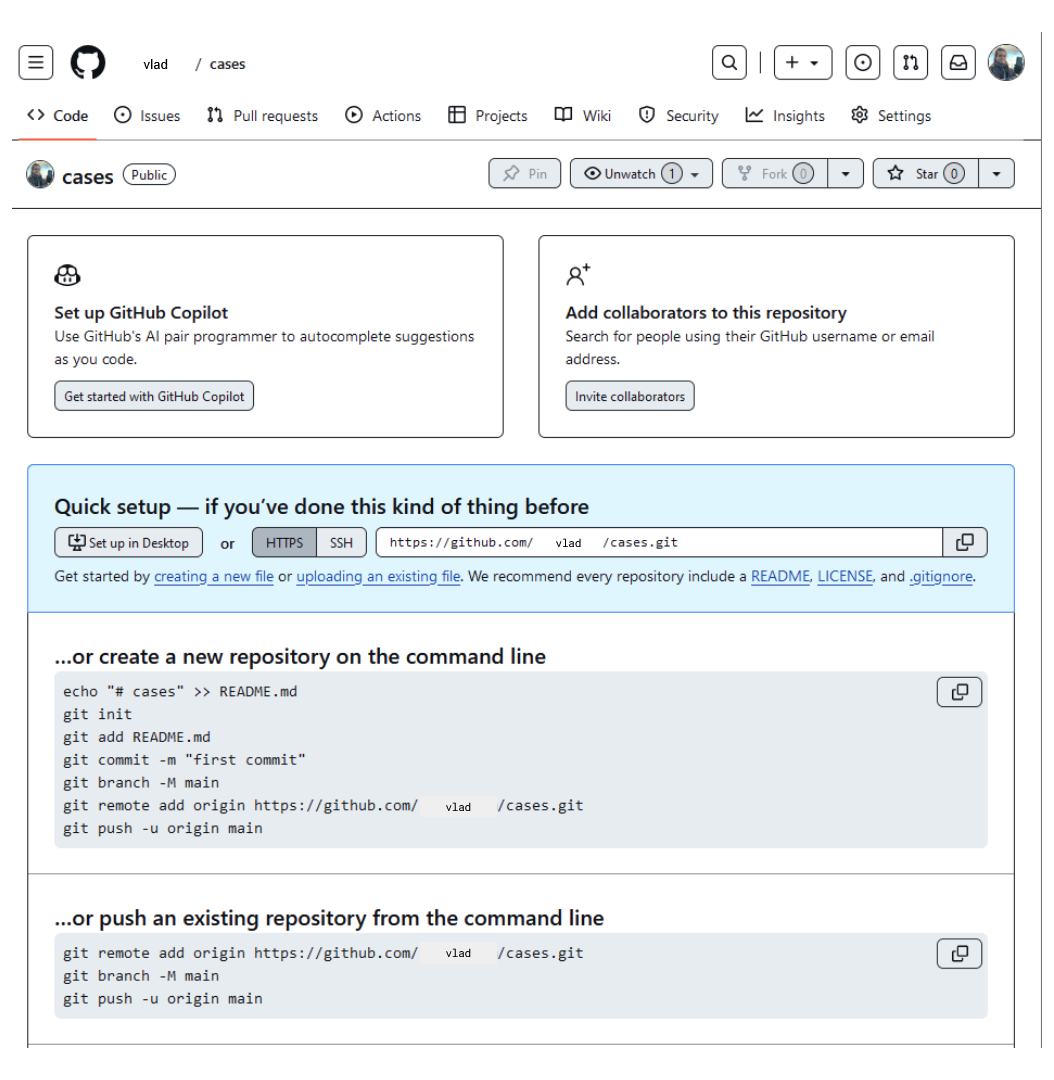
Figure 6
Figure 7
Figure 8
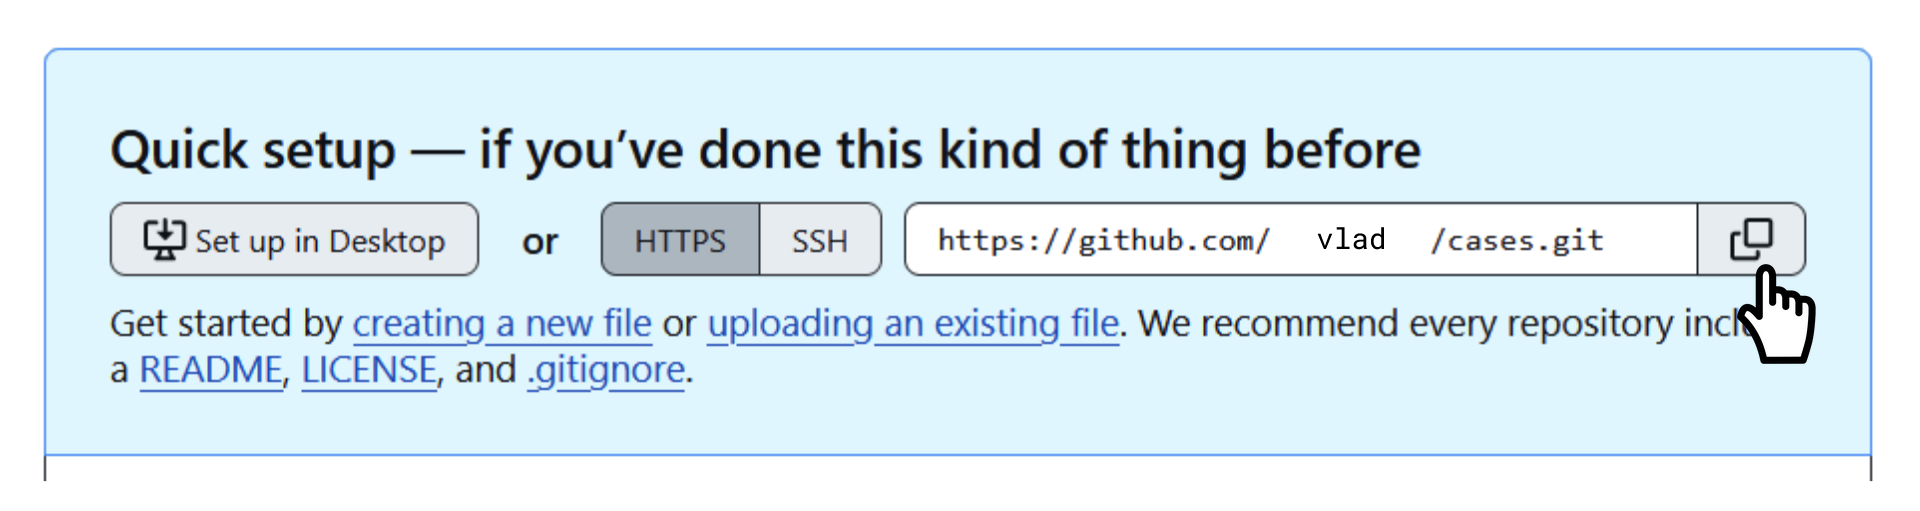
Figure 9
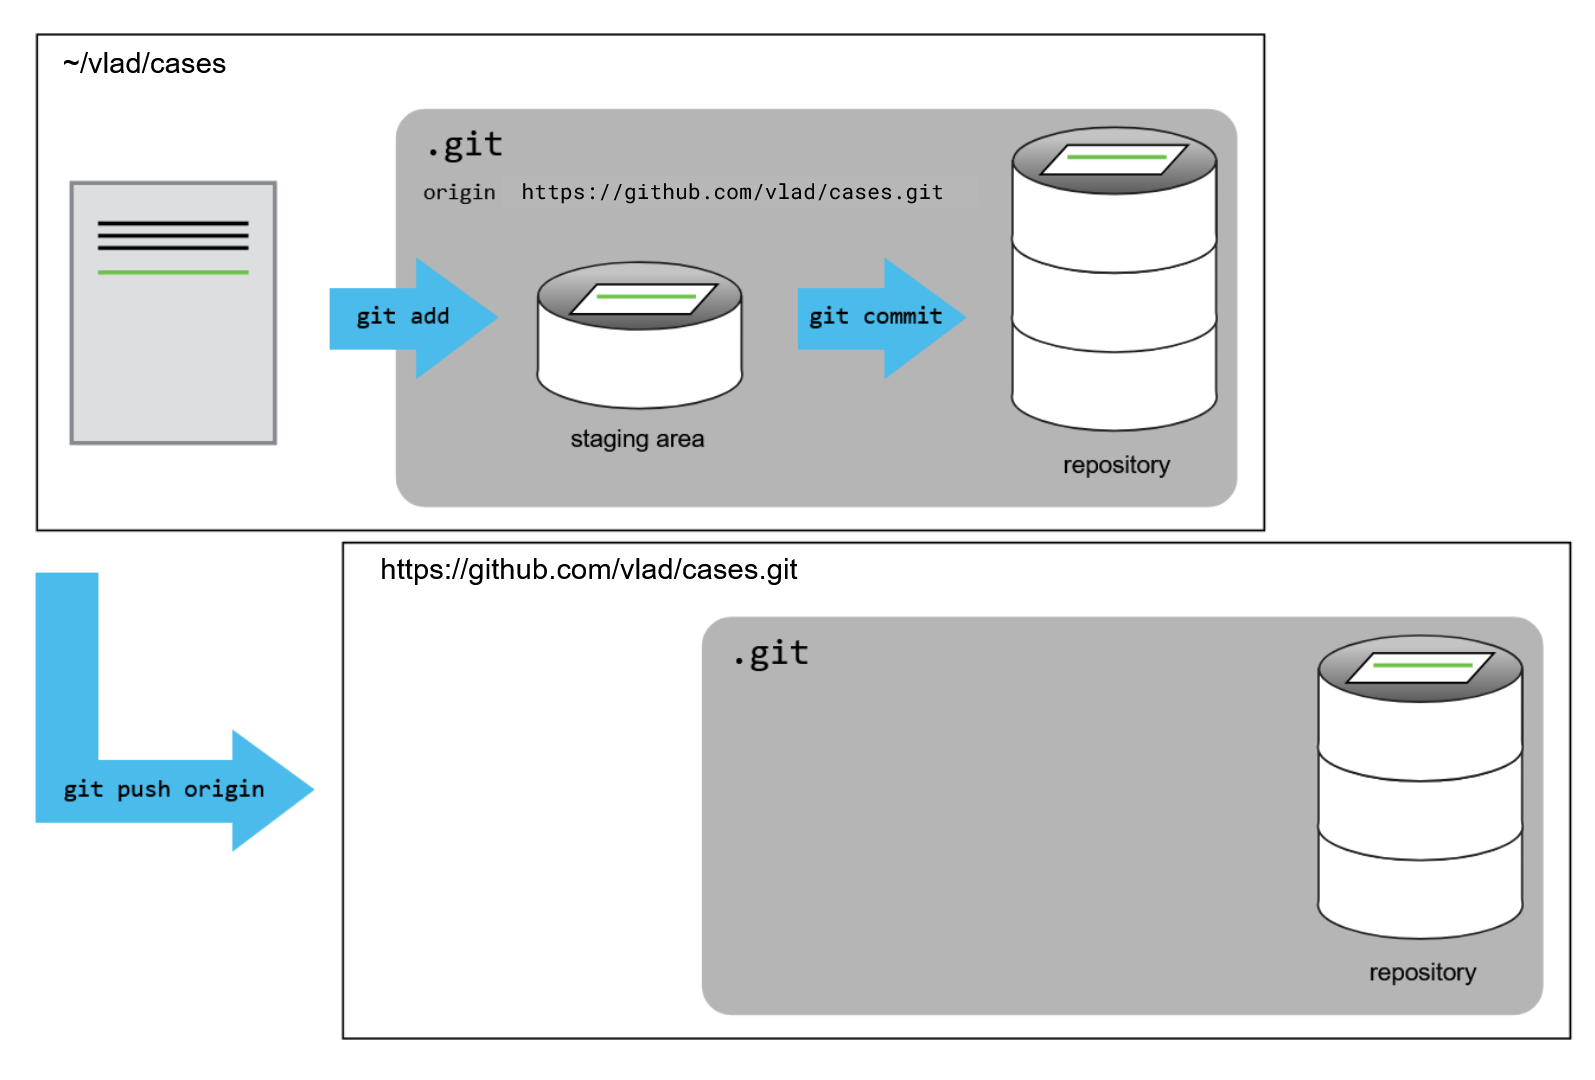
Figure 10
Figure 11
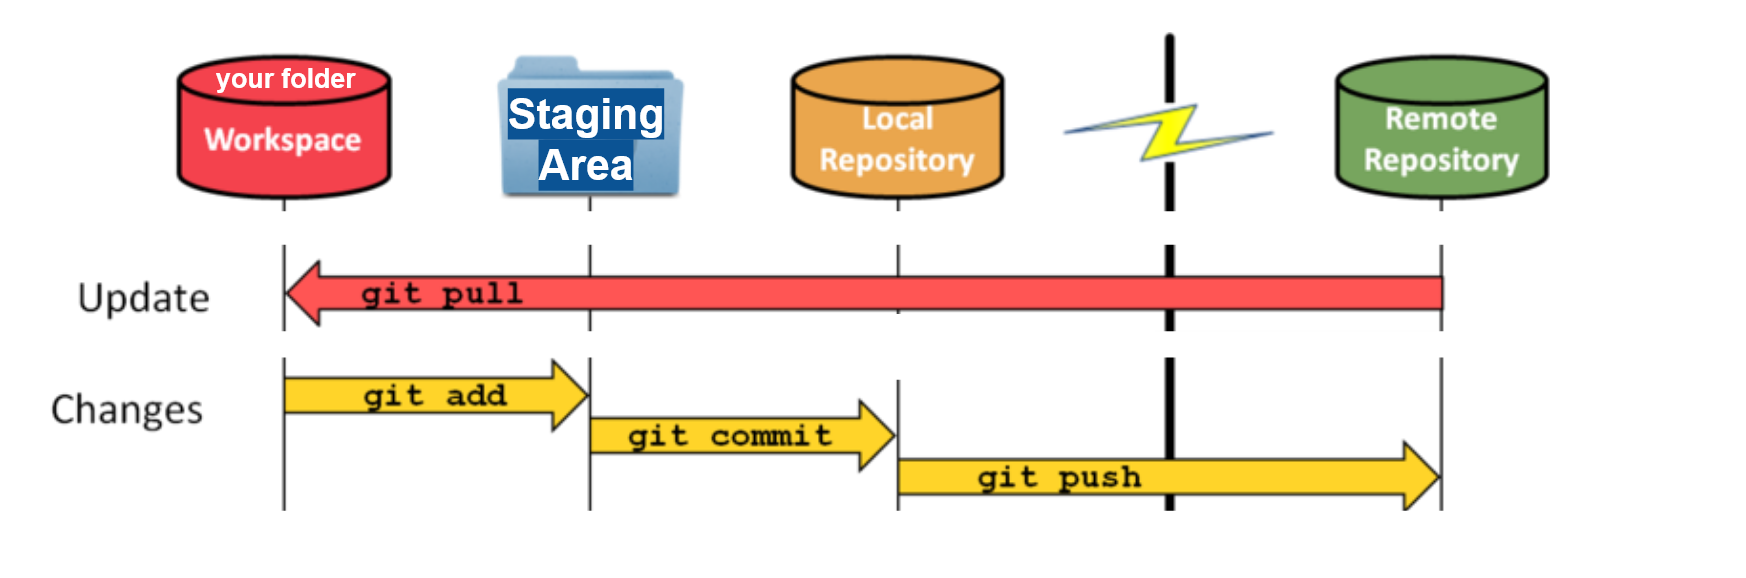
Use
git pull to download content
from a remote repository to the workspace and update the local
repository to match that content. Use git push to upload
local repository content to a remote repository.Collaborating
Figure 1
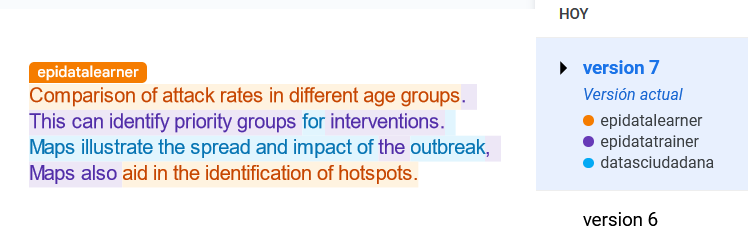
Figure 2

Figure 3
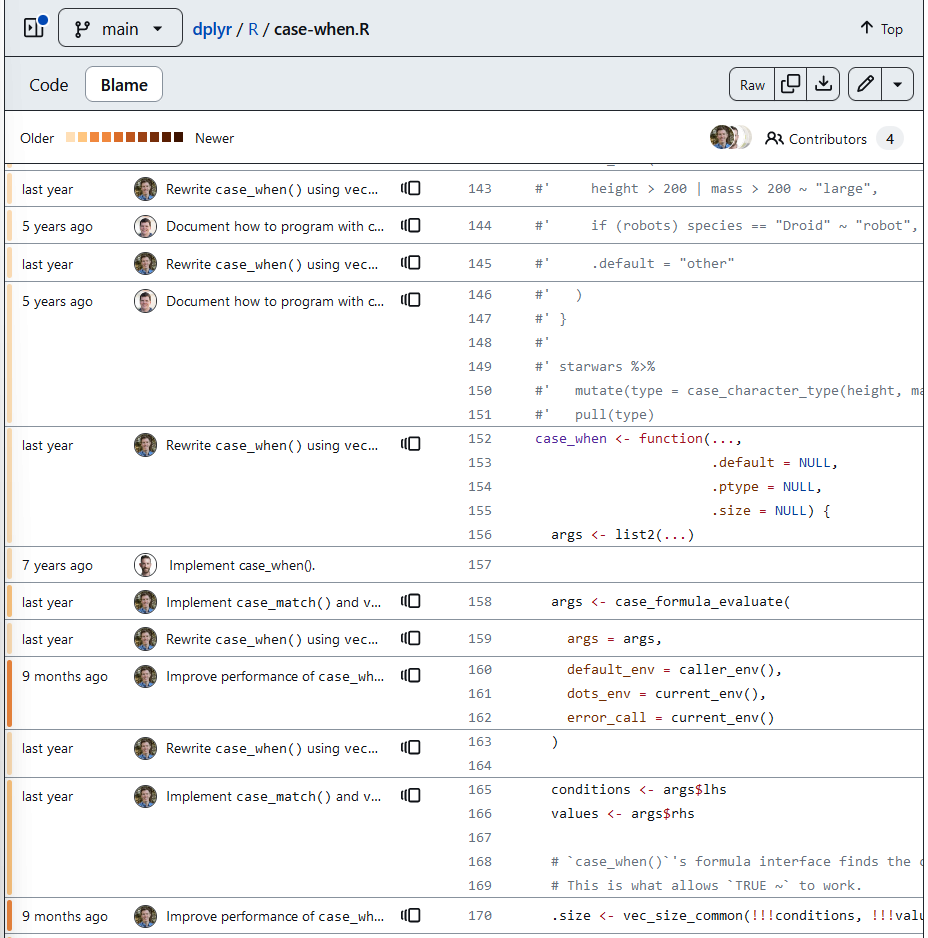
Figure 4
Figure 5
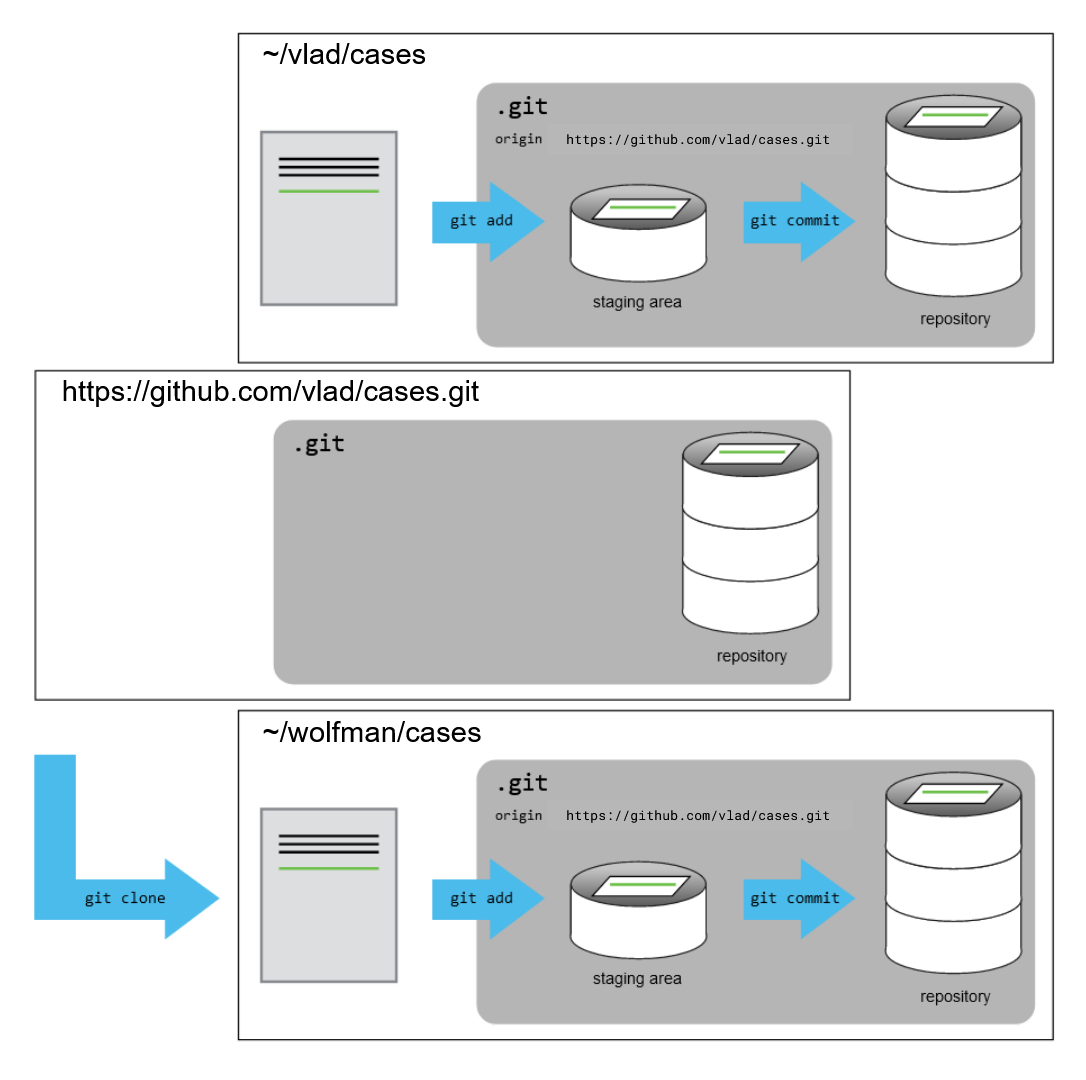
In the Outbreak response scenario, now Wolfman
has a local copy of the remote repository. They are already set up to
collaborate for one project!
Figure 6
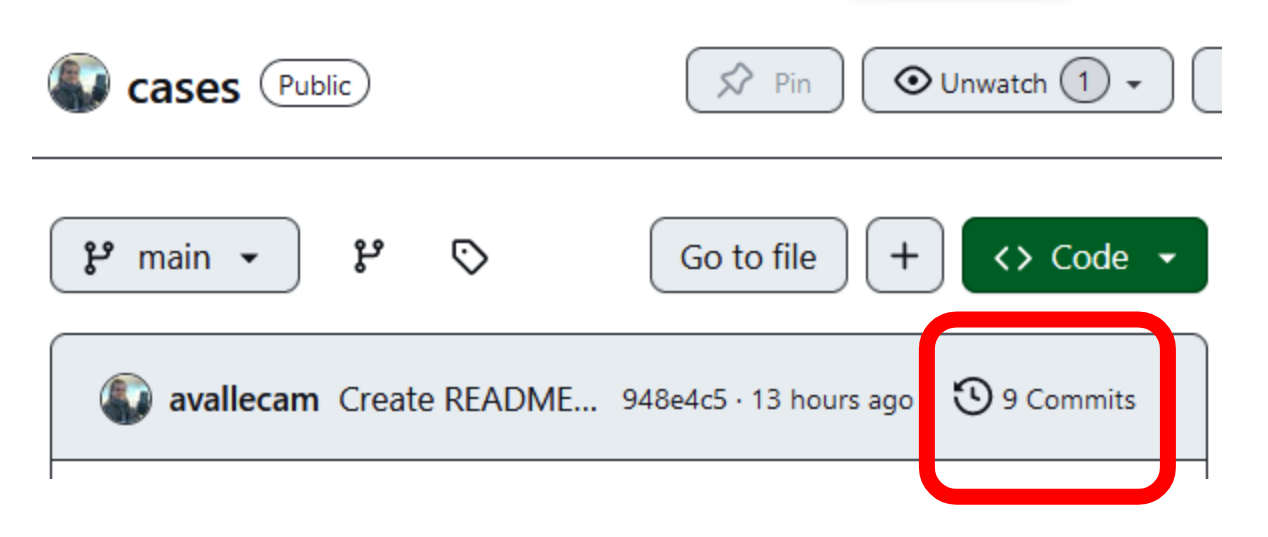
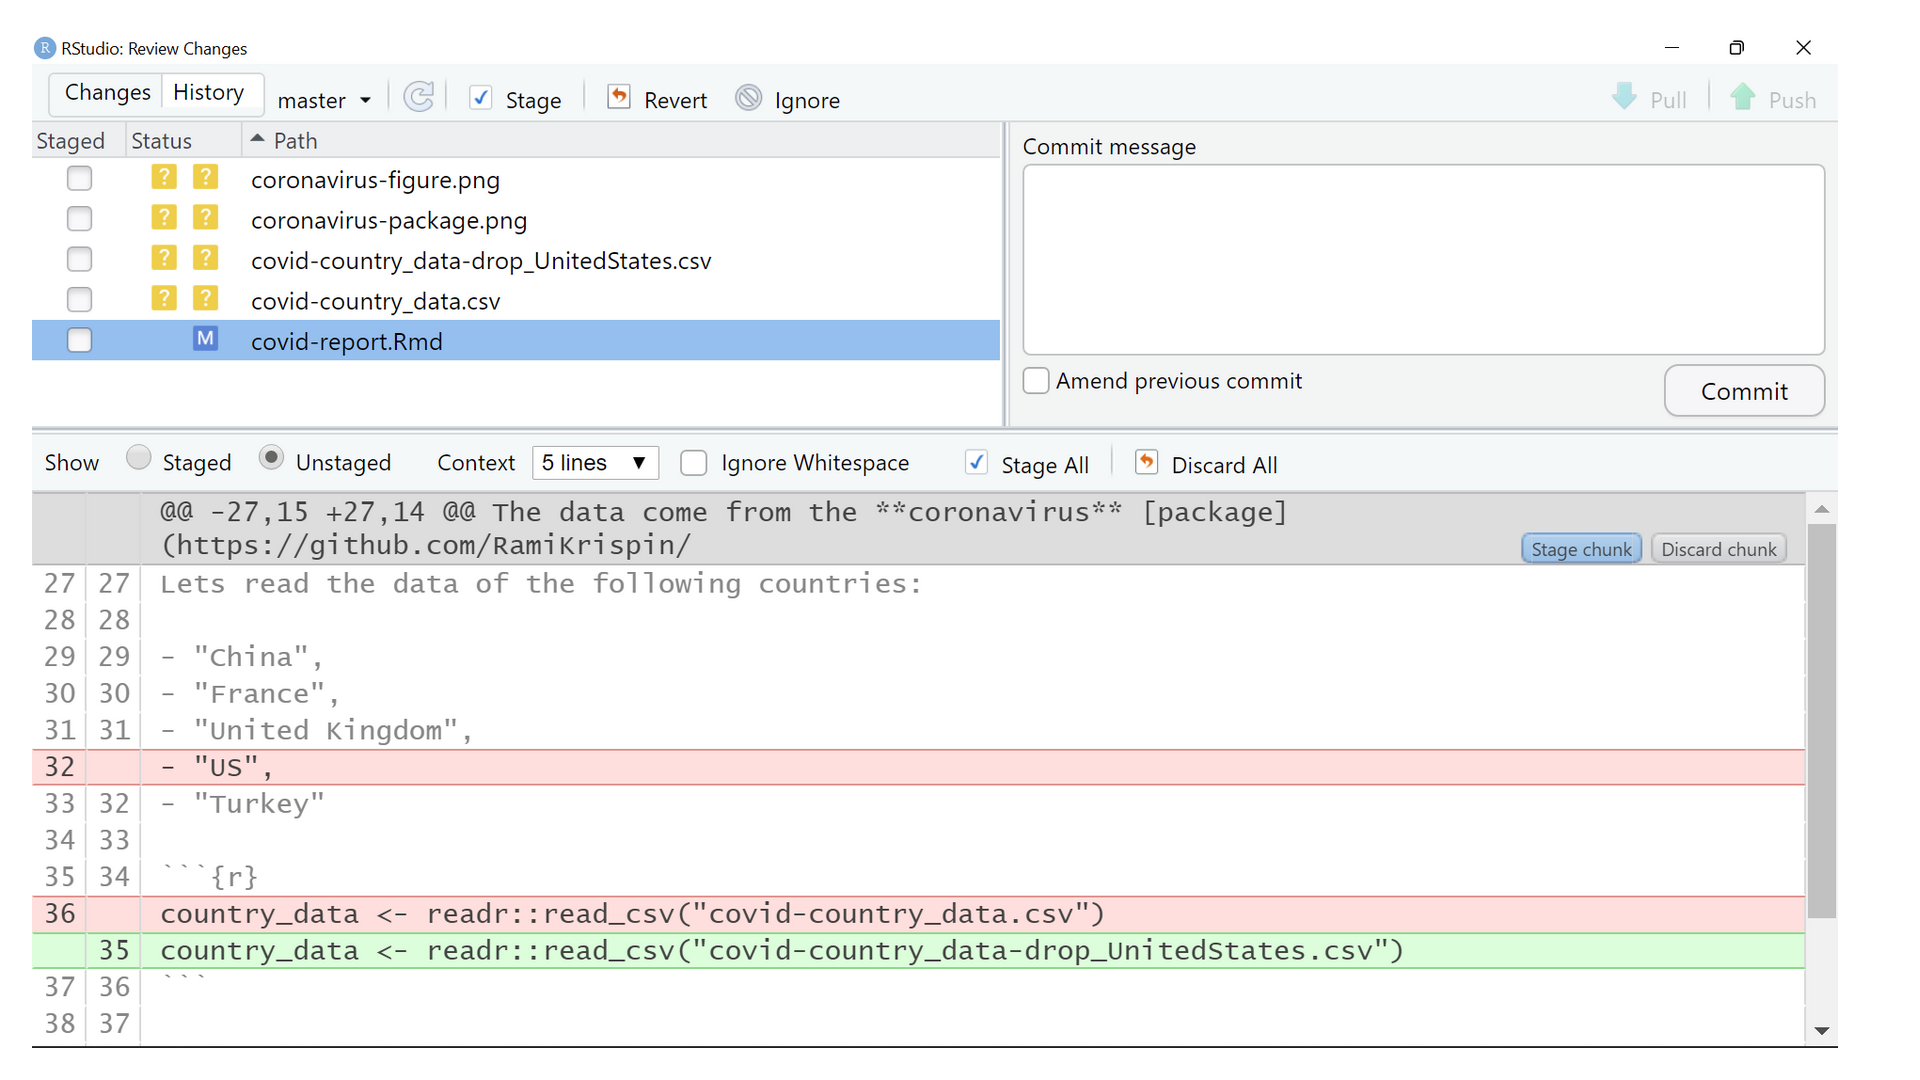
Click on “commit”. Select one commit.
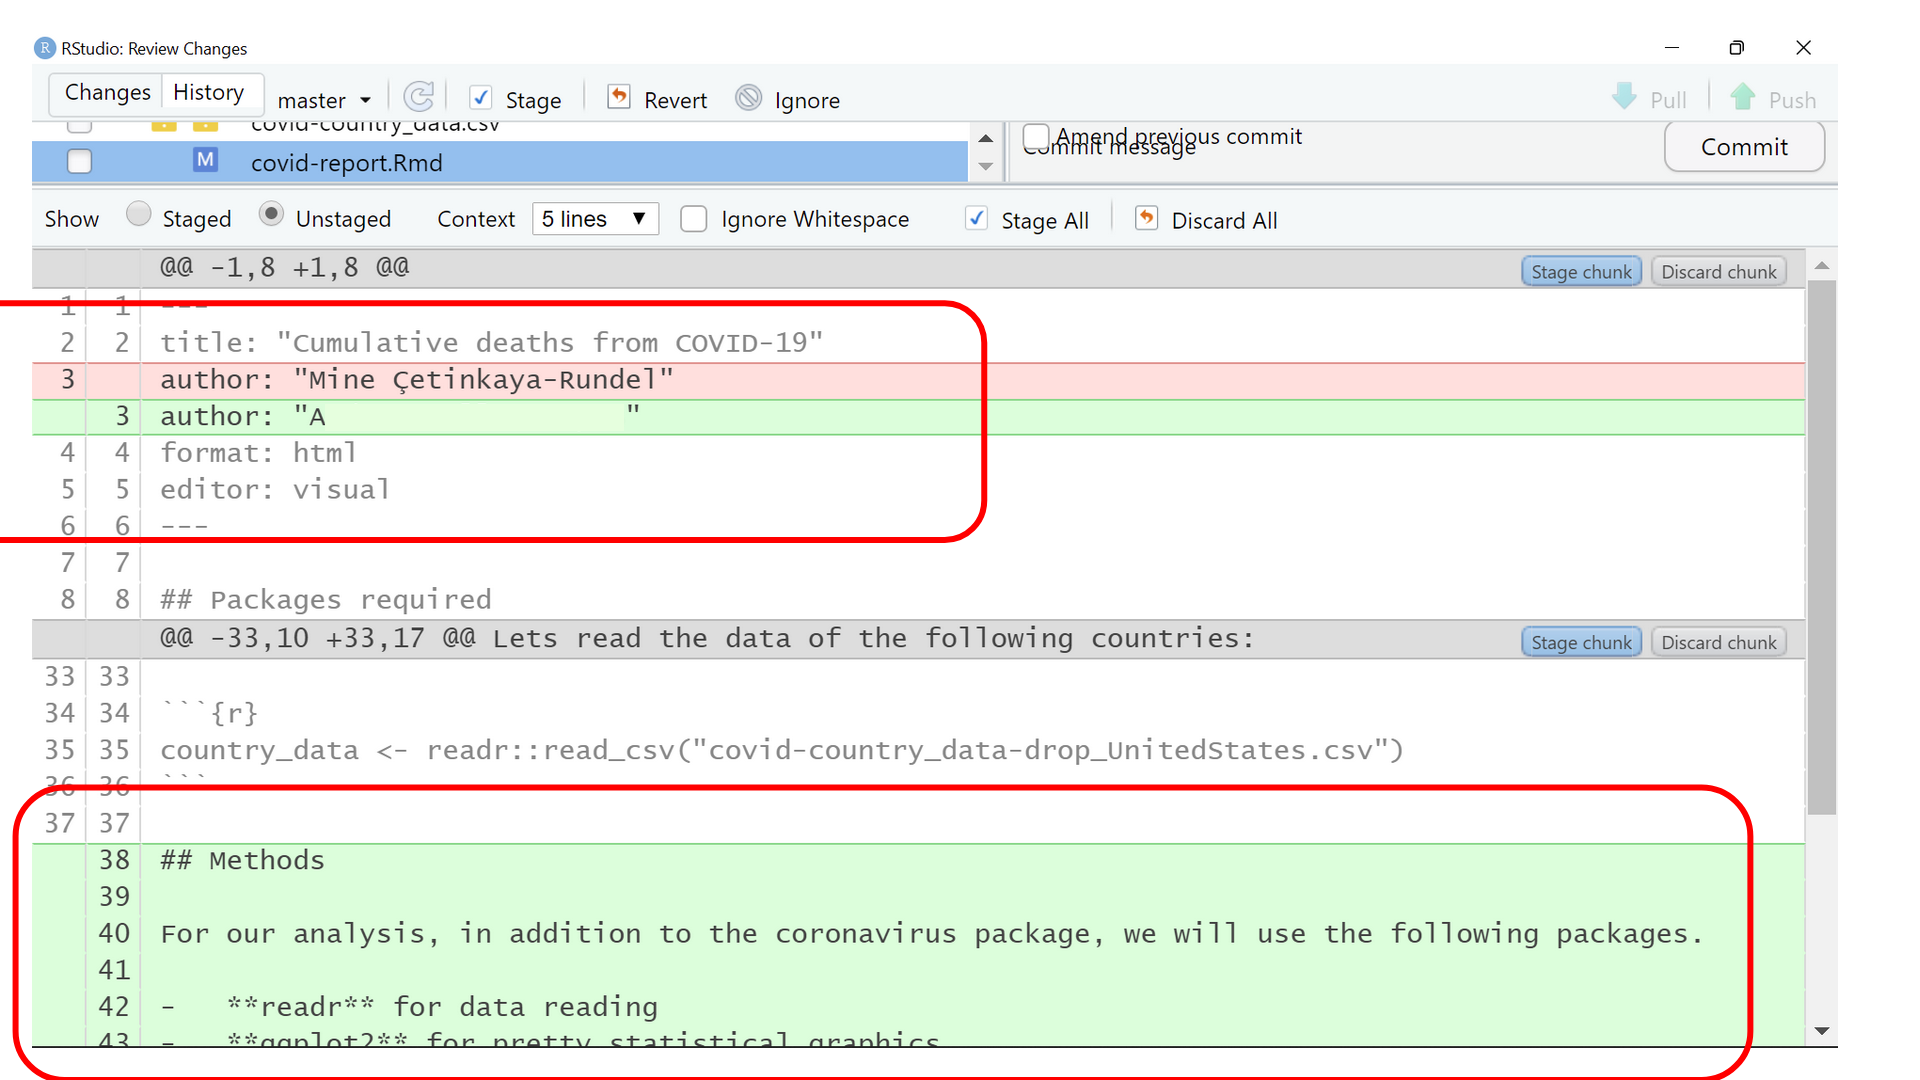
Figure 7
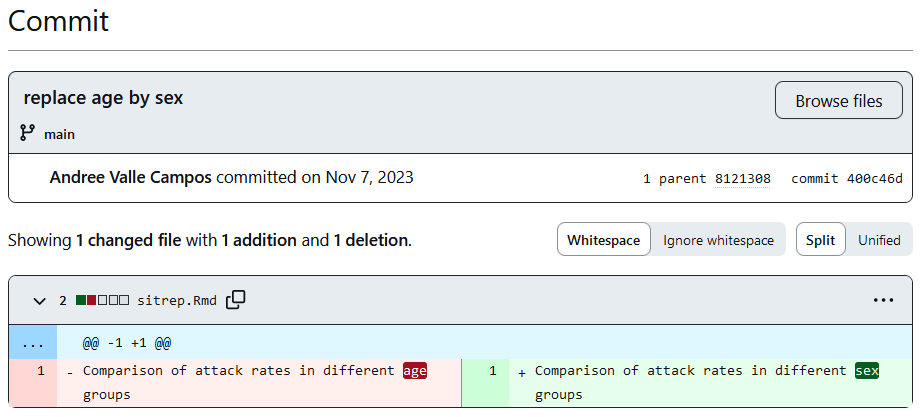
Replace age with sex commit. The removed content
within lines is in red. The added content within lines is in
green.
Figure 8
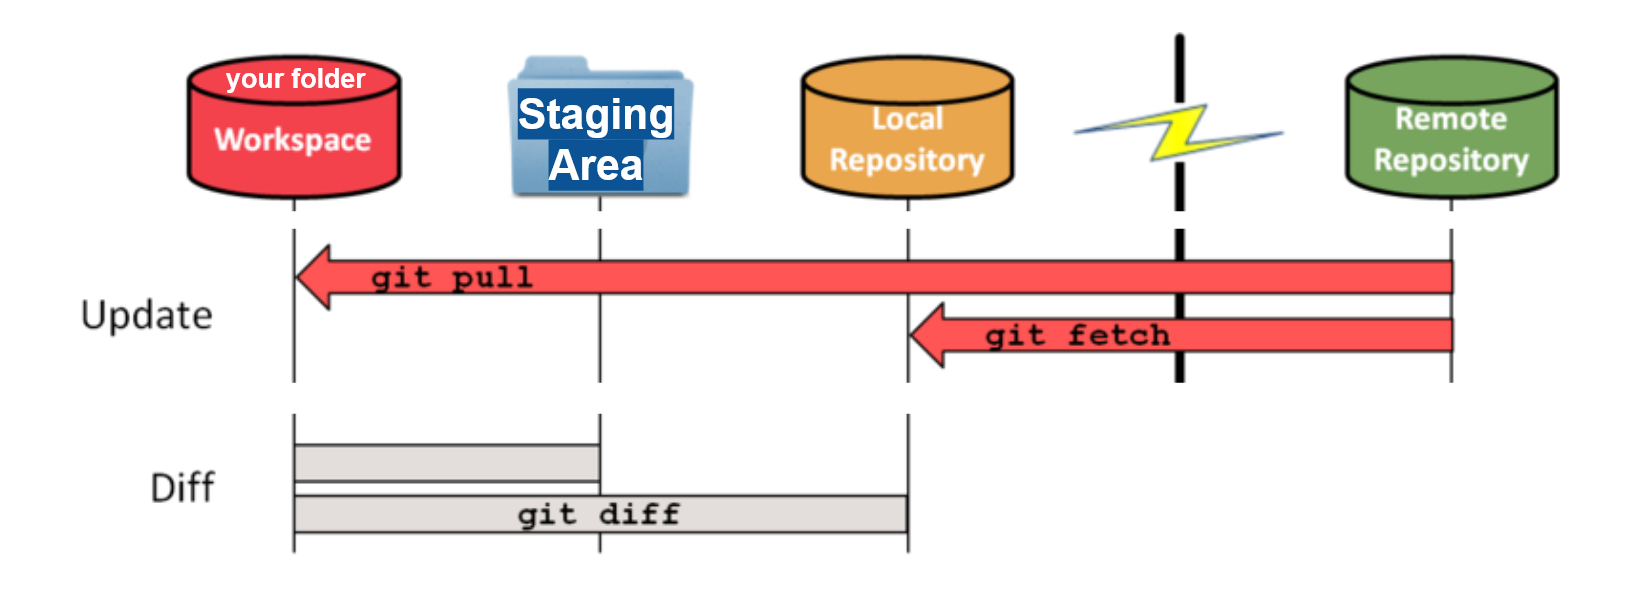
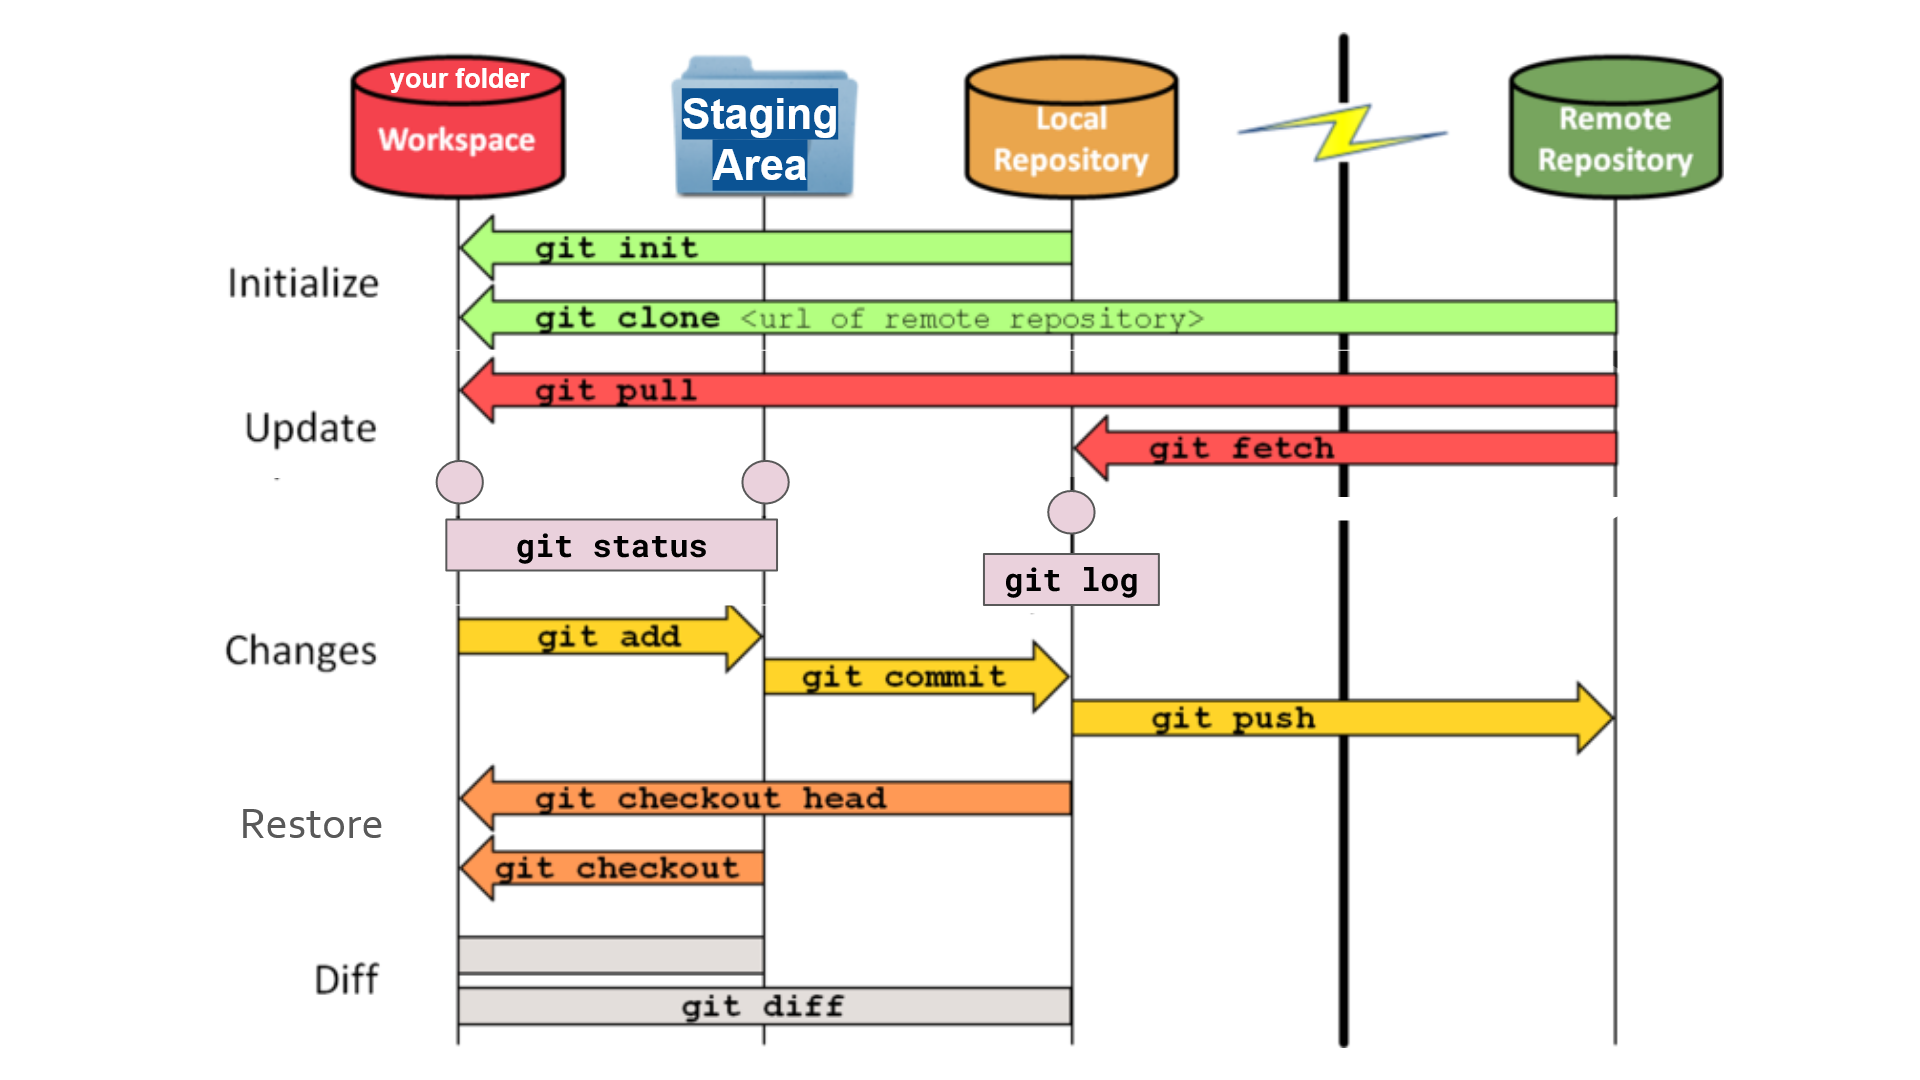
Use
git fetch to download the
remote content but not update your local repo’s working state, leaving
your current work intact. Use git pull to download the
remote content for the active local branch and immediately merge it.
this can potentially cause conflicts.Figure 9
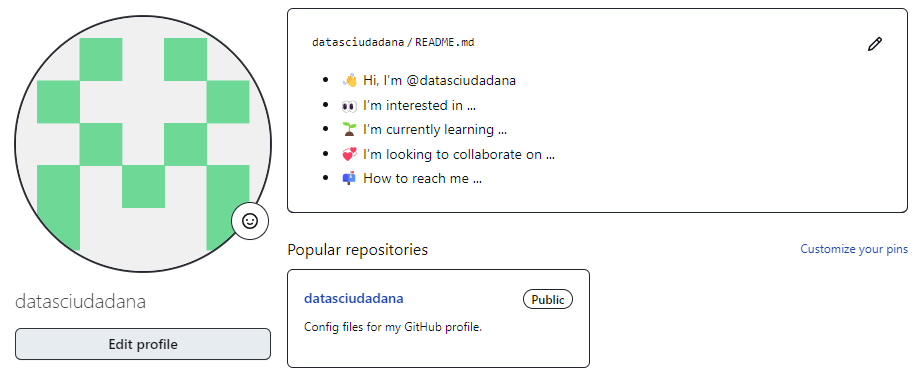
Figure 10
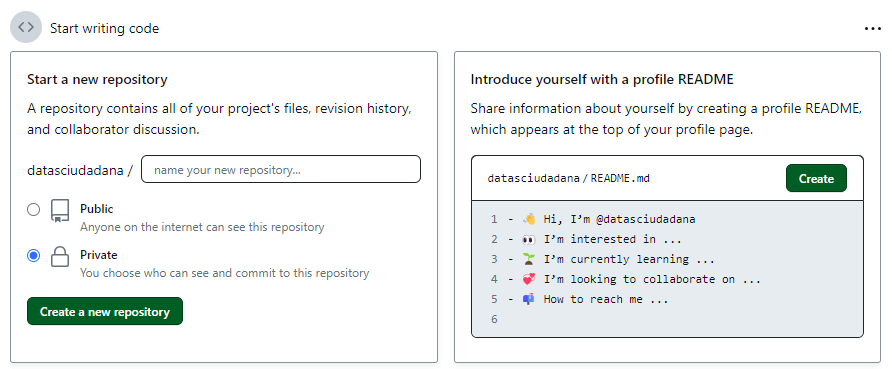
Figure 11

Figure 12
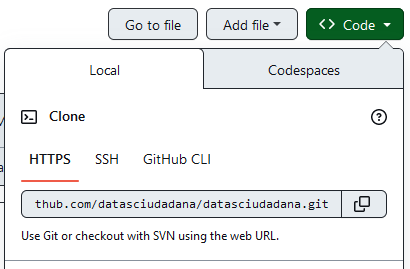
Figure 13
Use
git clone to obtain a
development copy of a remote repository. Like git init,
cloning is generally a one-time operation. Use git pull to
update the local repository to match the content in the remote
repository.Conflicts
Figure 1

Figure 2

Figure 3

Figure 4
Figure 5

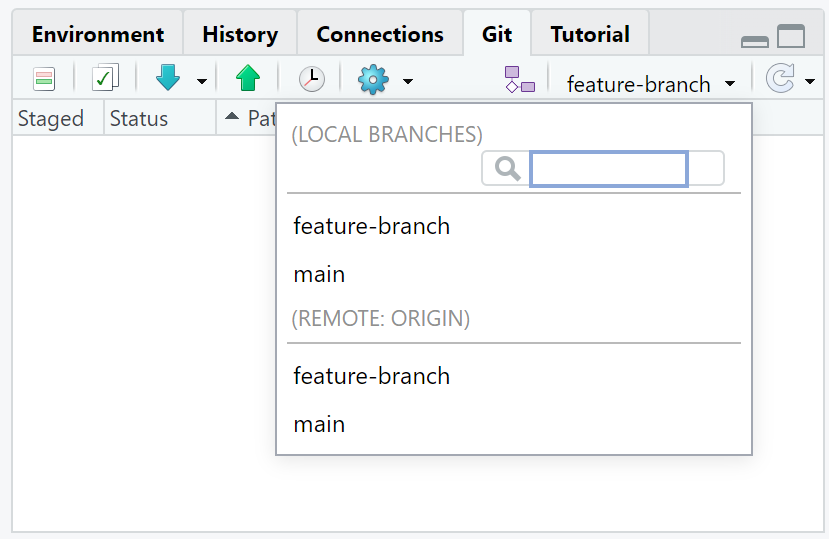
One feature branch and one main branch in
Git.
Figure 6
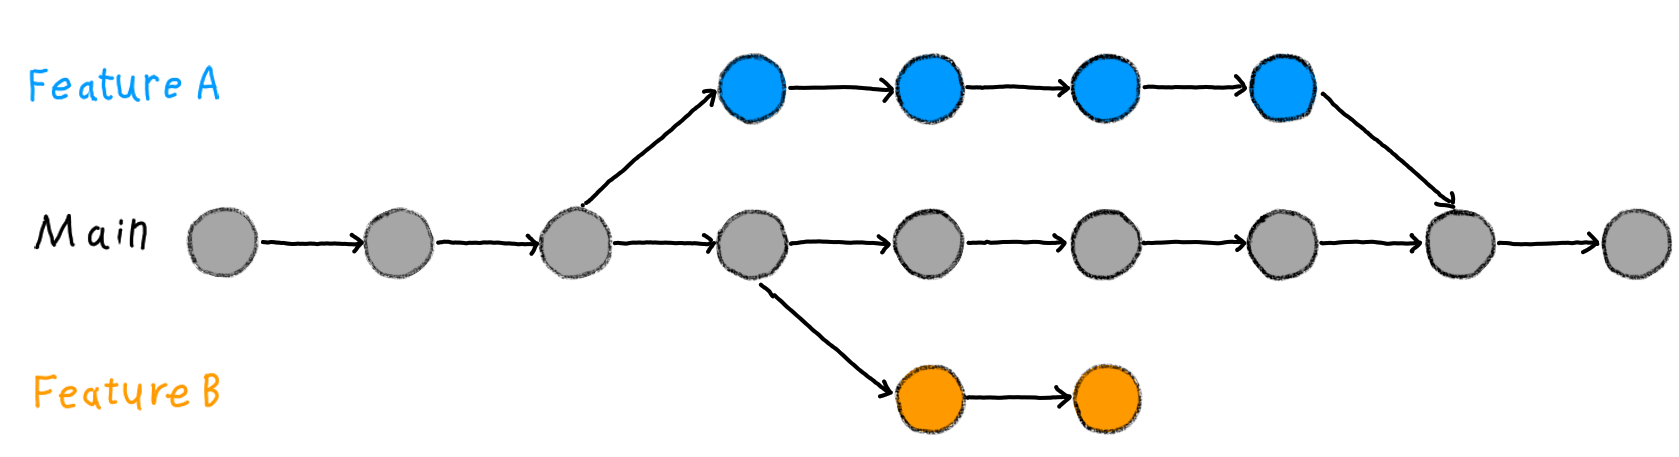
Two feature branches and one main branch in
Git.
Figure 7
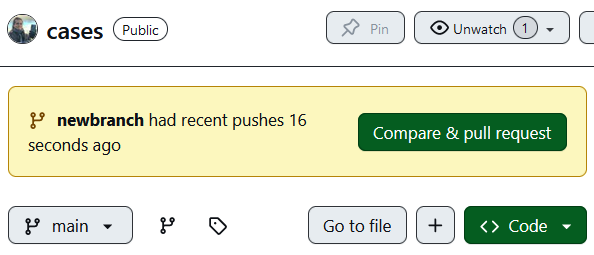
Figure 8
Two related modified lines must be part of the
same commit.
Figure 9
Two unrelated edits must be part of two isolated
commits.
Wrap-up
Figure 1
Complete workflow with actions,
git verb commands, and spaces.Supplemental: Using RStudio for Git
Figure 1
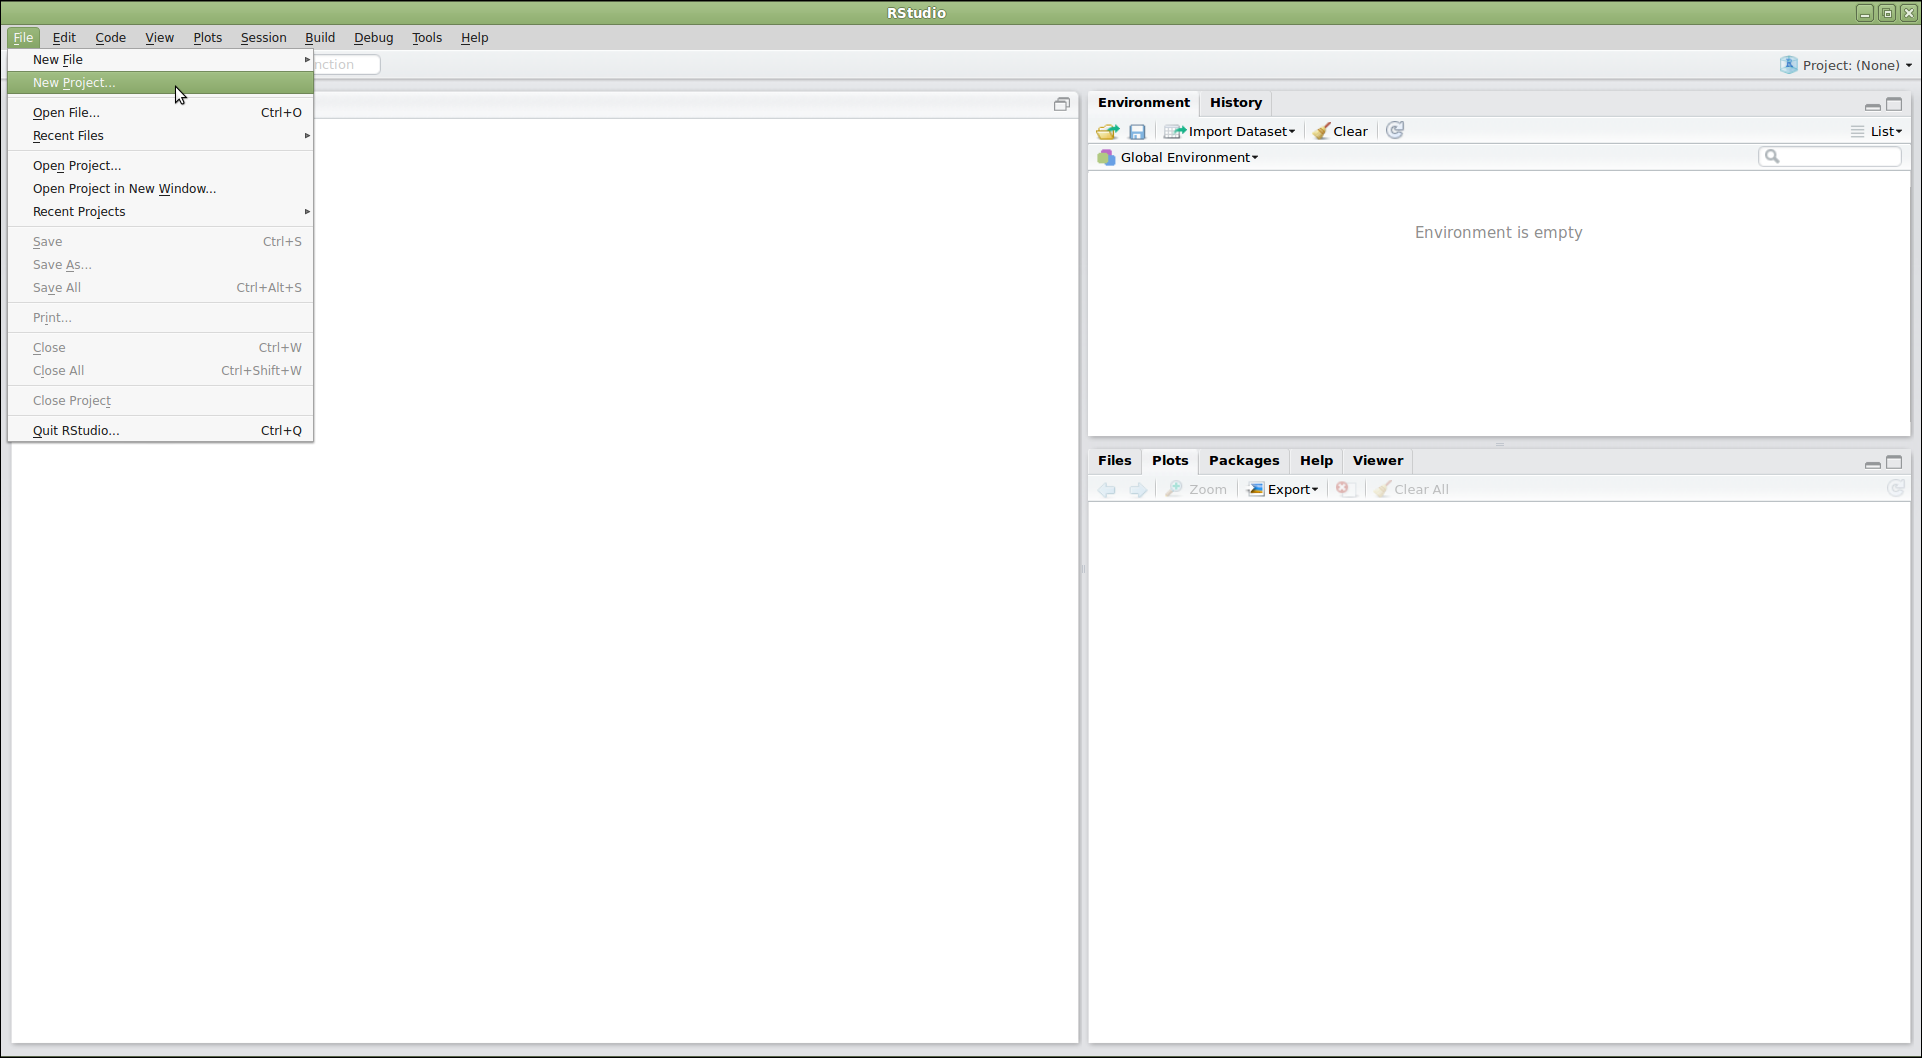
Figure 2
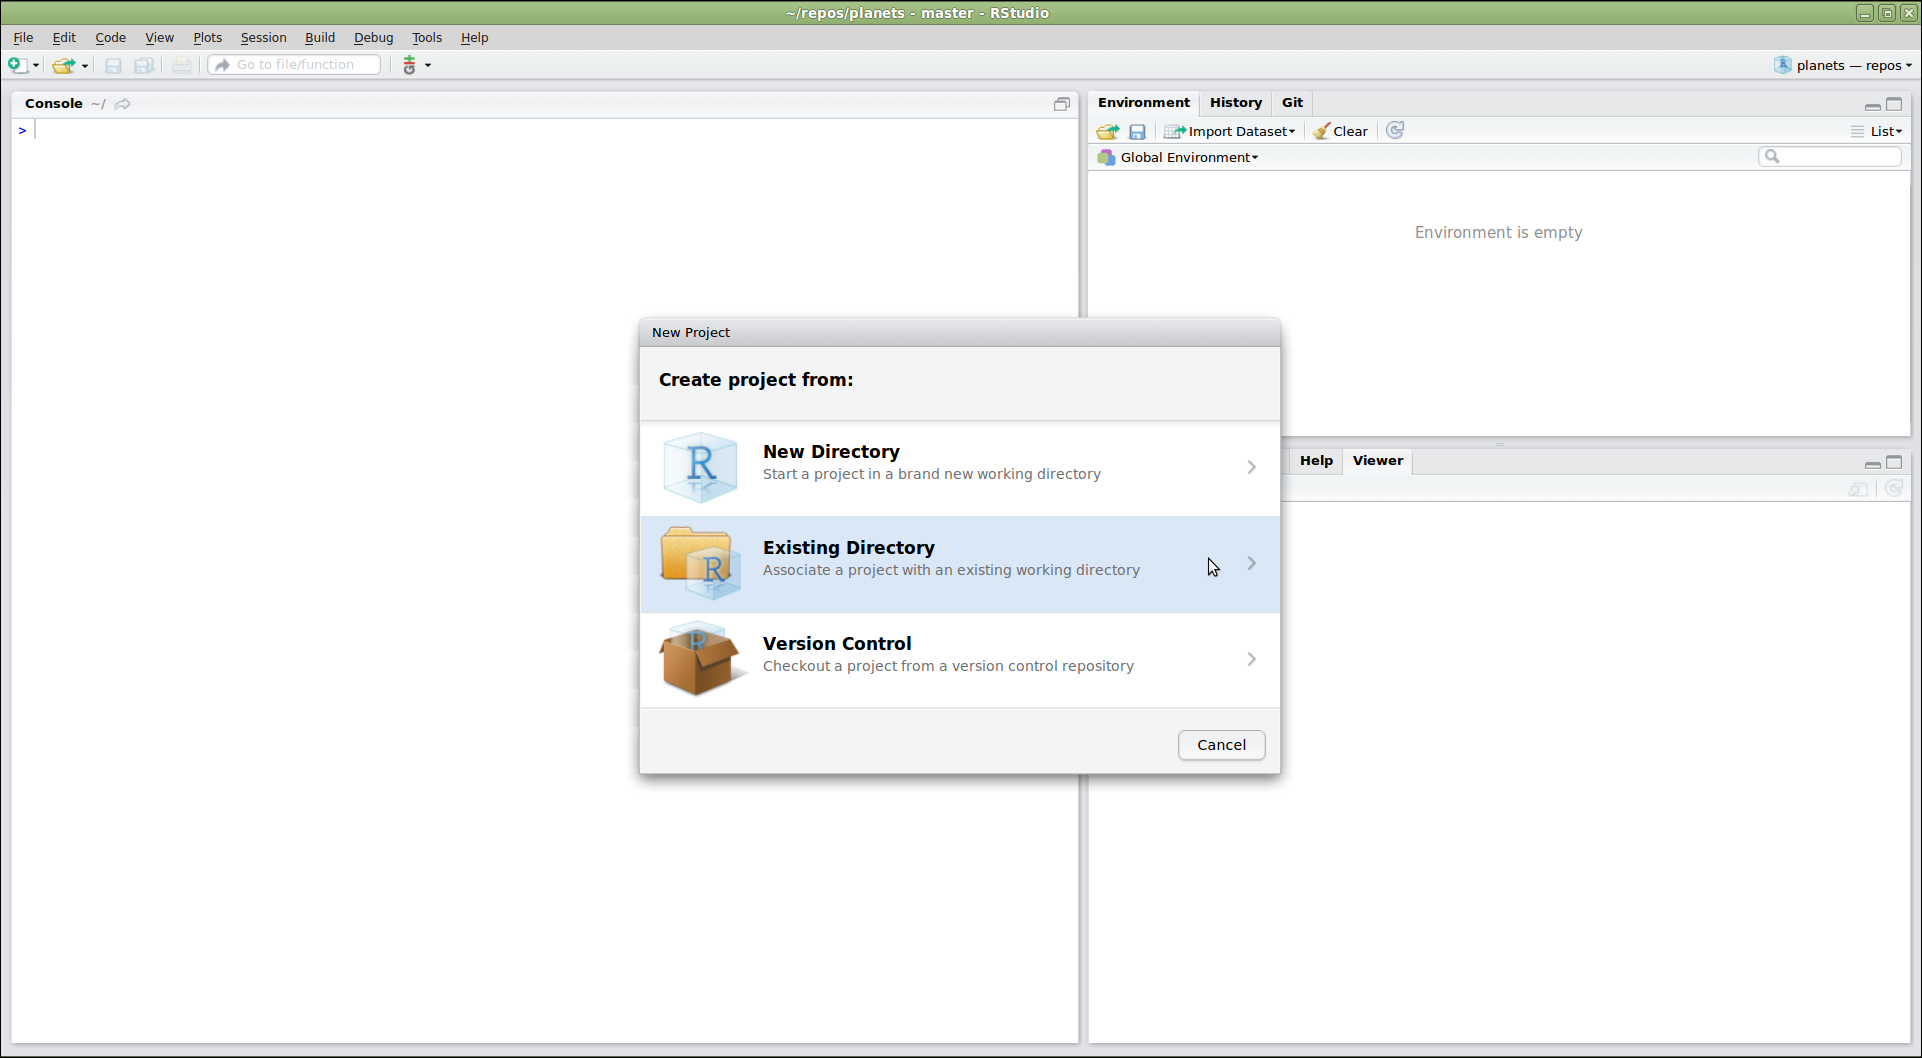
Figure 3
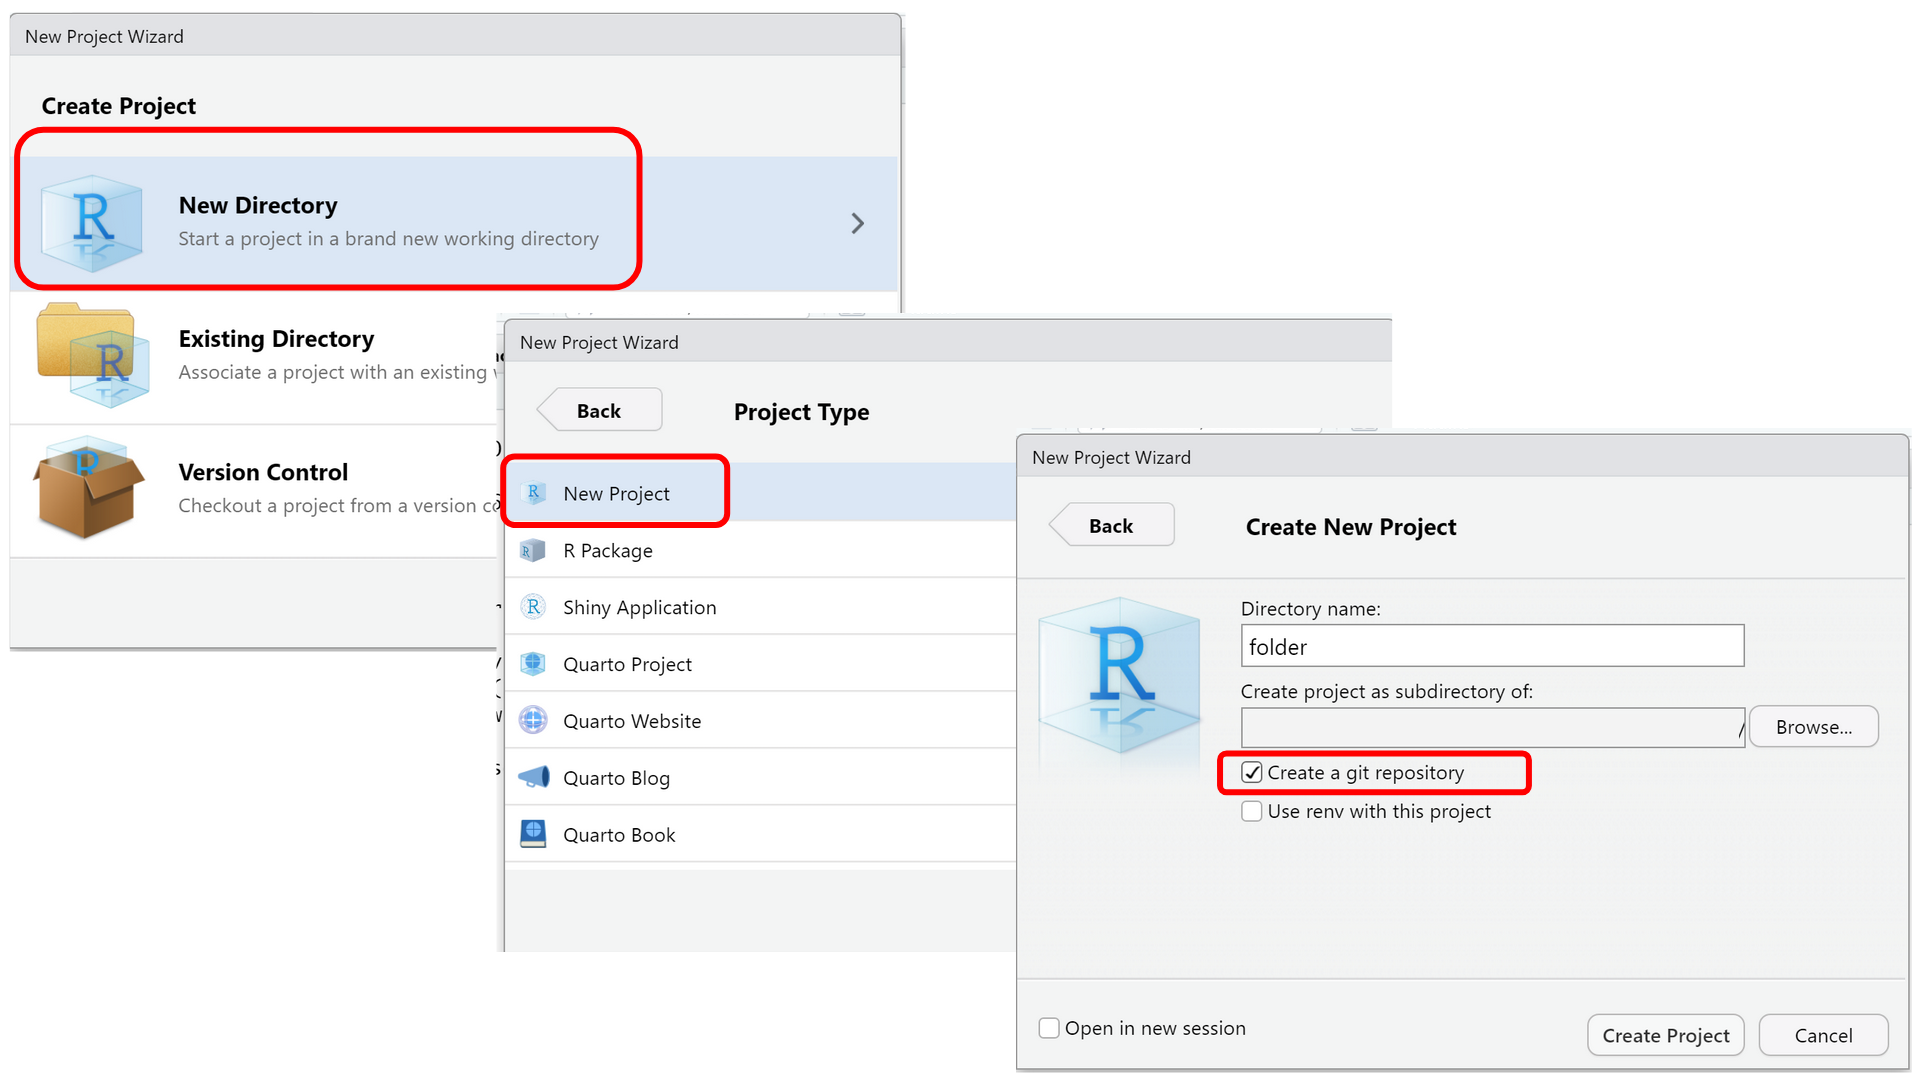
Figure 4
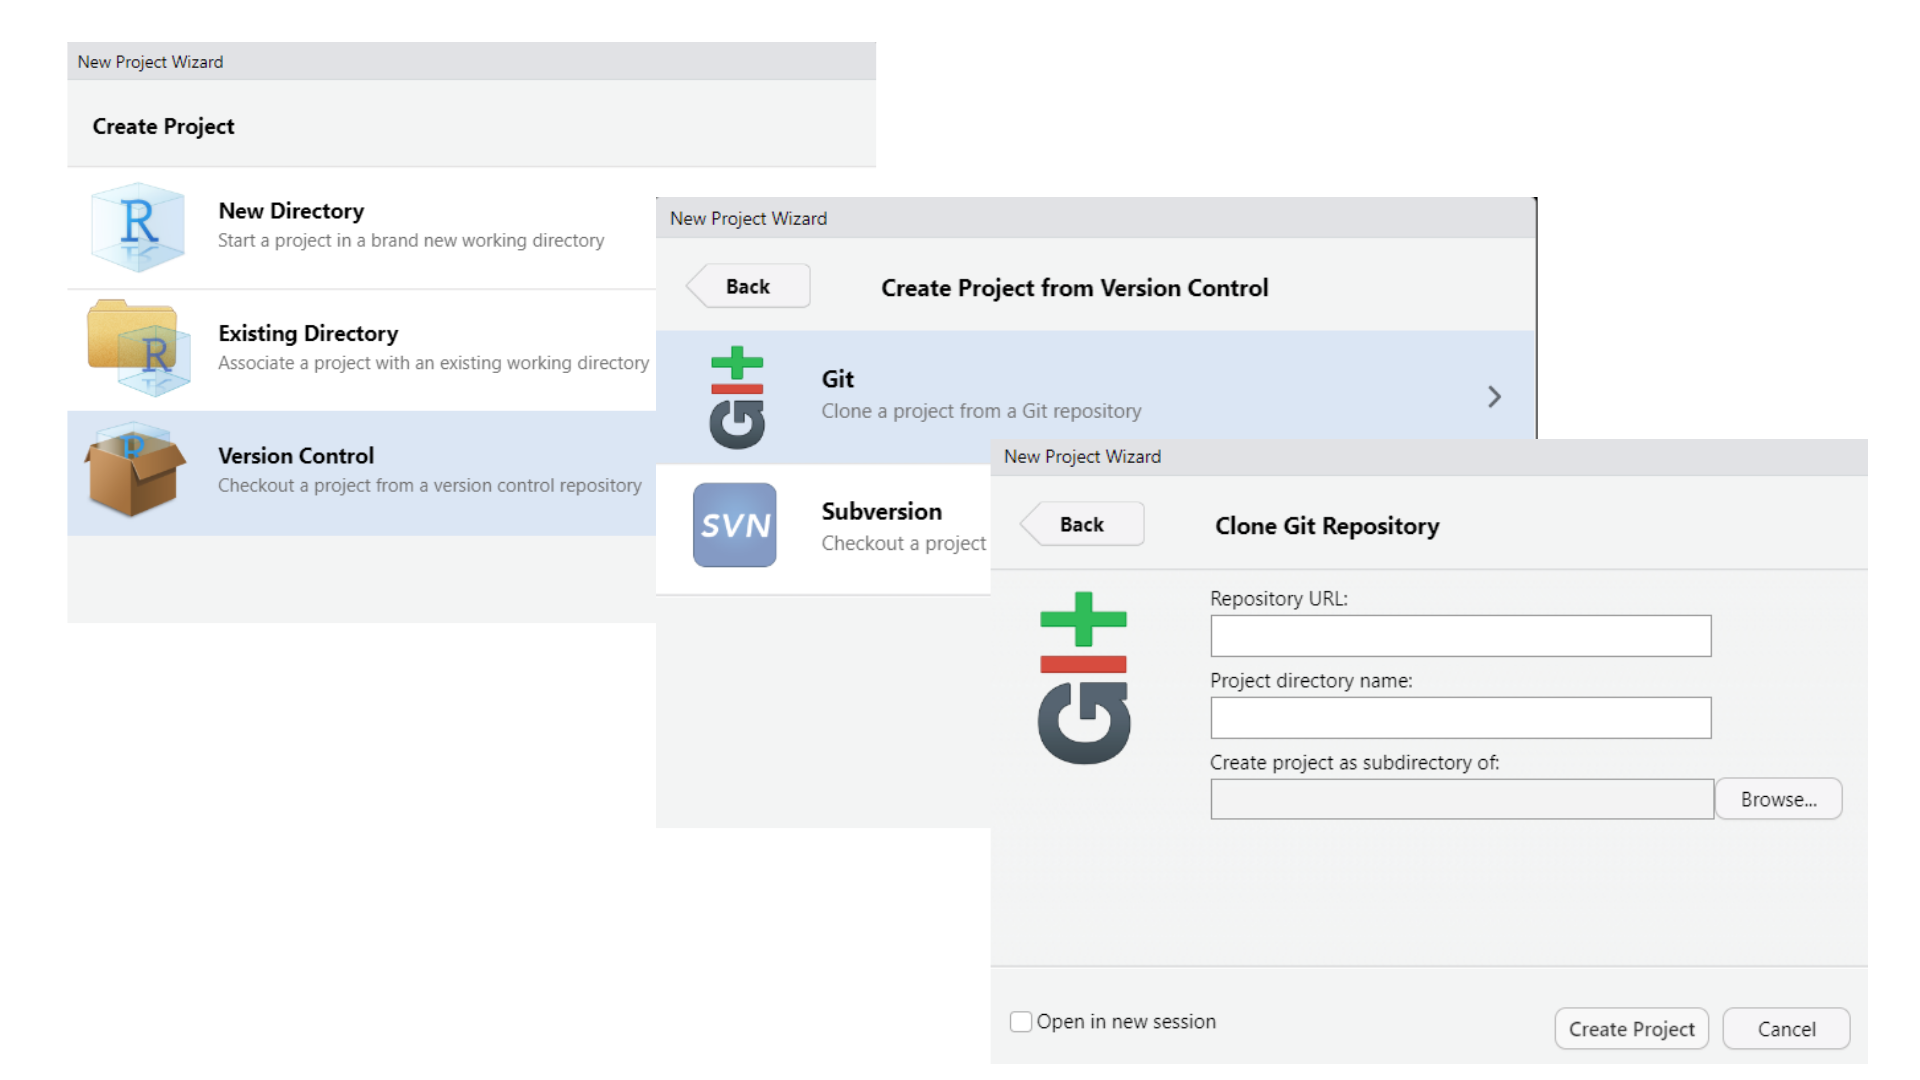
Figure 5
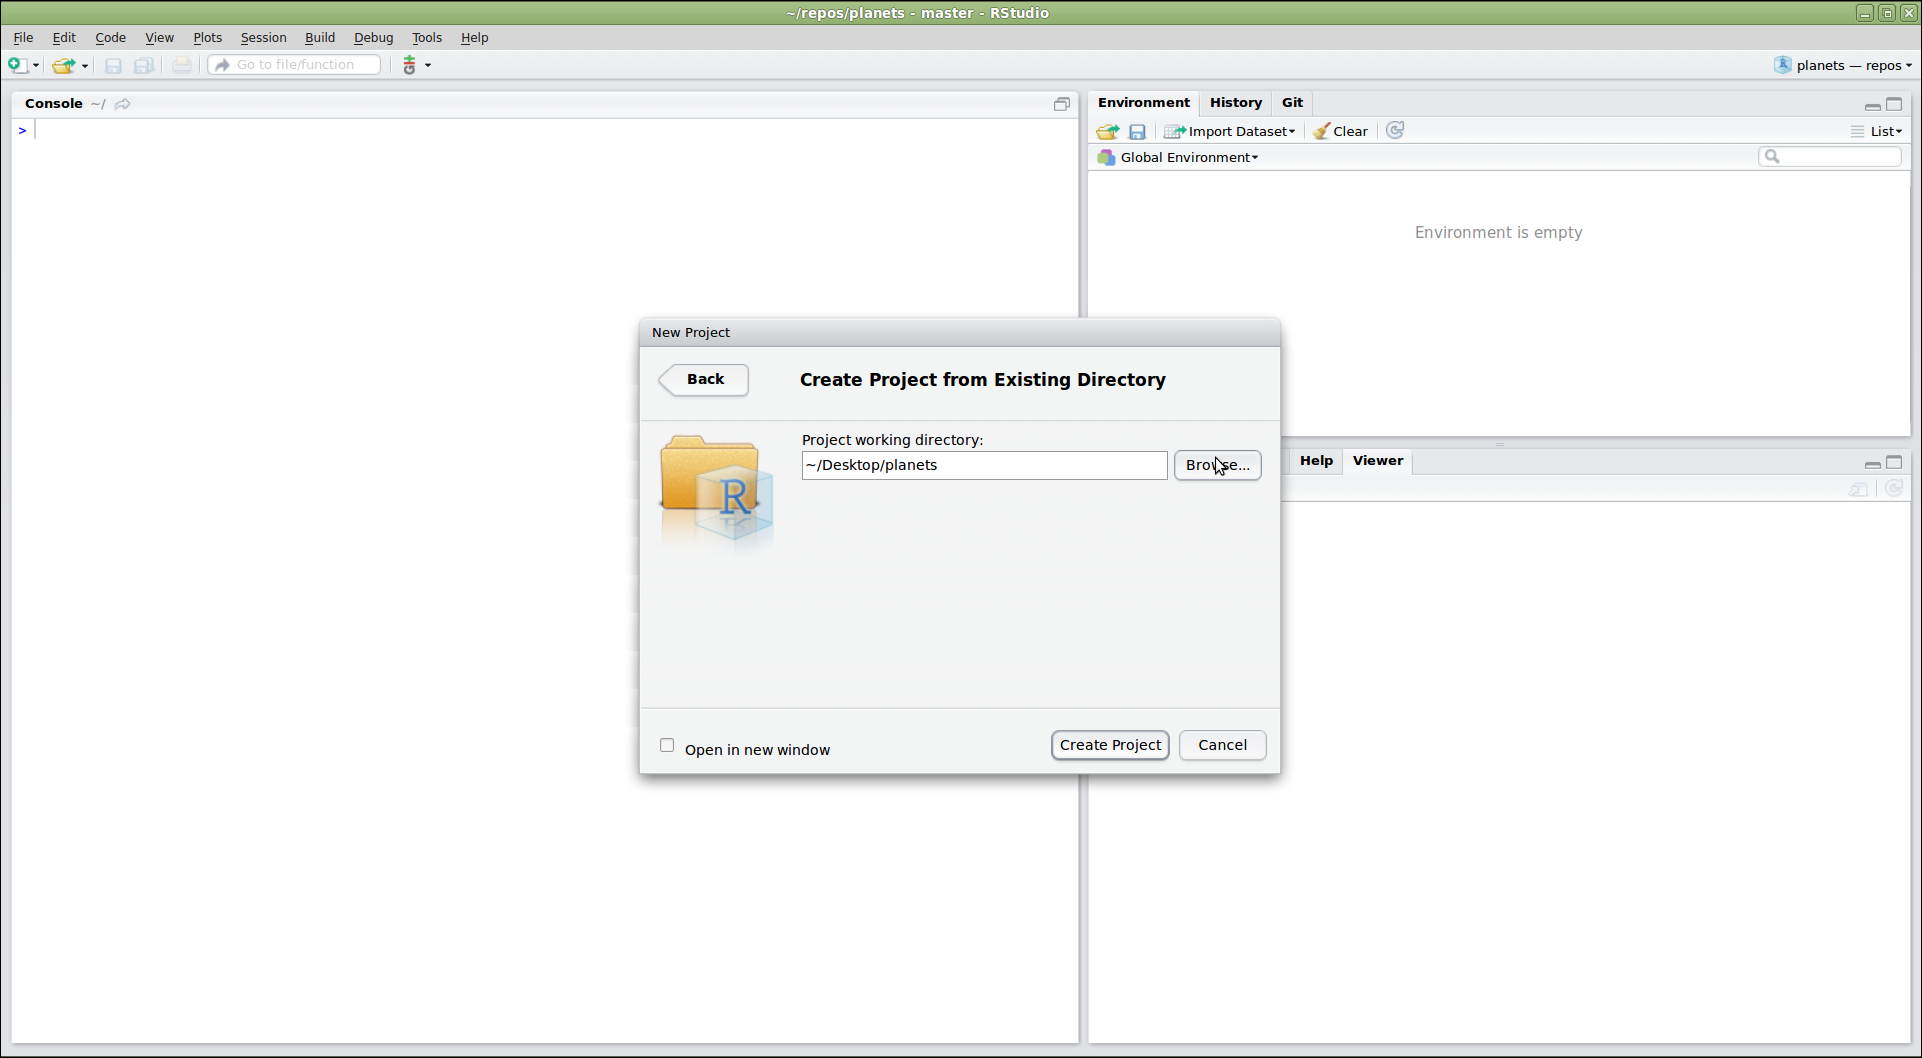
Figure 6
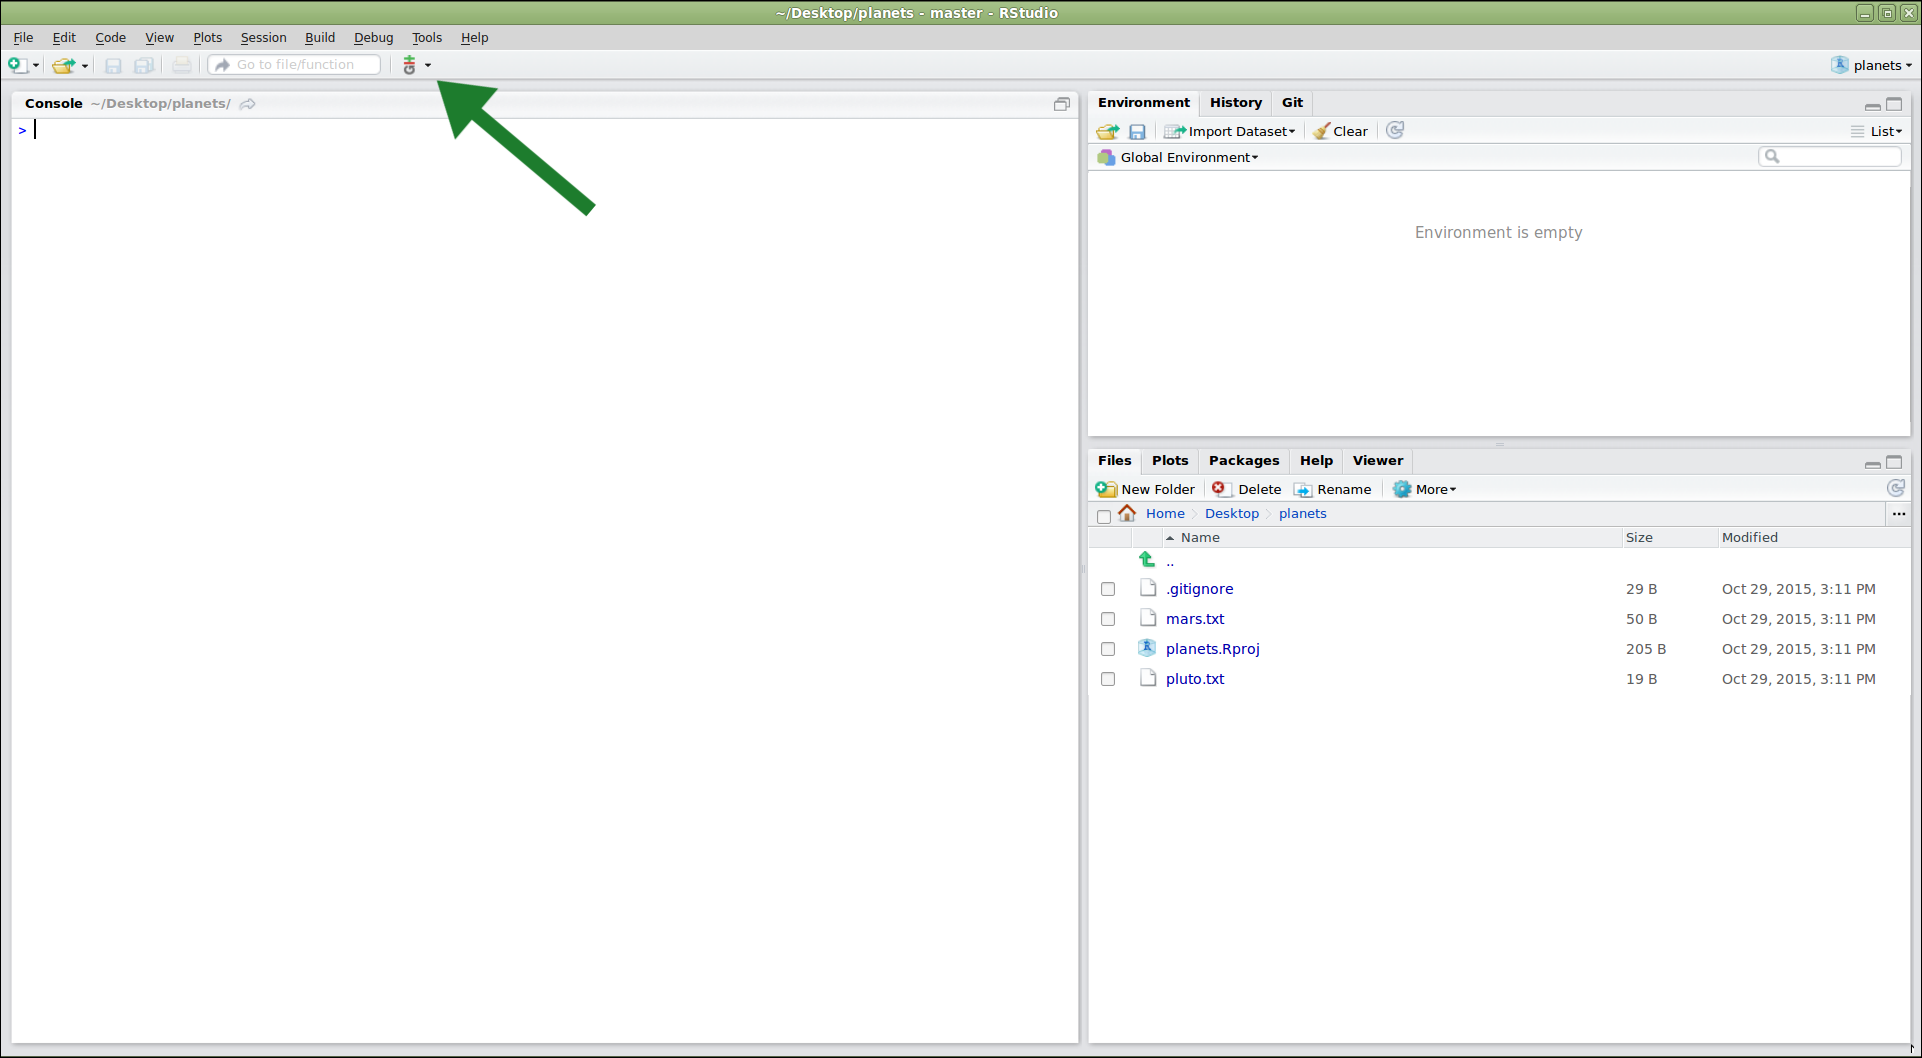
Figure 7
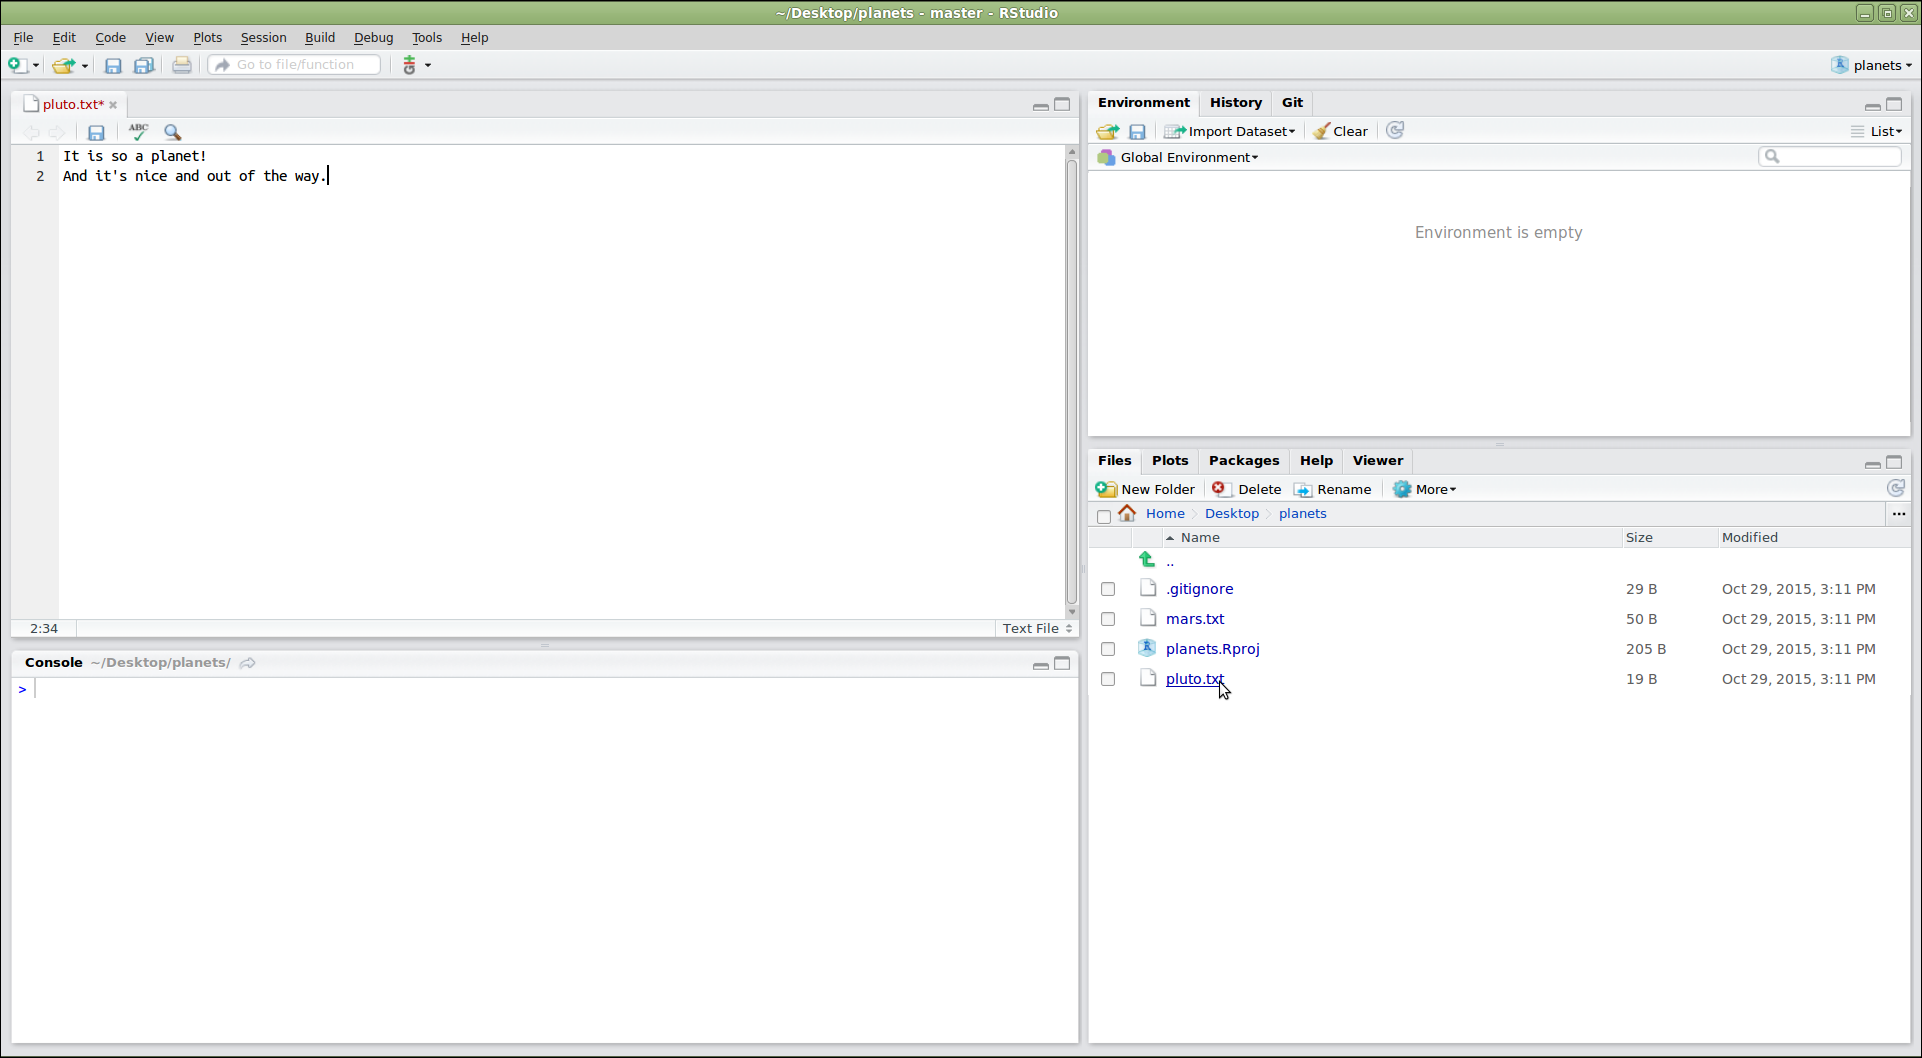
Figure 8
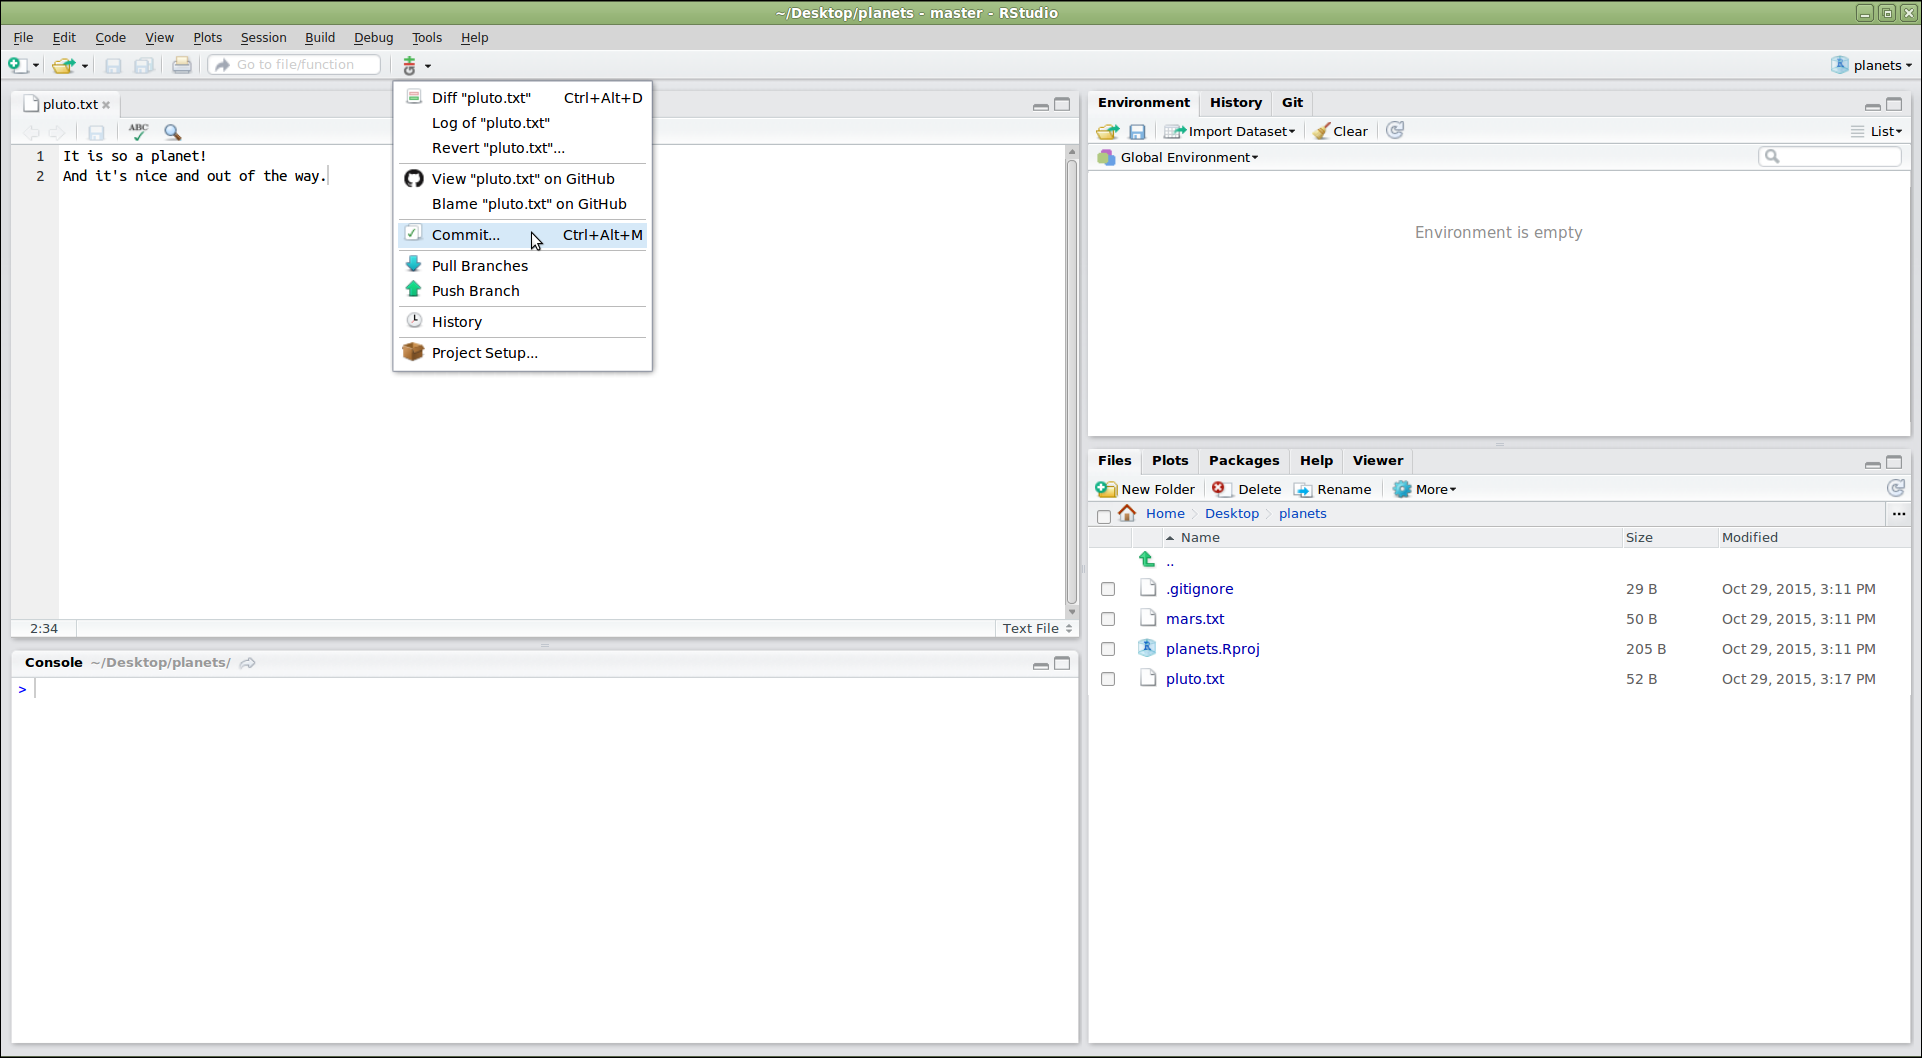
Figure 9
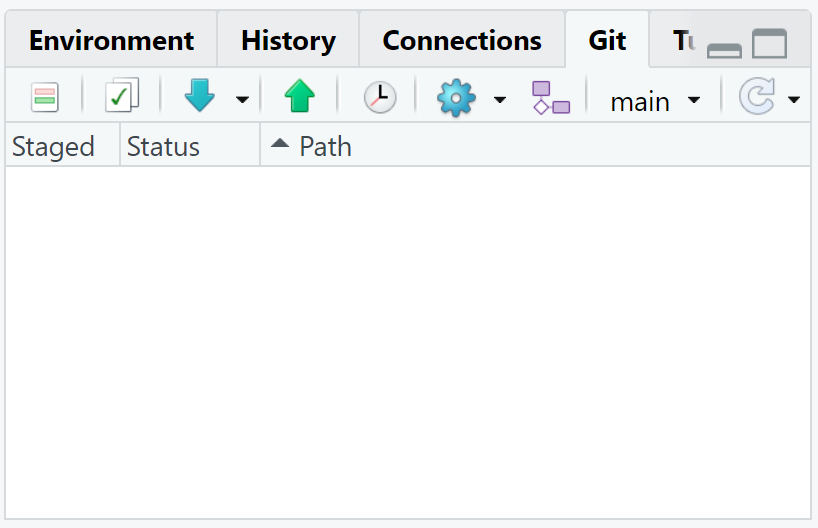
Figure 10
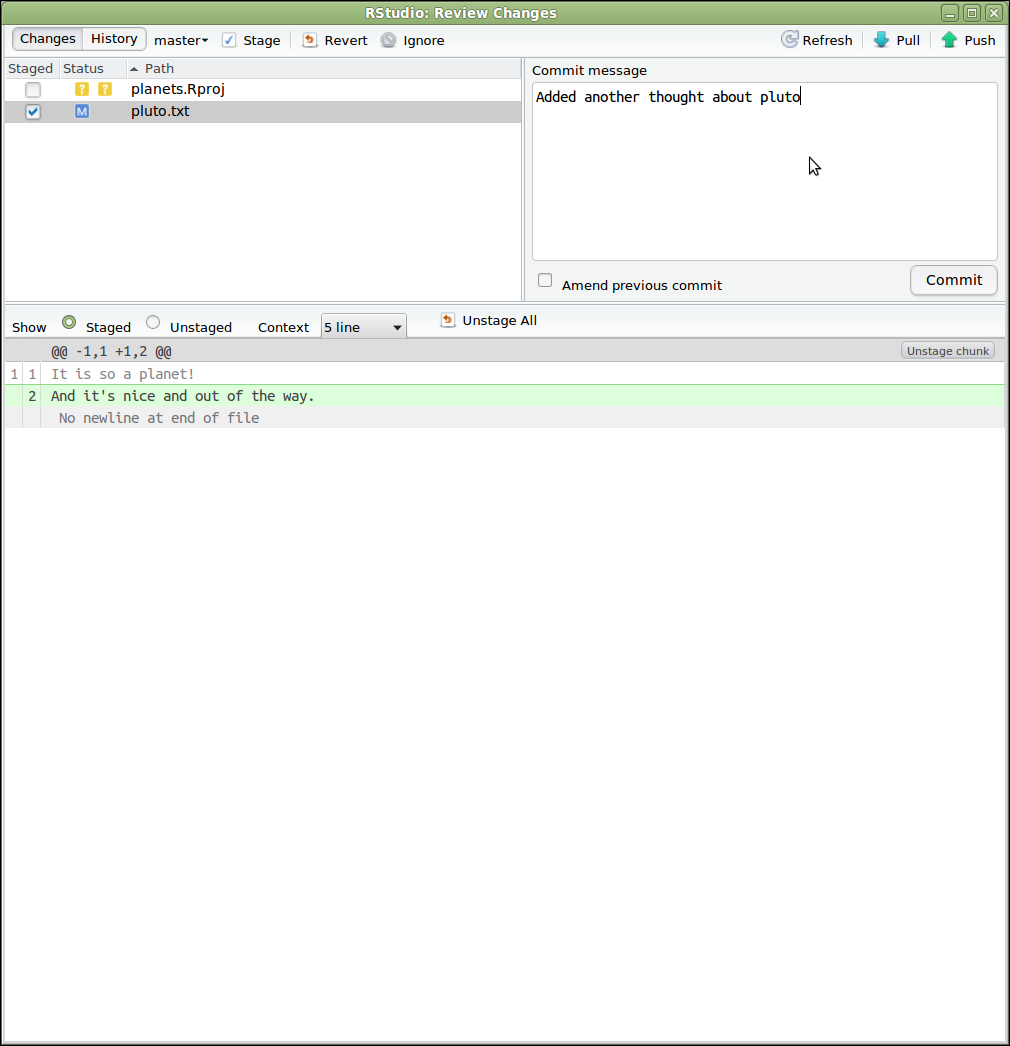
Figure 11
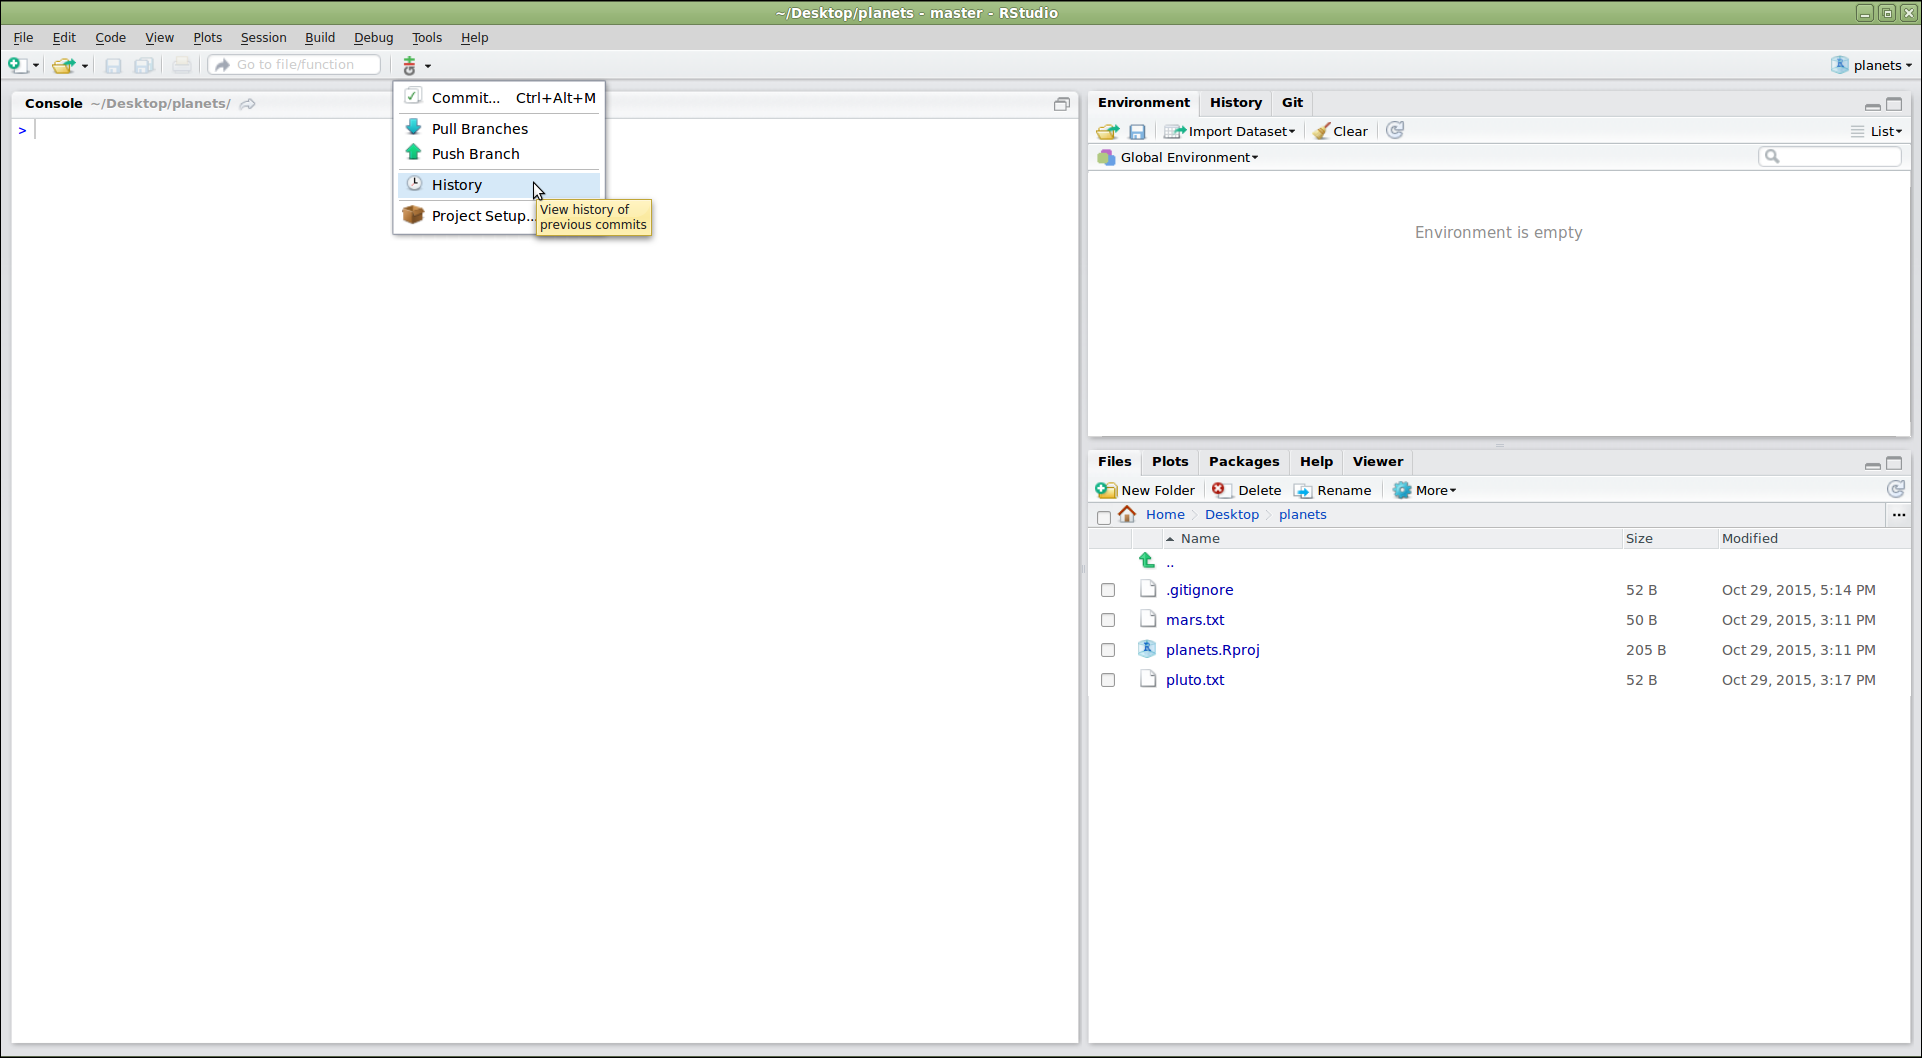
Figure 12
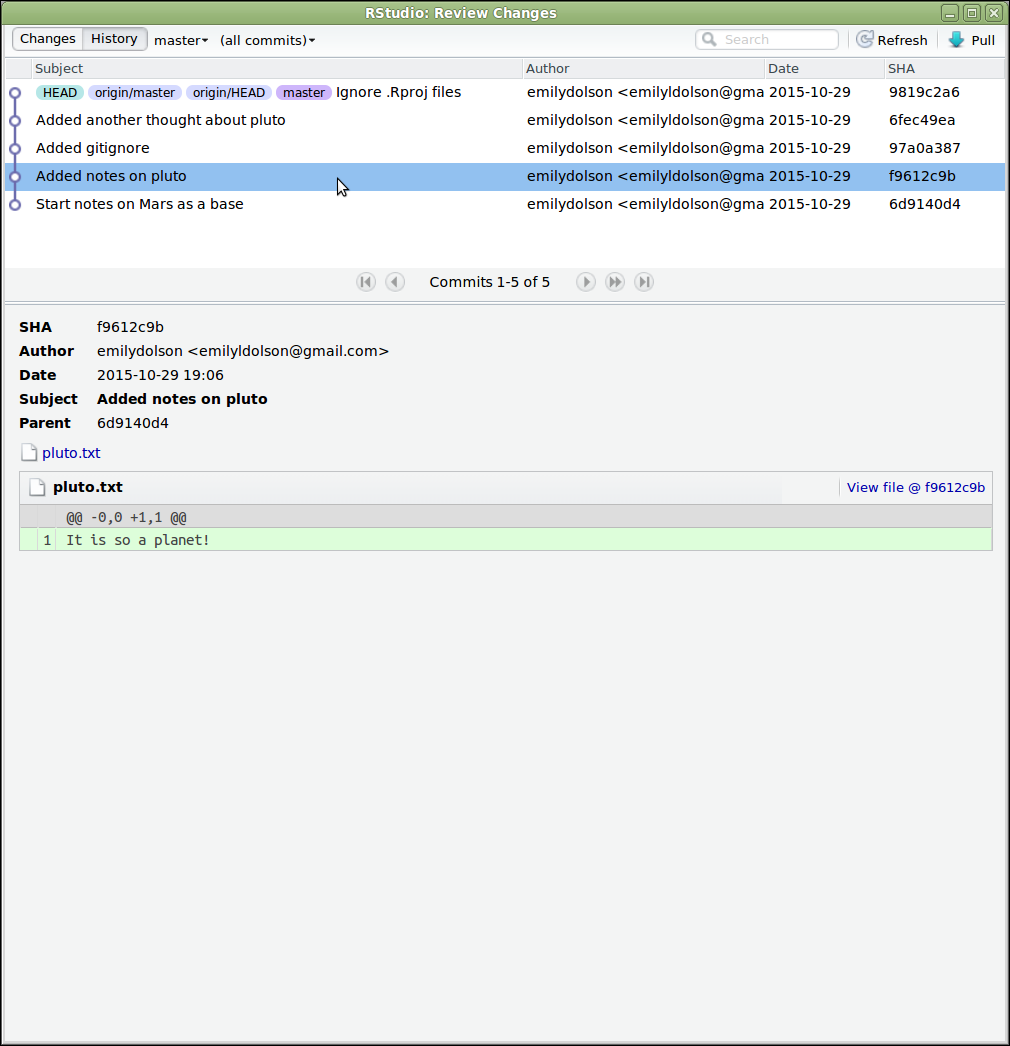
Figure 13
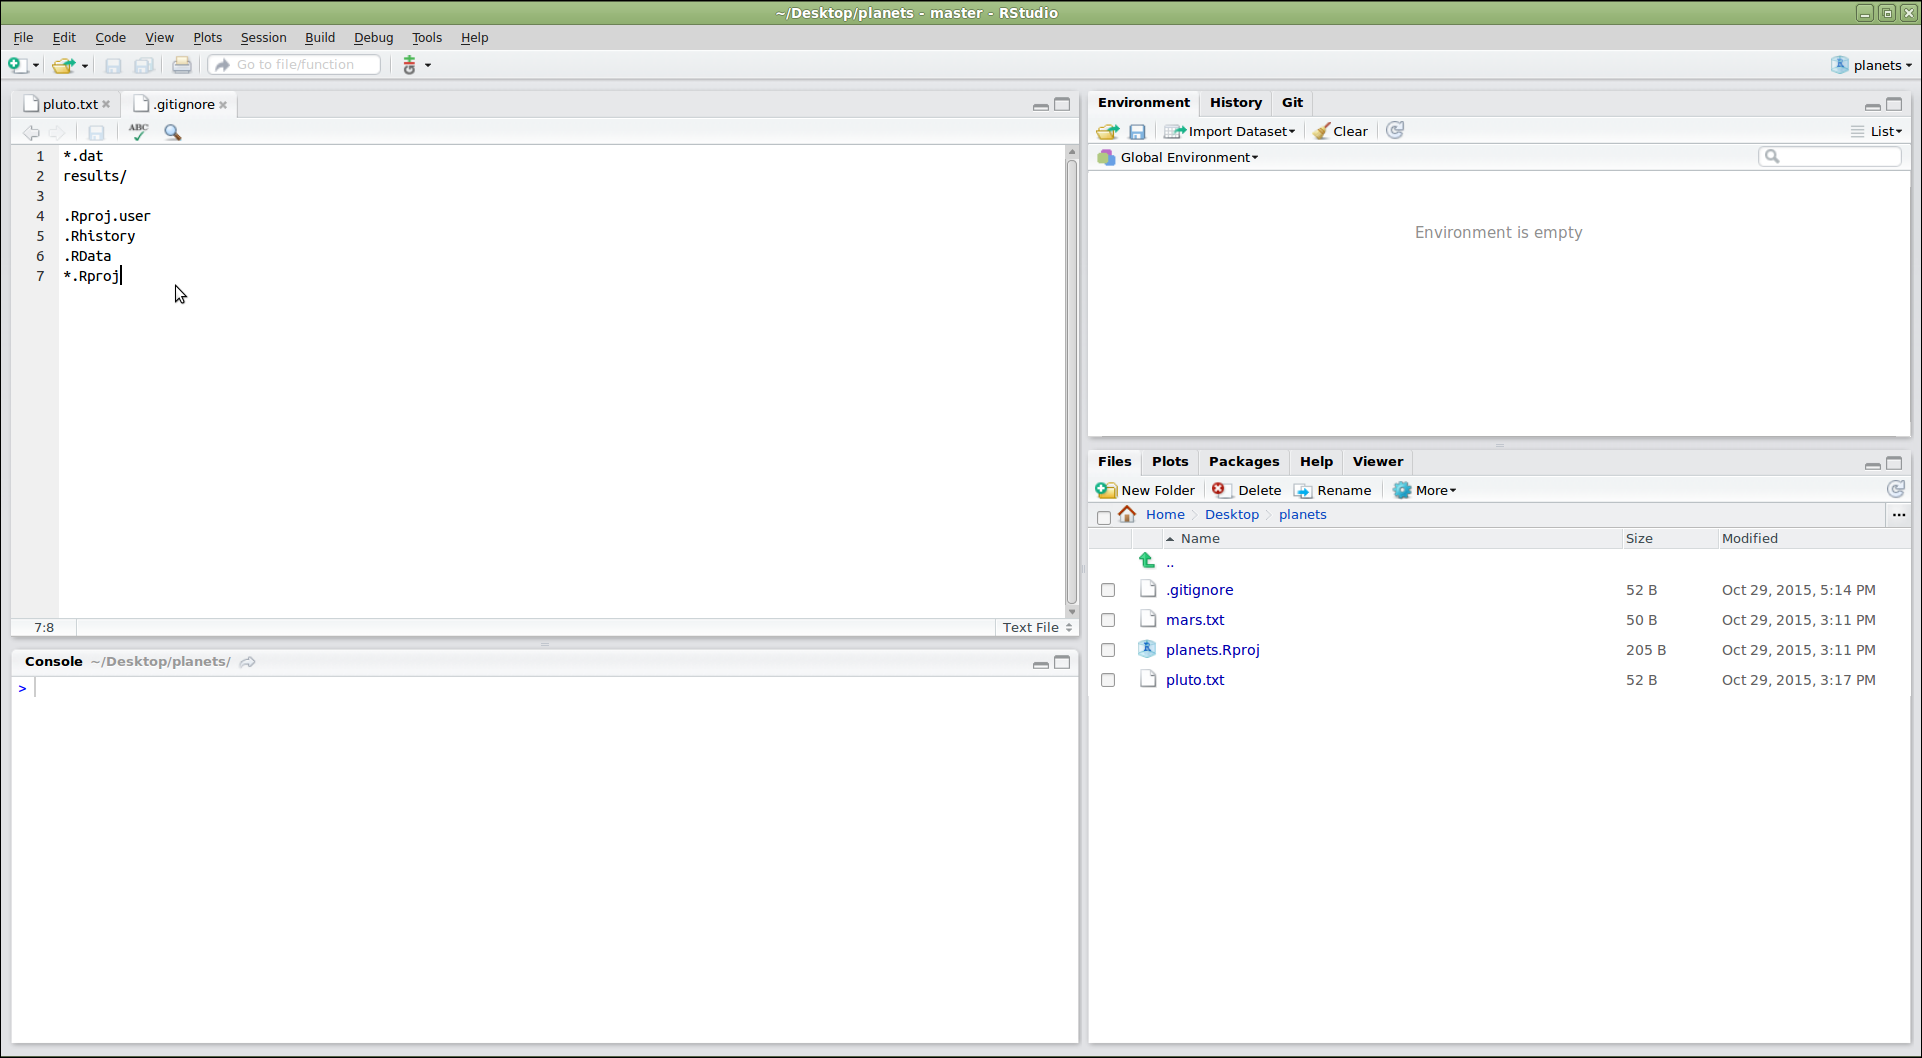
Figure 14
Figure 15
Figure 16
Figure 17
Exploring History
Figure 1

Figure 2

Figure 3
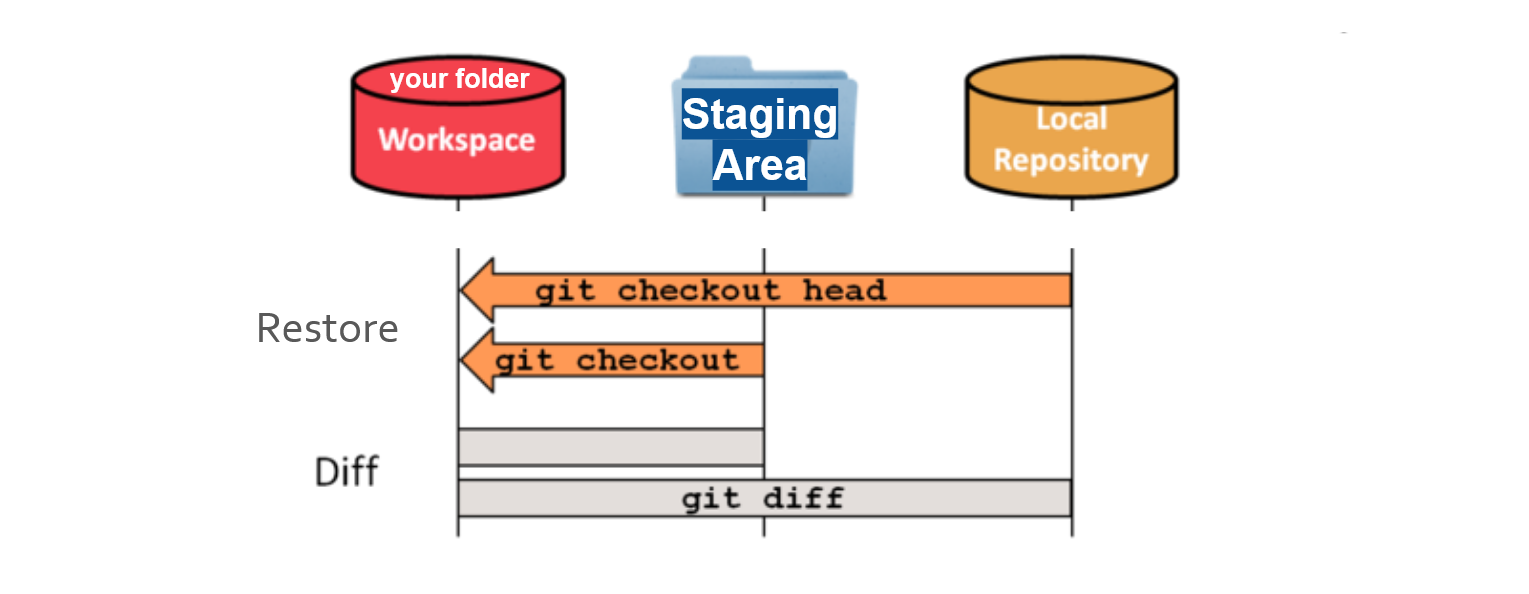
Use
git diff to compare changes
since last commit or between commits. Use git checkout to
undo changes by restoring the staging area (committed changes) or the
local repository (last commit)