Supplemental: Using RStudio for Git
Last updated on 2025-04-09 | Edit this page
Estimated time: 10 minutes
Overview
Questions
- How can I use Git with RStudio?
Objectives
- Understand how to use Git from RStudio.
Version control can be very useful when developing data analysis scripts. For that reason, the popular development environment RStudio for the R programming language has built-in integration with Git. While some advanced Git features still require the command-line, RStudio has a nice interface for many common Git operations.
Testimonial
We also invite you to read this blog post about 10 Commands to Get Started with Git with screenshots of the RStudio web-based interface.
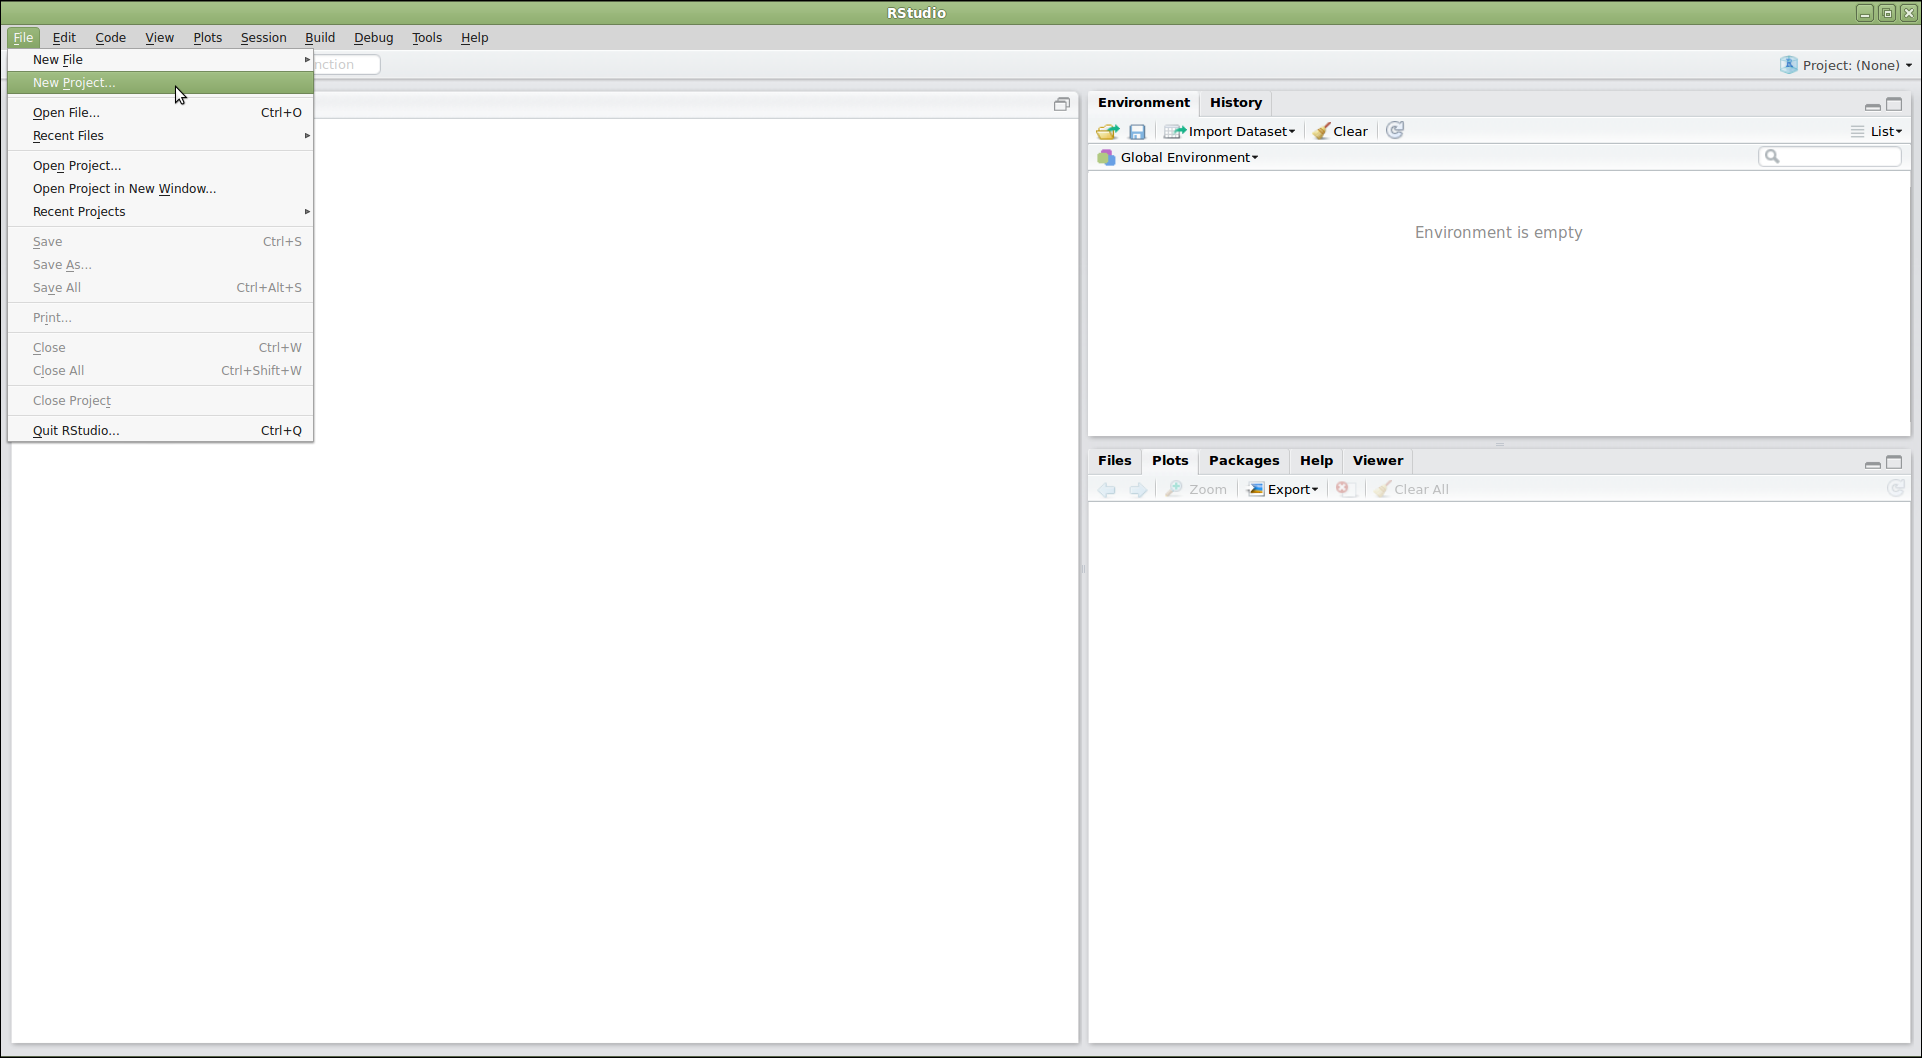
Create project
RStudio allows us to create a project associated with a given directory to keep track of various related files. To be able to track the development of the project over time, to be able to revert to previous versions, and to collaborate with others, we version control the RStudio project with Git. To get started using Git in RStudio, we create a new project:
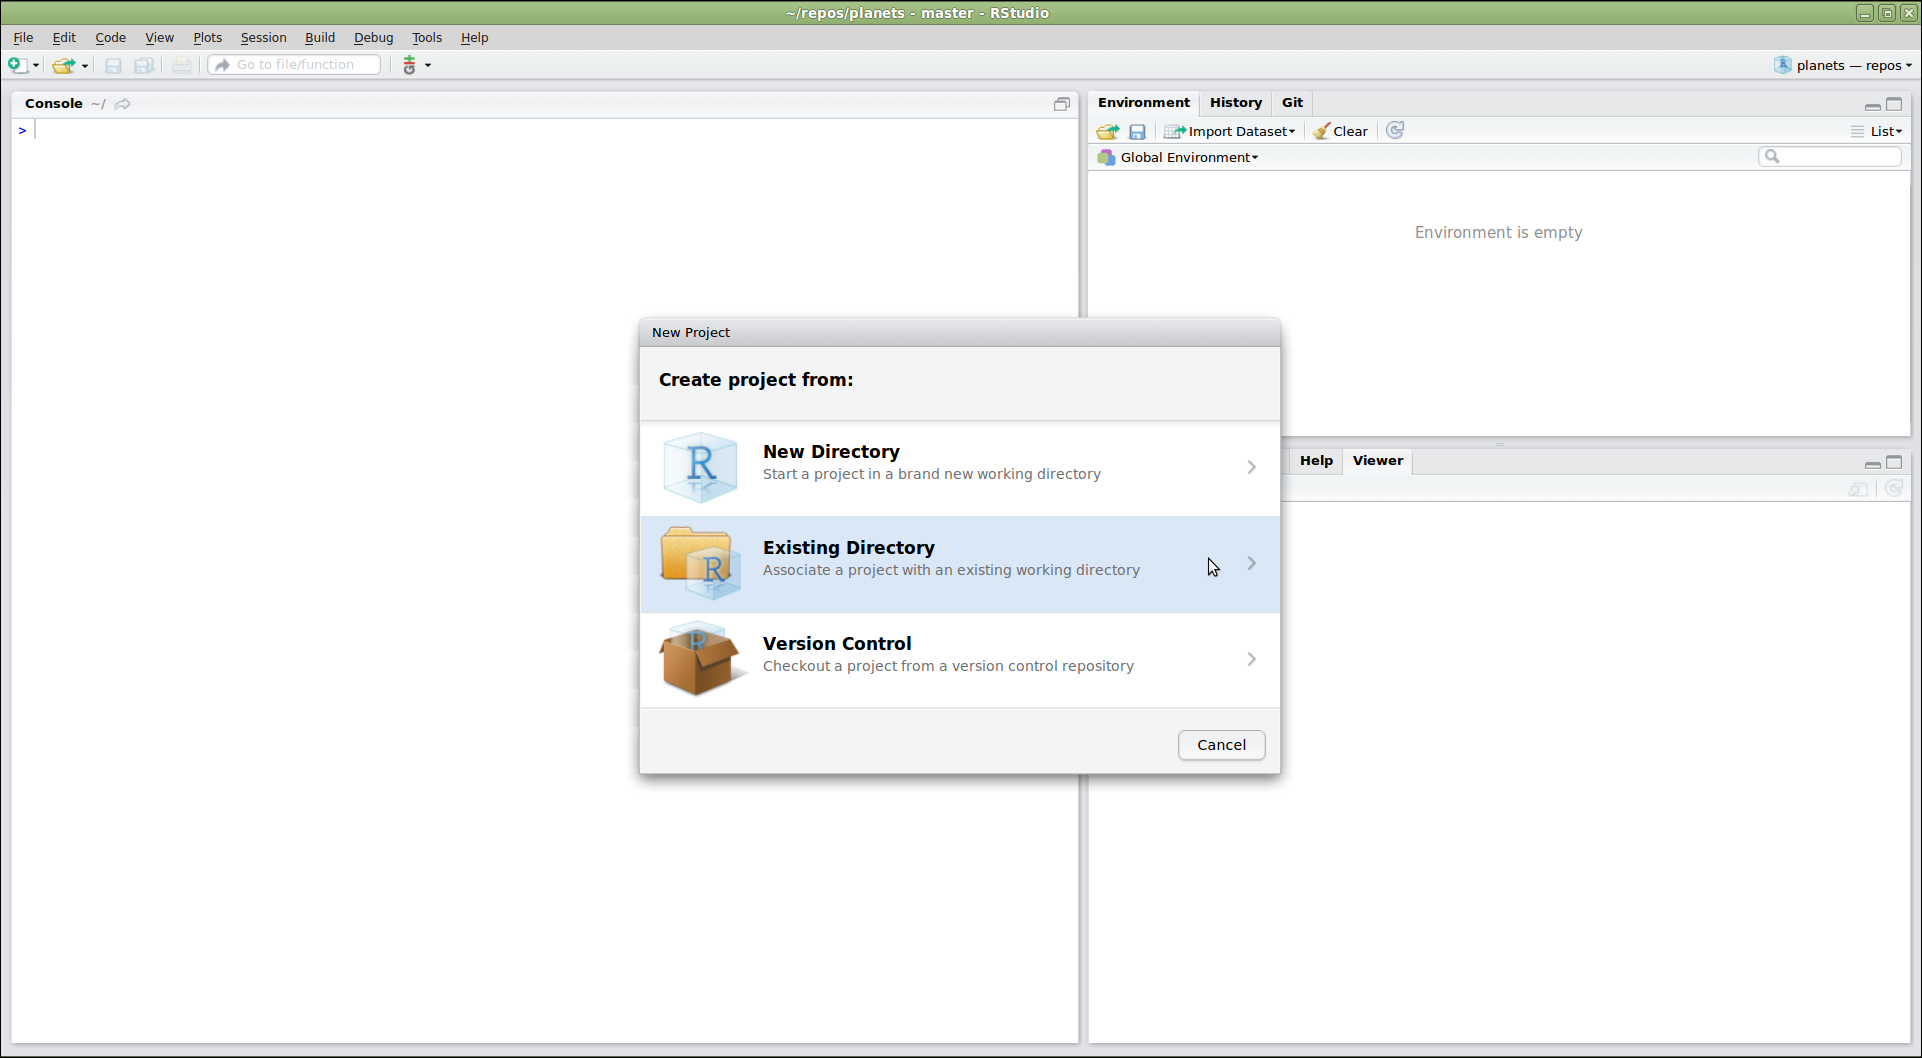
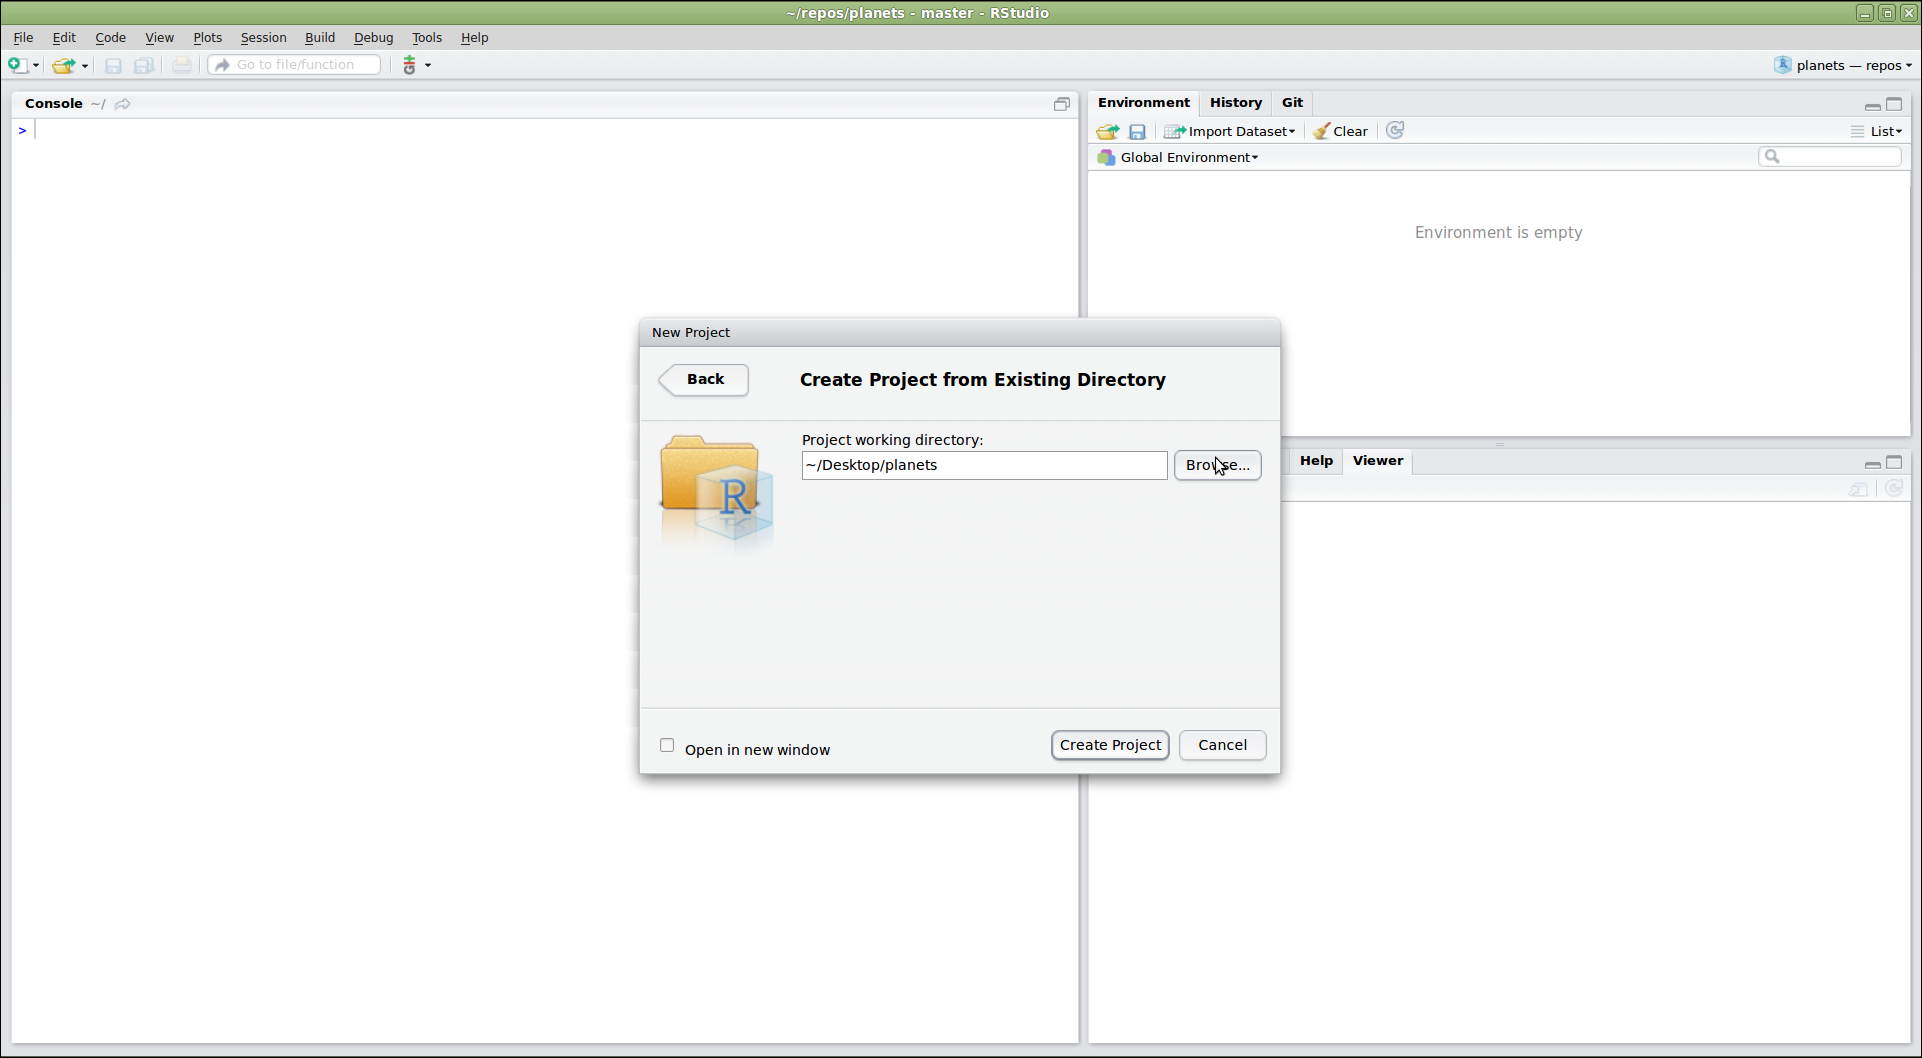
This opens a dialog asking us how we want to create the project. We have some options here. Let’s say that we want to use RStudio with the planets repository that we already made. Since that repository lives in a directory on our computer, we choose the option “Existing Directory”:
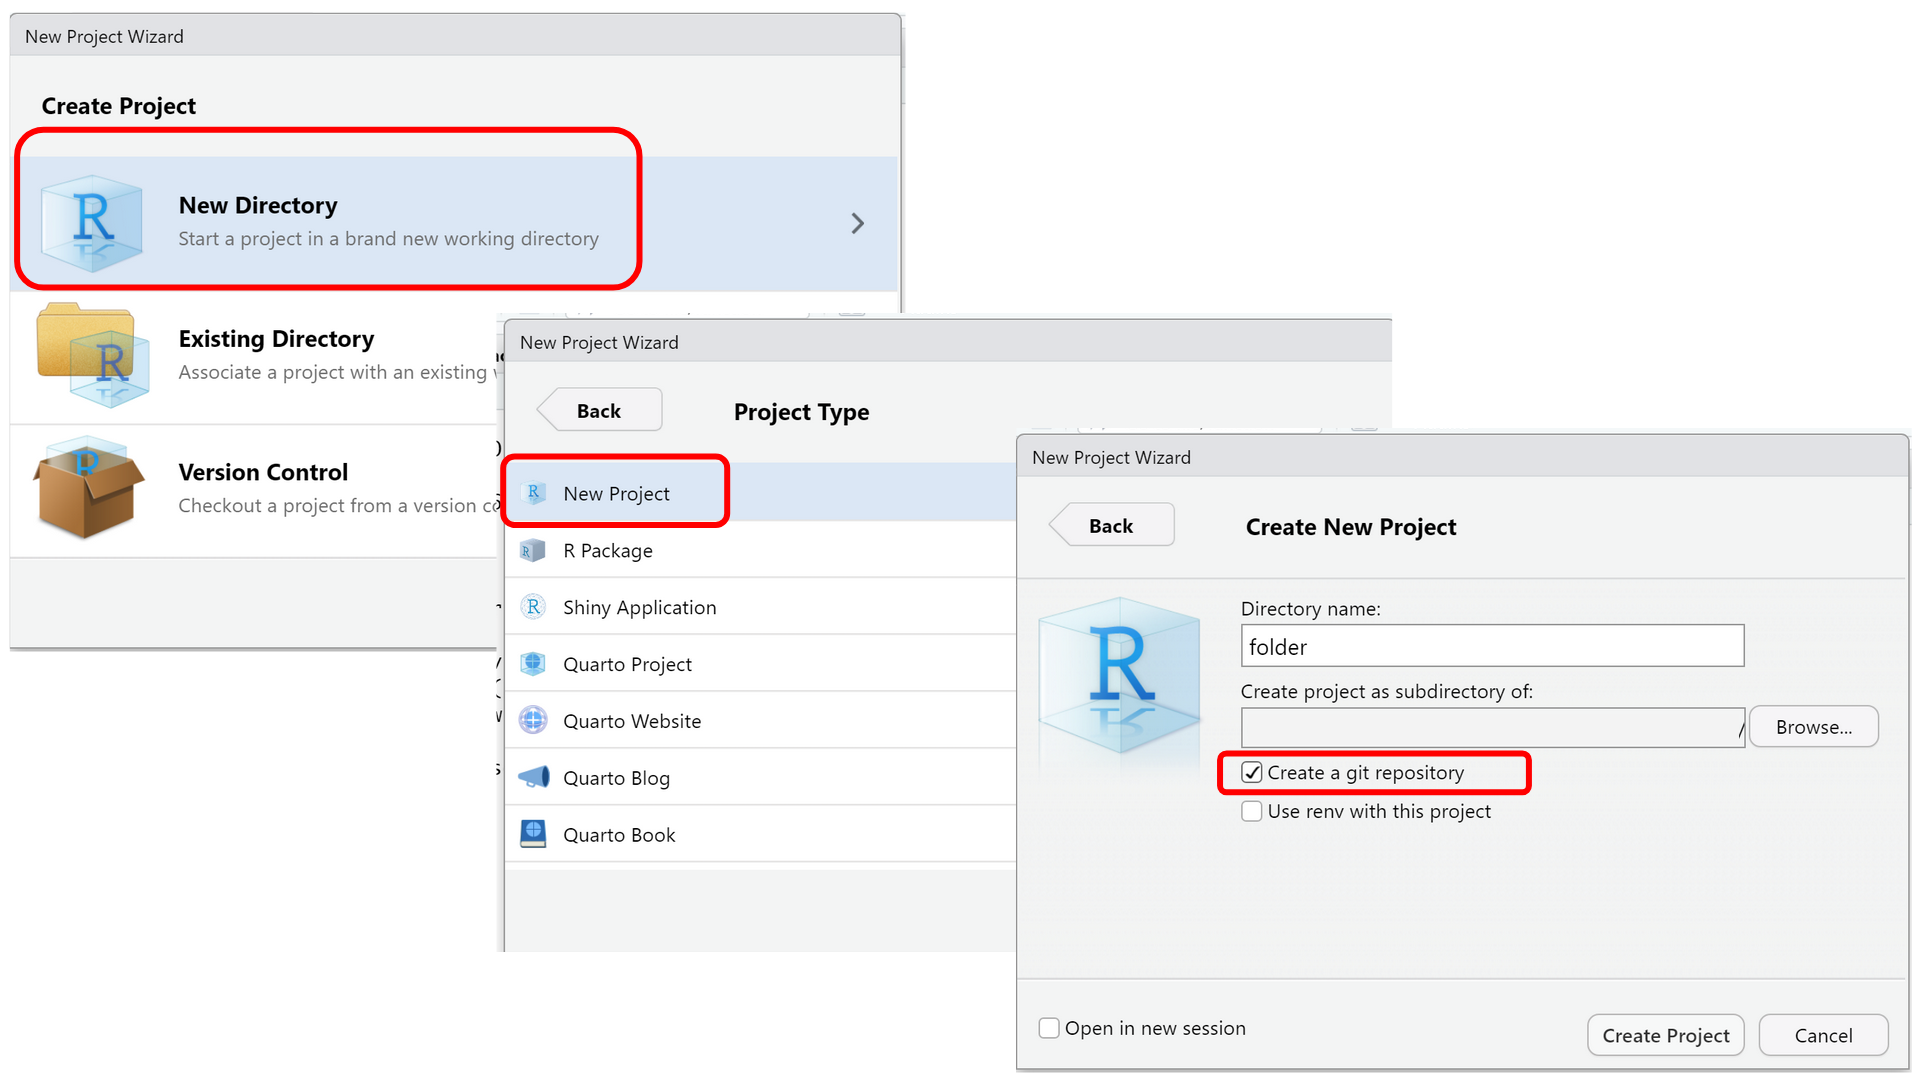
For a new directory, follow the steps in this section about “Versioning new work”.
To clone a remote repository from RStudio, follow these steps:
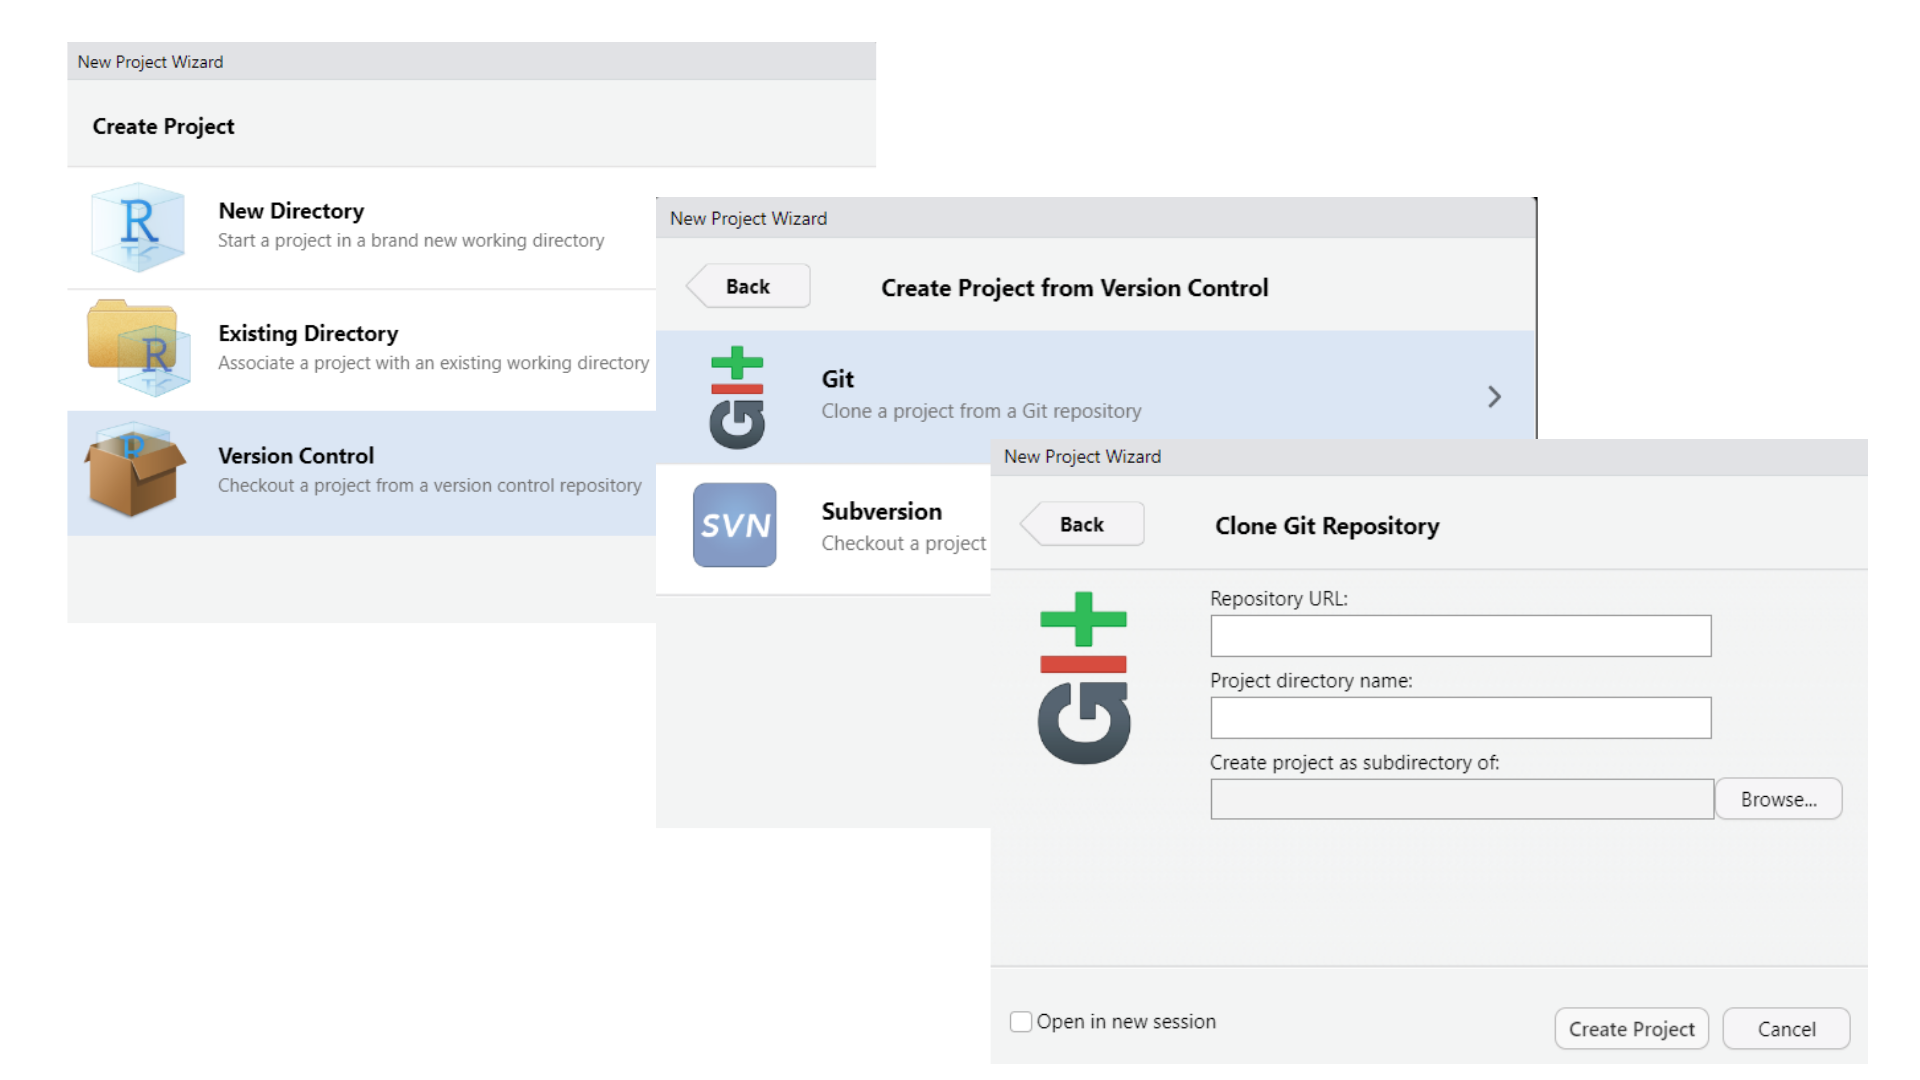
Do You See a “Version Control” Option?
Although we’re not going to use it here, there should be a “version control” option on this menu. That is what you would click on if you wanted to create a project on your computer by cloning a repository from GitHub. If that option is not present, it probably means that RStudio doesn’t know where your Git executable is, and you won’t be able to progress further in this lesson until you tell RStudio where it is.
Find your Git Executable
First let’s make sure that Git is installed on your computer. Open your shell on Mac or Linux, or on Windows open the command prompt and then type:
-
which git(macOS, Linux) -
where git(Windows)
If there is no version of Git on your computer, please follow the Git
installation instructions in the setup of this lesson to install Git
now. Next open your shell or command prompt and type
which git (macOS, Linux), or where git
(Windows). Copy the path to the git executable.
On one Windows computer which had GitHub Desktop installed on it, the
path was:
C:/Users/UserName/AppData/Local/GitHubDesktop/app-1.1.1/resources/app/git/cmd/git.exe
NOTE: The path on your computer will be somewhat different.
Next, RStudio will ask which existing directory we want to use. Click “Browse…” and navigate to the correct directory, then click “Create Project”:
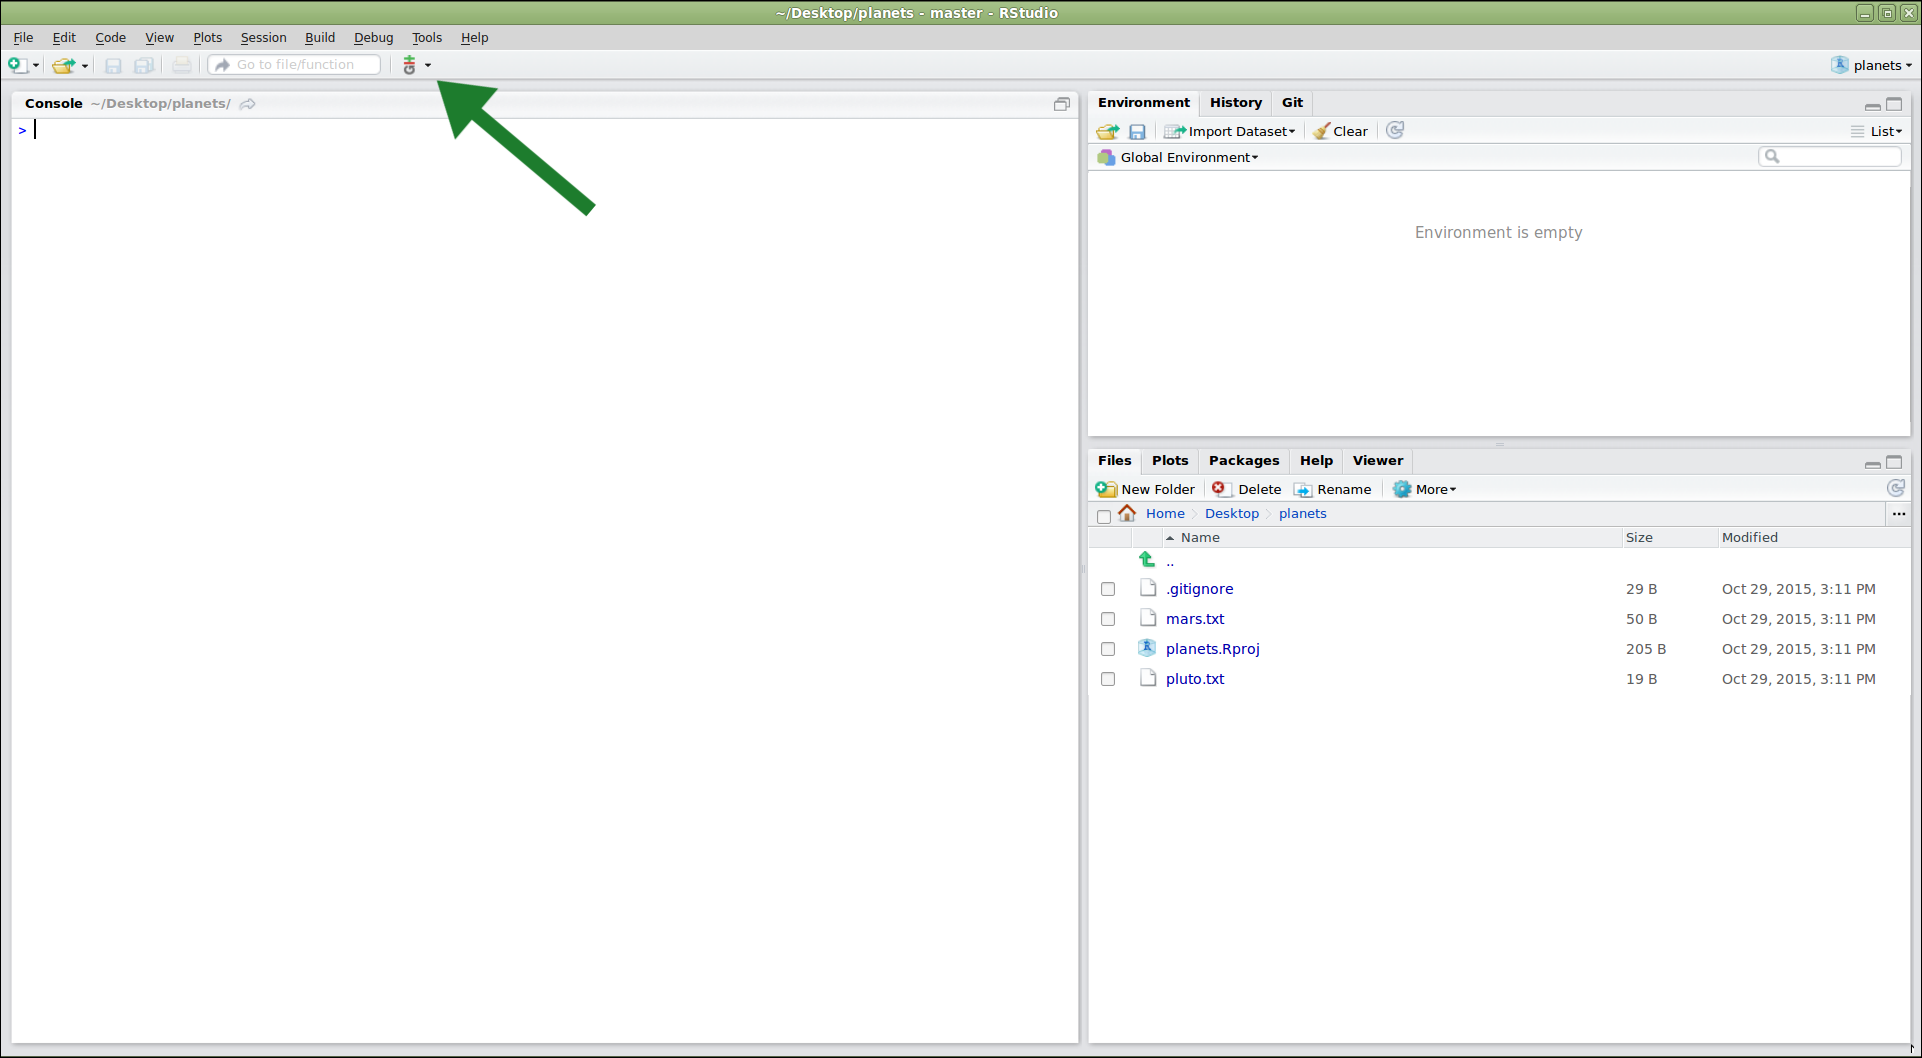
Ta-da! We have created a new project in RStudio within the existing planets repository. Notice the vertical “Git” menu in the menu bar. RStudio has recognized that the current directory is a Git repository, and gives us a number of tools to use Git:
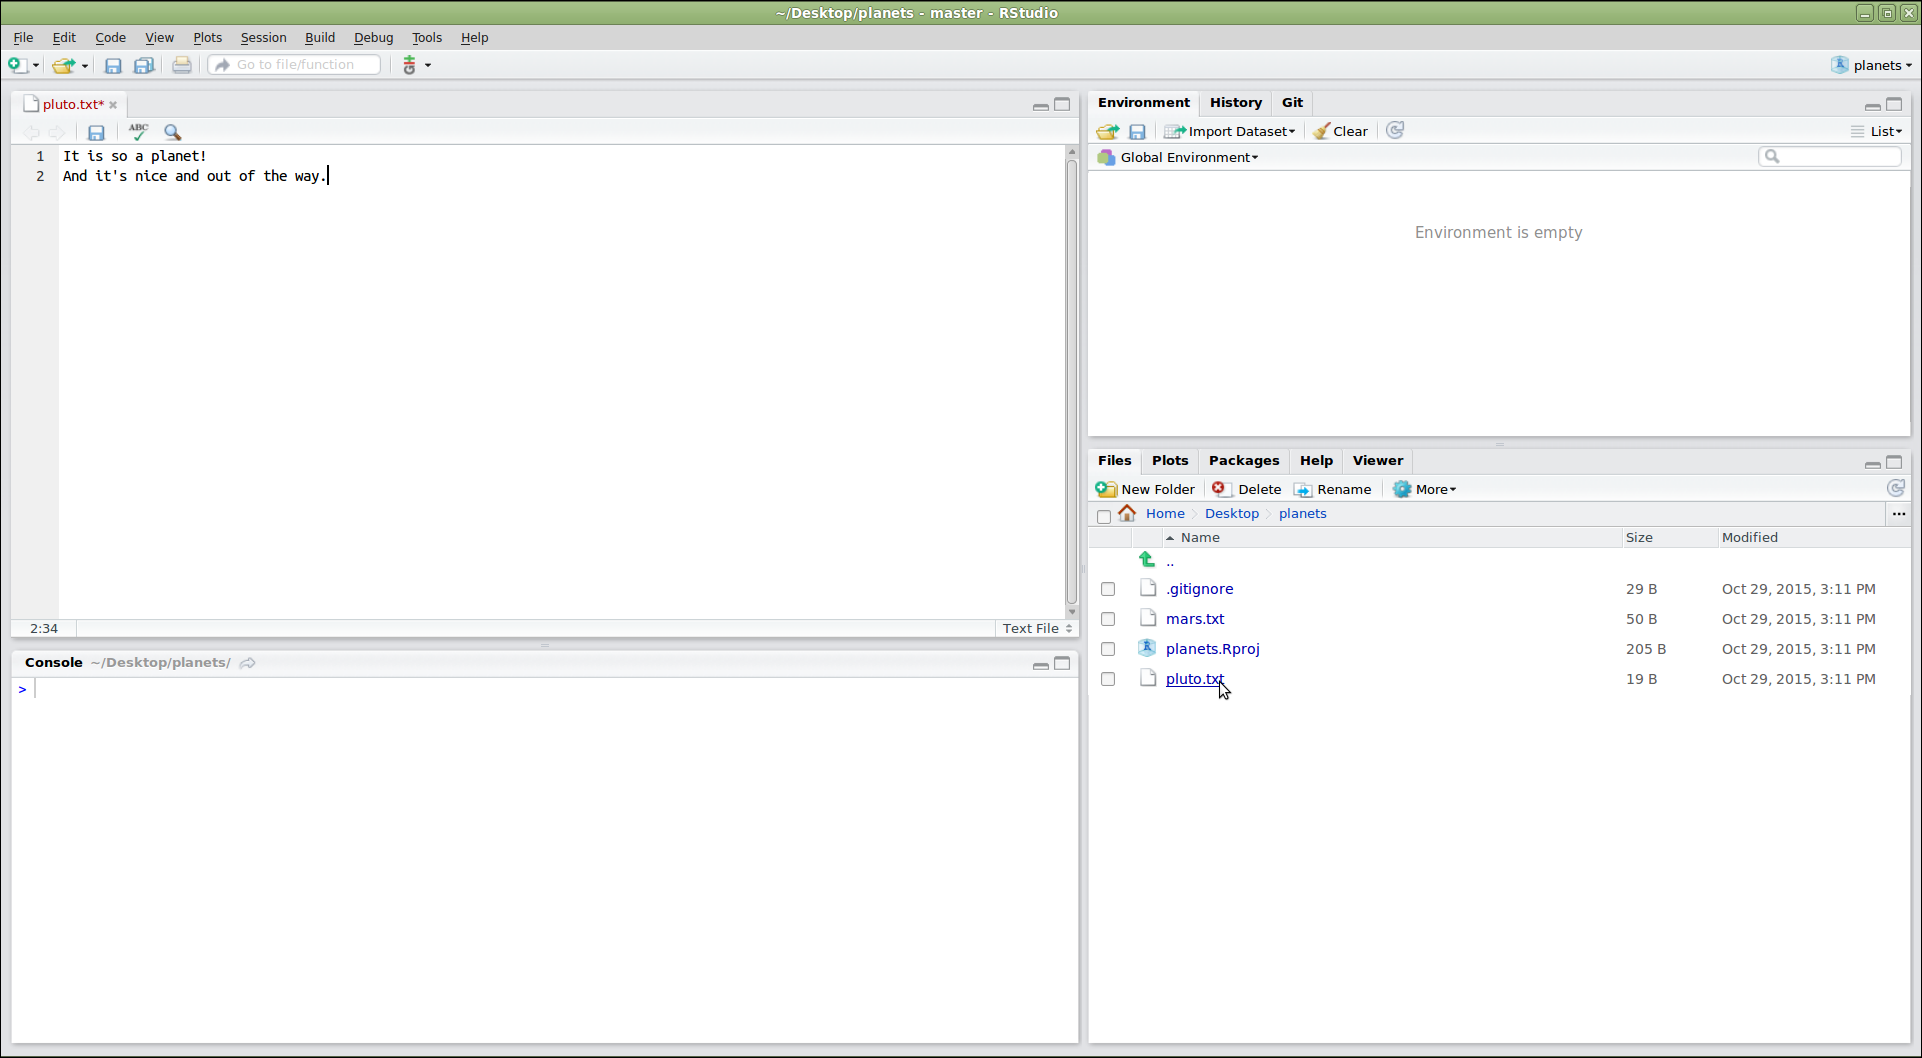
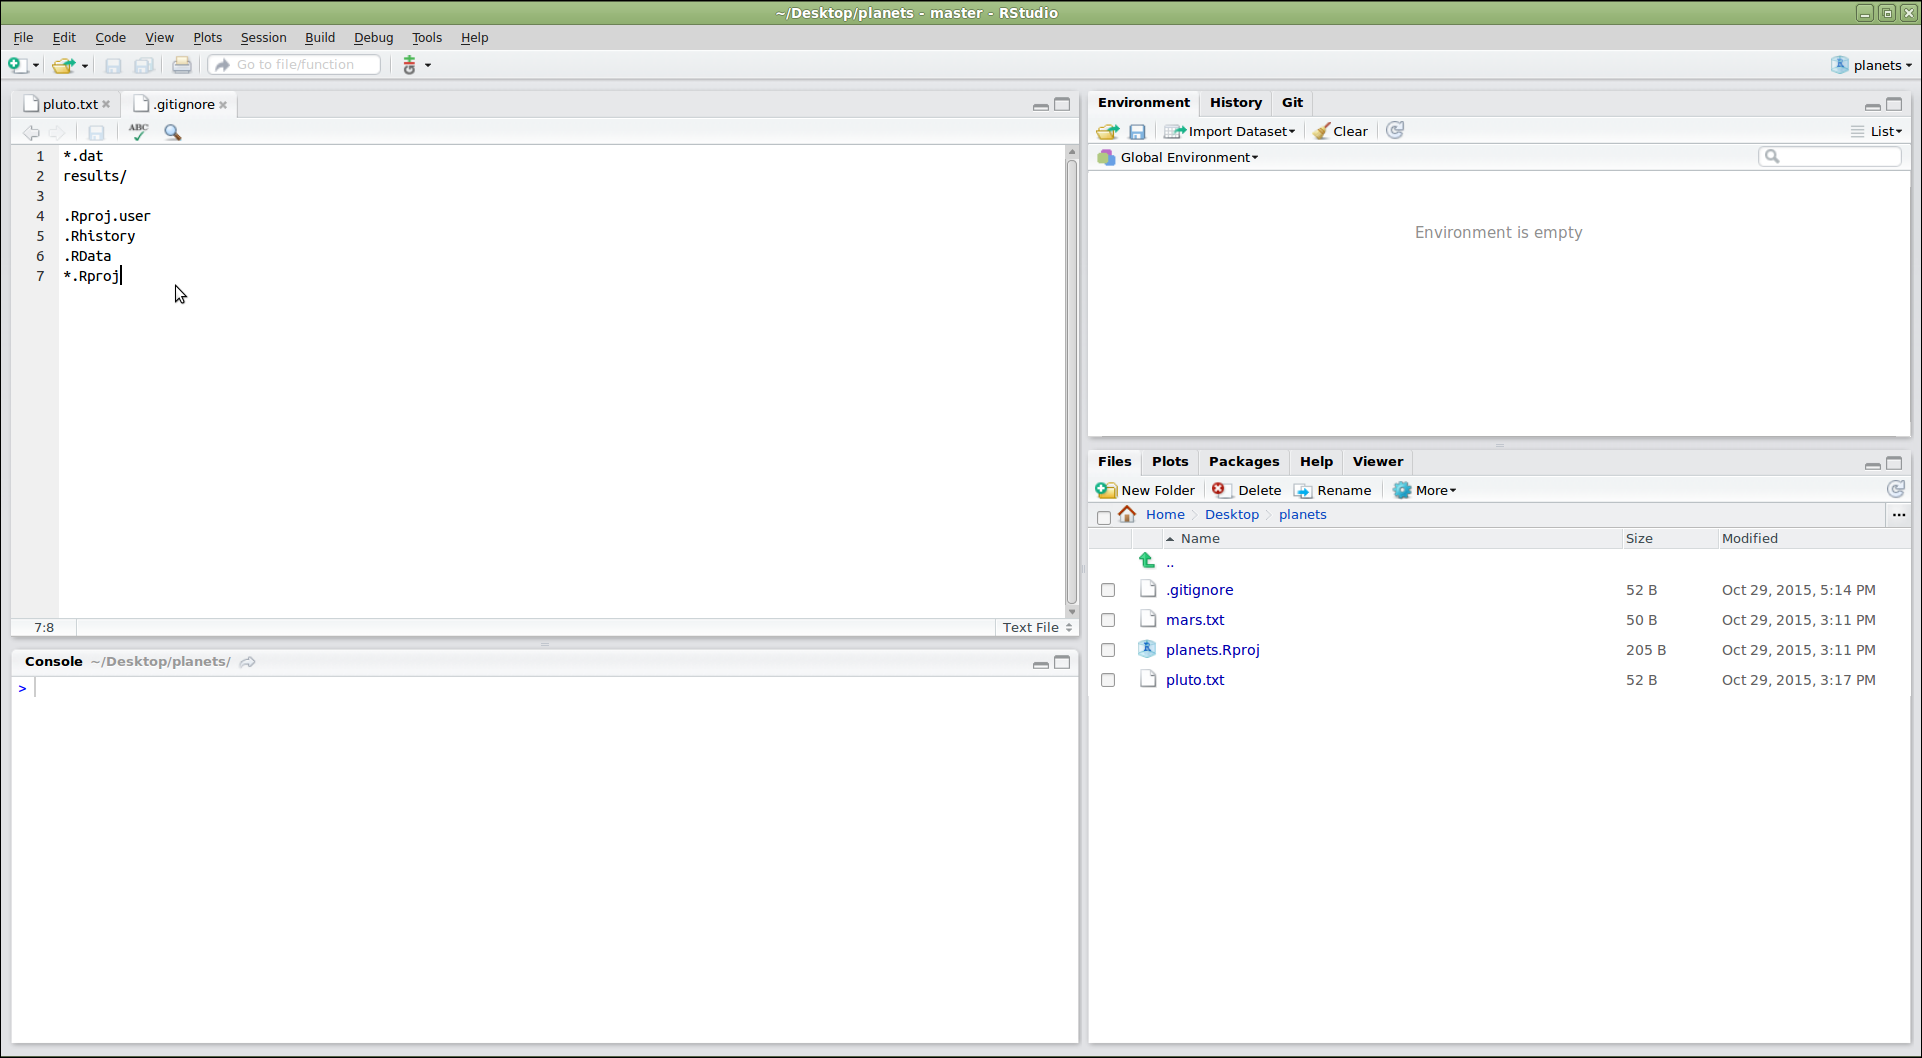
To edit the existing files in the repository, we can click on them in the “Files” panel on the lower right. Now let’s add some additional information about Pluto:
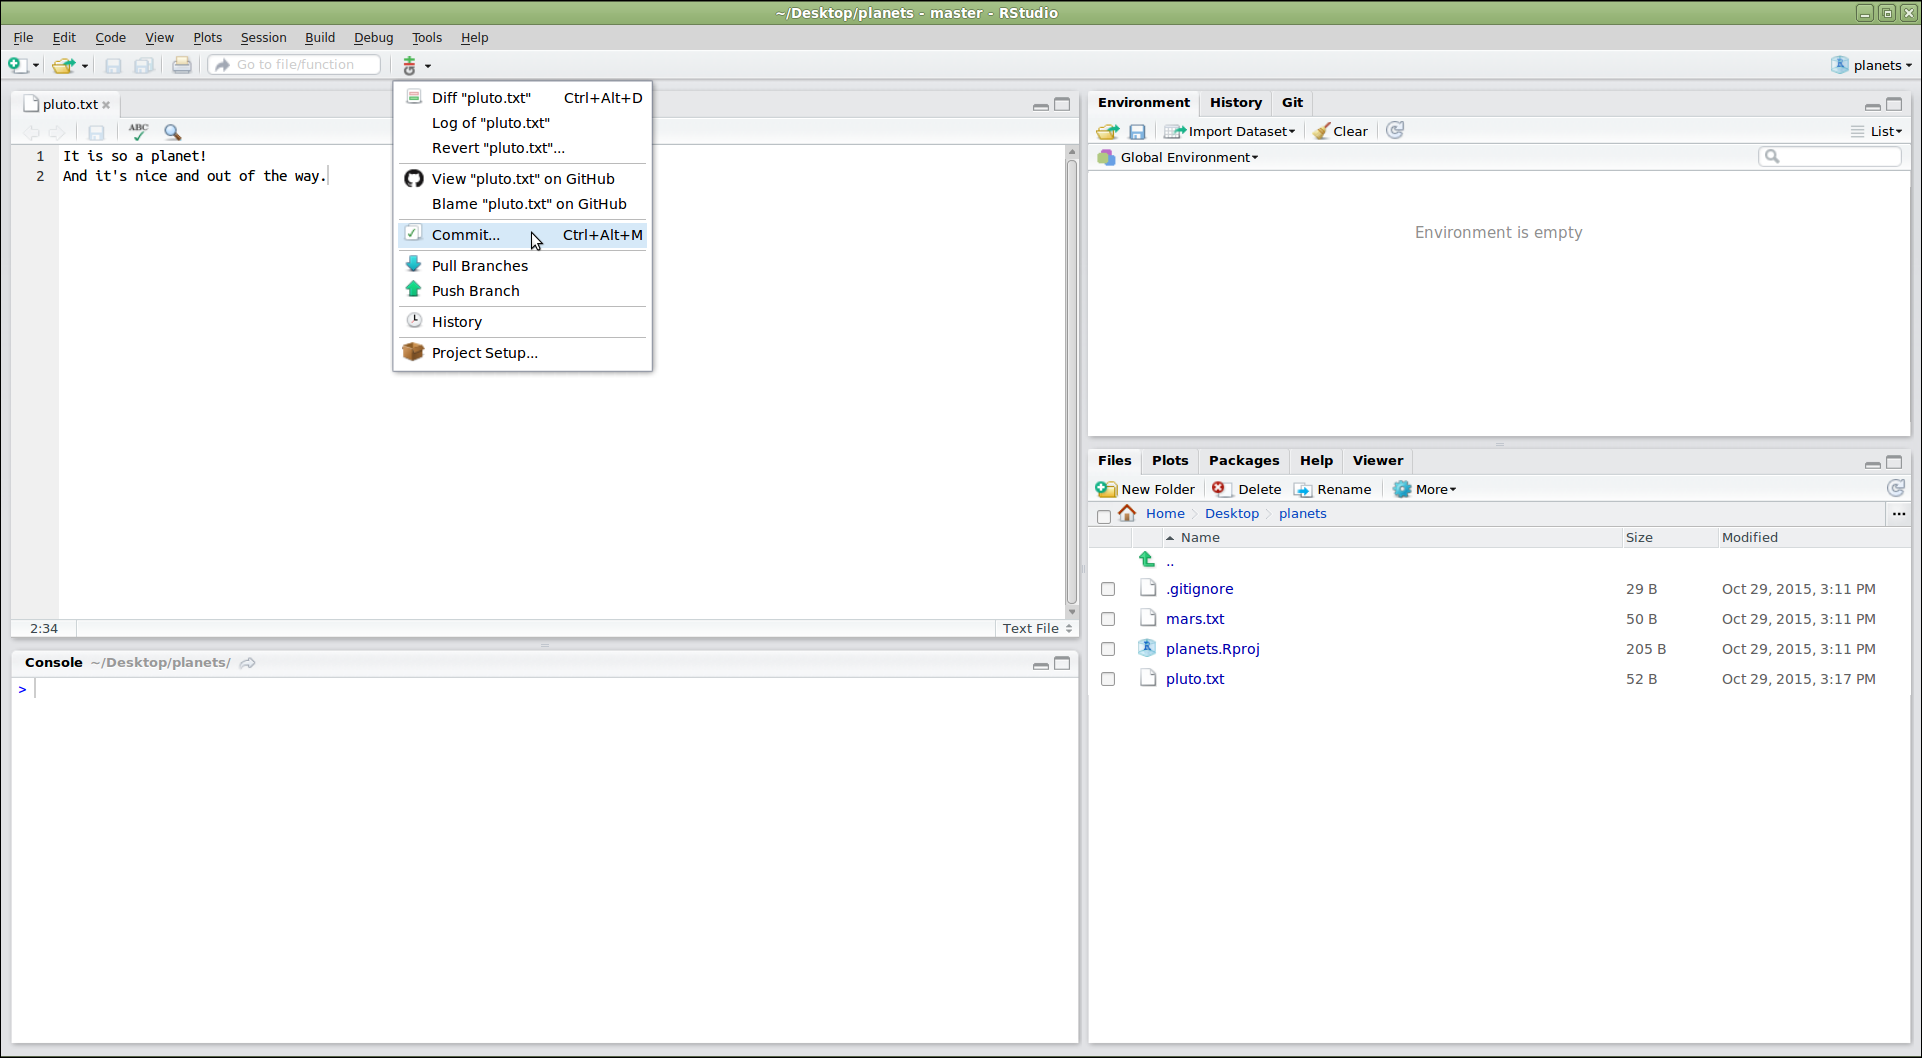
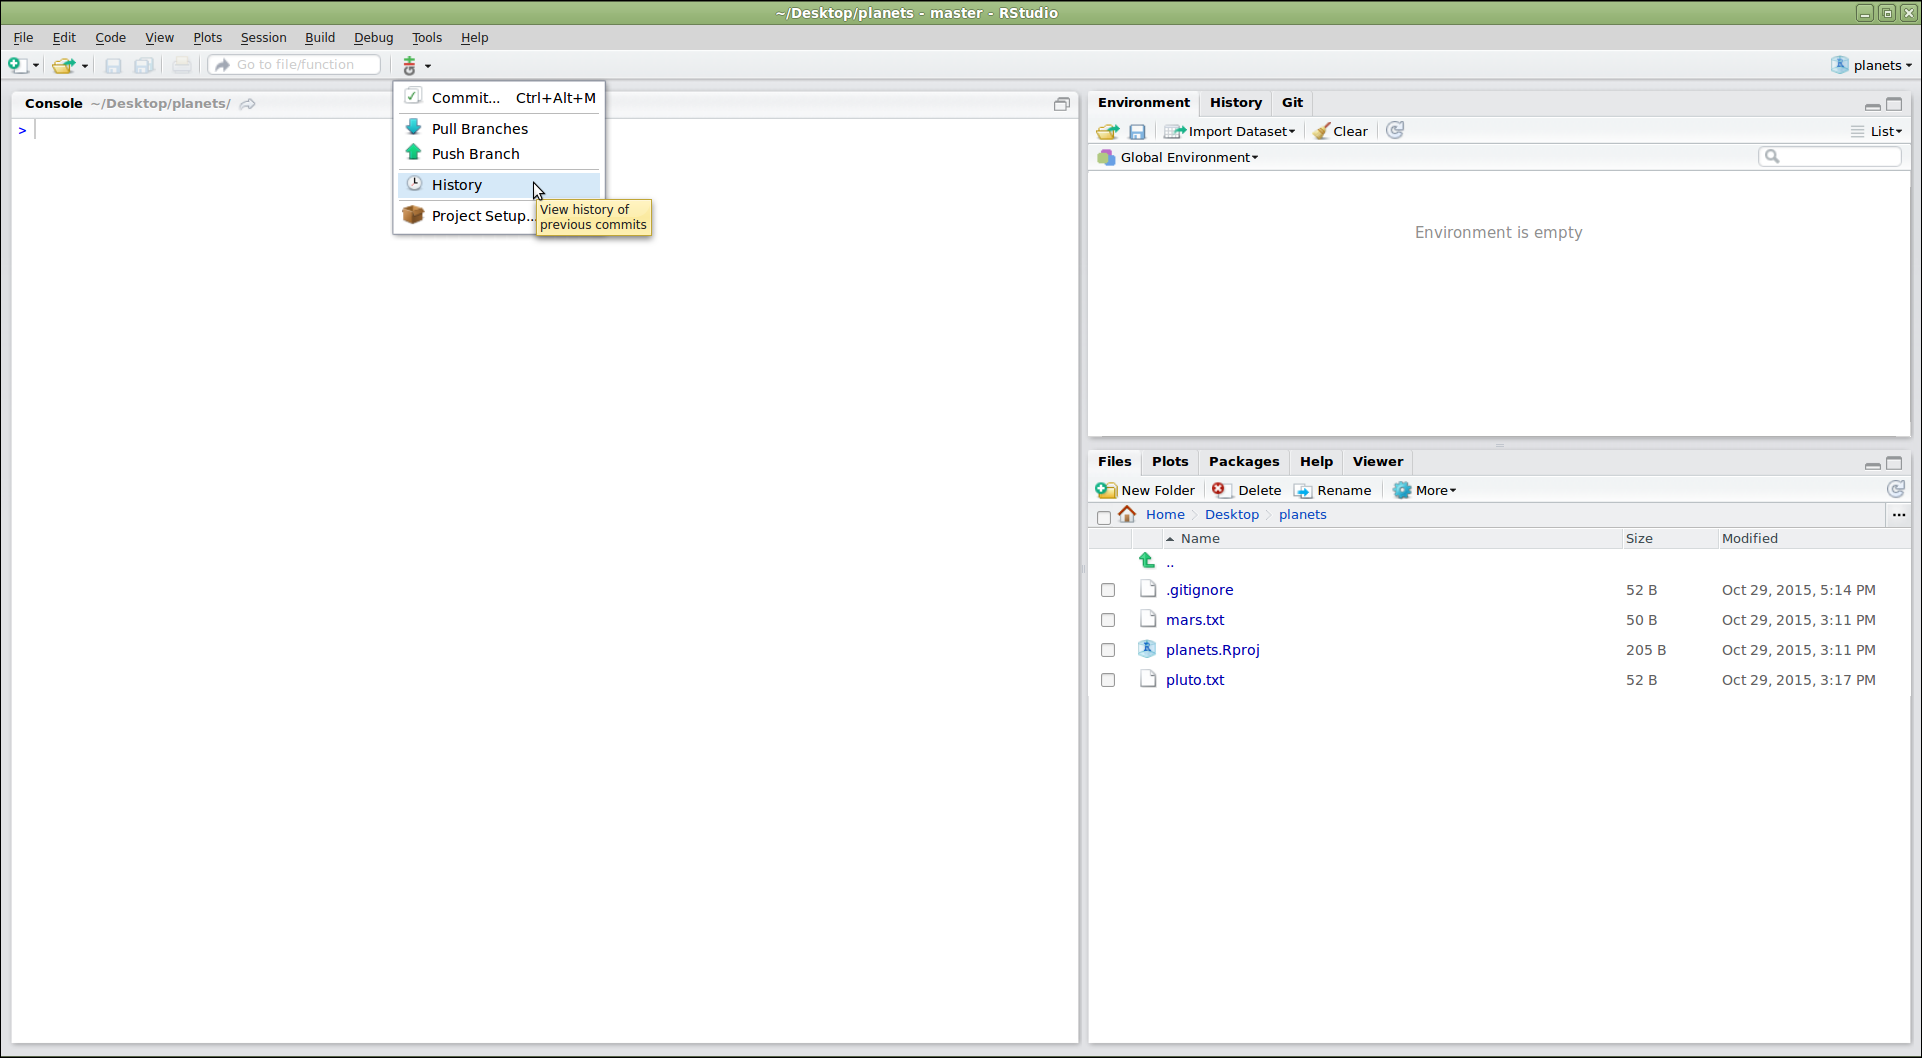
Once we have saved our edited files, we can use RStudio to commit the changes by clicking on “Commit…” in the Git menu:
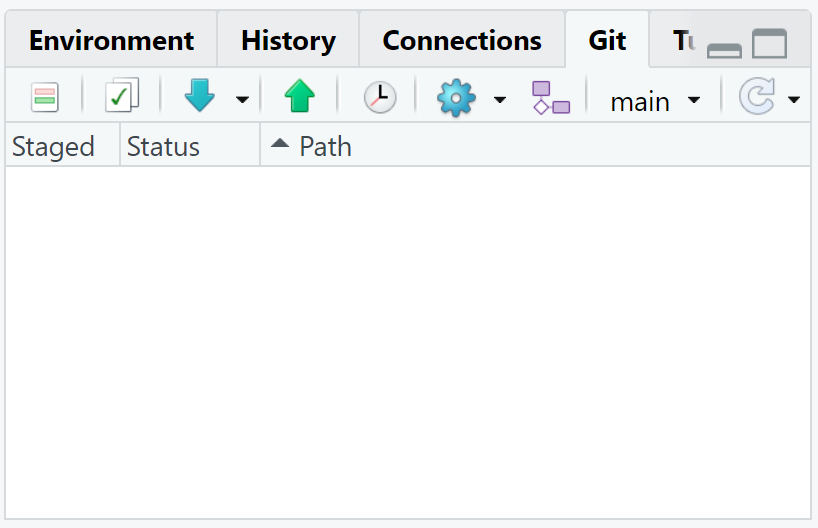
You can also use the buttons from the Git tab, usually in the upper right pane:
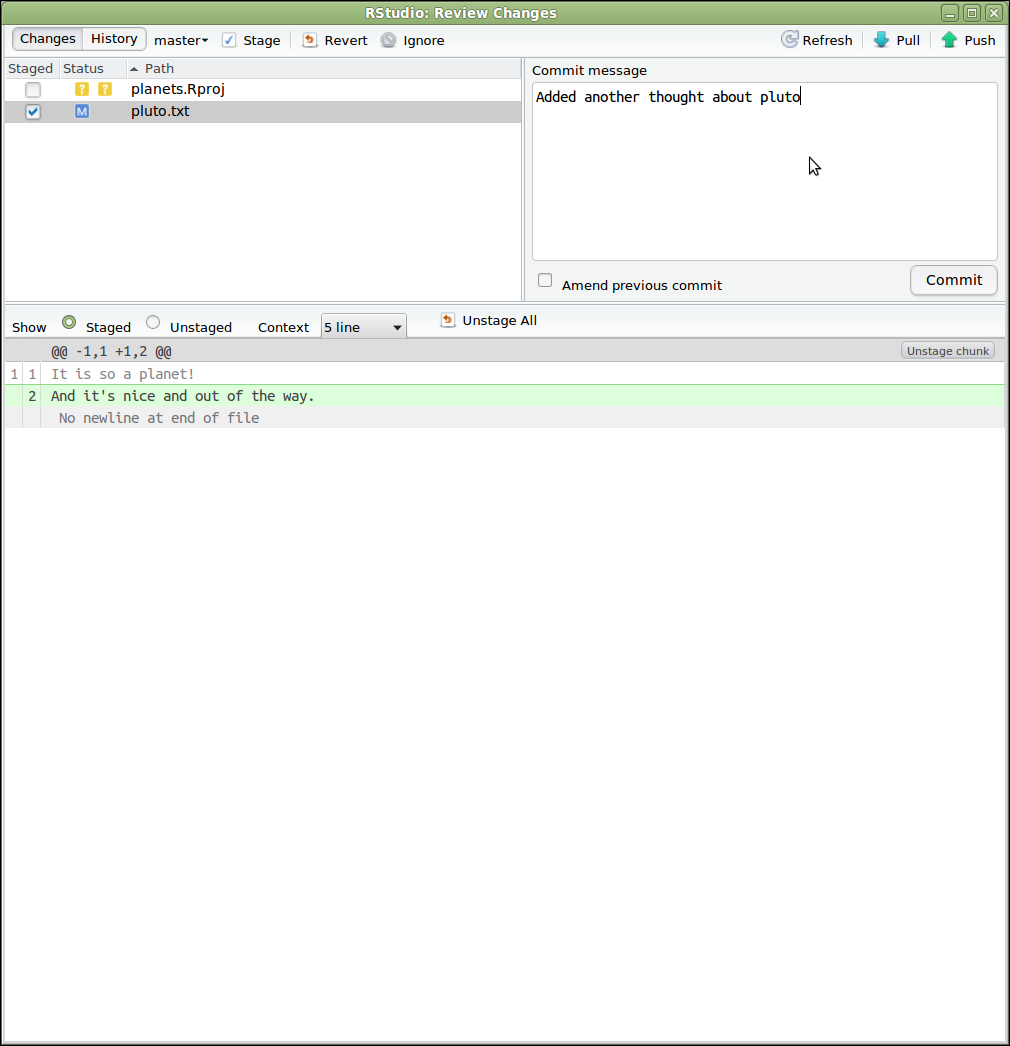
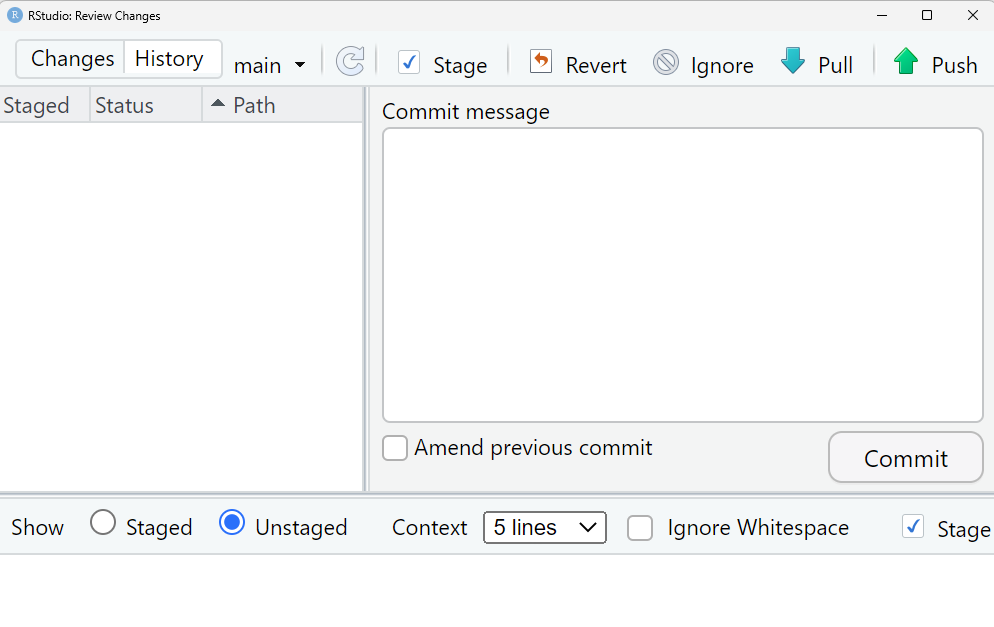
This will open a dialogue where we can select which files to commit
(by checking the appropriate boxes in the “Staged” column), and enter a
commit message (in the upper right panel). The icons in the “Status”
column indicate the current status of each file. Clicking on a file
shows information about changes in the lower panel (using output of
git diff). Once everything is the way we want it, we click
“Commit”:
The changes can be pushed by selecting “Push Branch” from the Git menu. There are also options to pull from the remote repository, and to view the commit history:
Are the Push/Pull Commands Grayed Out?
Grayed out Push/Pull commands generally mean that RStudio doesn’t
know the location of your remote repository (e.g. on GitHub). To fix
this, open a terminal to the repository and enter the command:
git push -u origin main. Then restart RStudio.
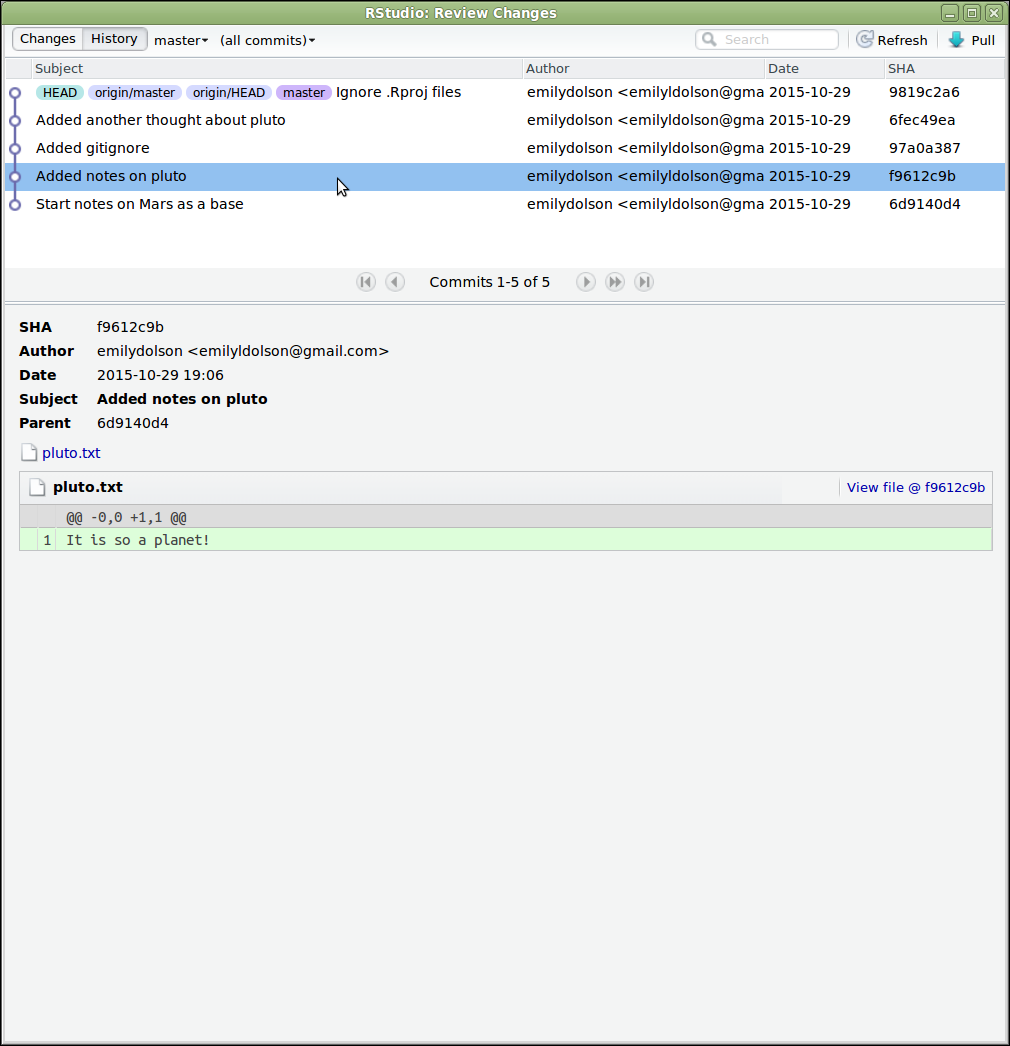
If we click on “History”, we can see a graphical version of what
git log would tell us:
RStudio creates a number of files that it uses to keep track of a
project. We often don’t want to track these, in which case we add them
to our .gitignore file:
Tip: versioning disposable output
Generally you do not want to version control disposable output (or
read-only data). You should modify the .gitignore file to
tell Git to ignore these files and directories.
In the RStudio: Review changes window, you can also open
the .gitignore files from the Ignore button.
You can use the Revert button to do a
git checkout HEAD, i.e., to undo changes not yet on staging
area by restoring the local repository (last commit).
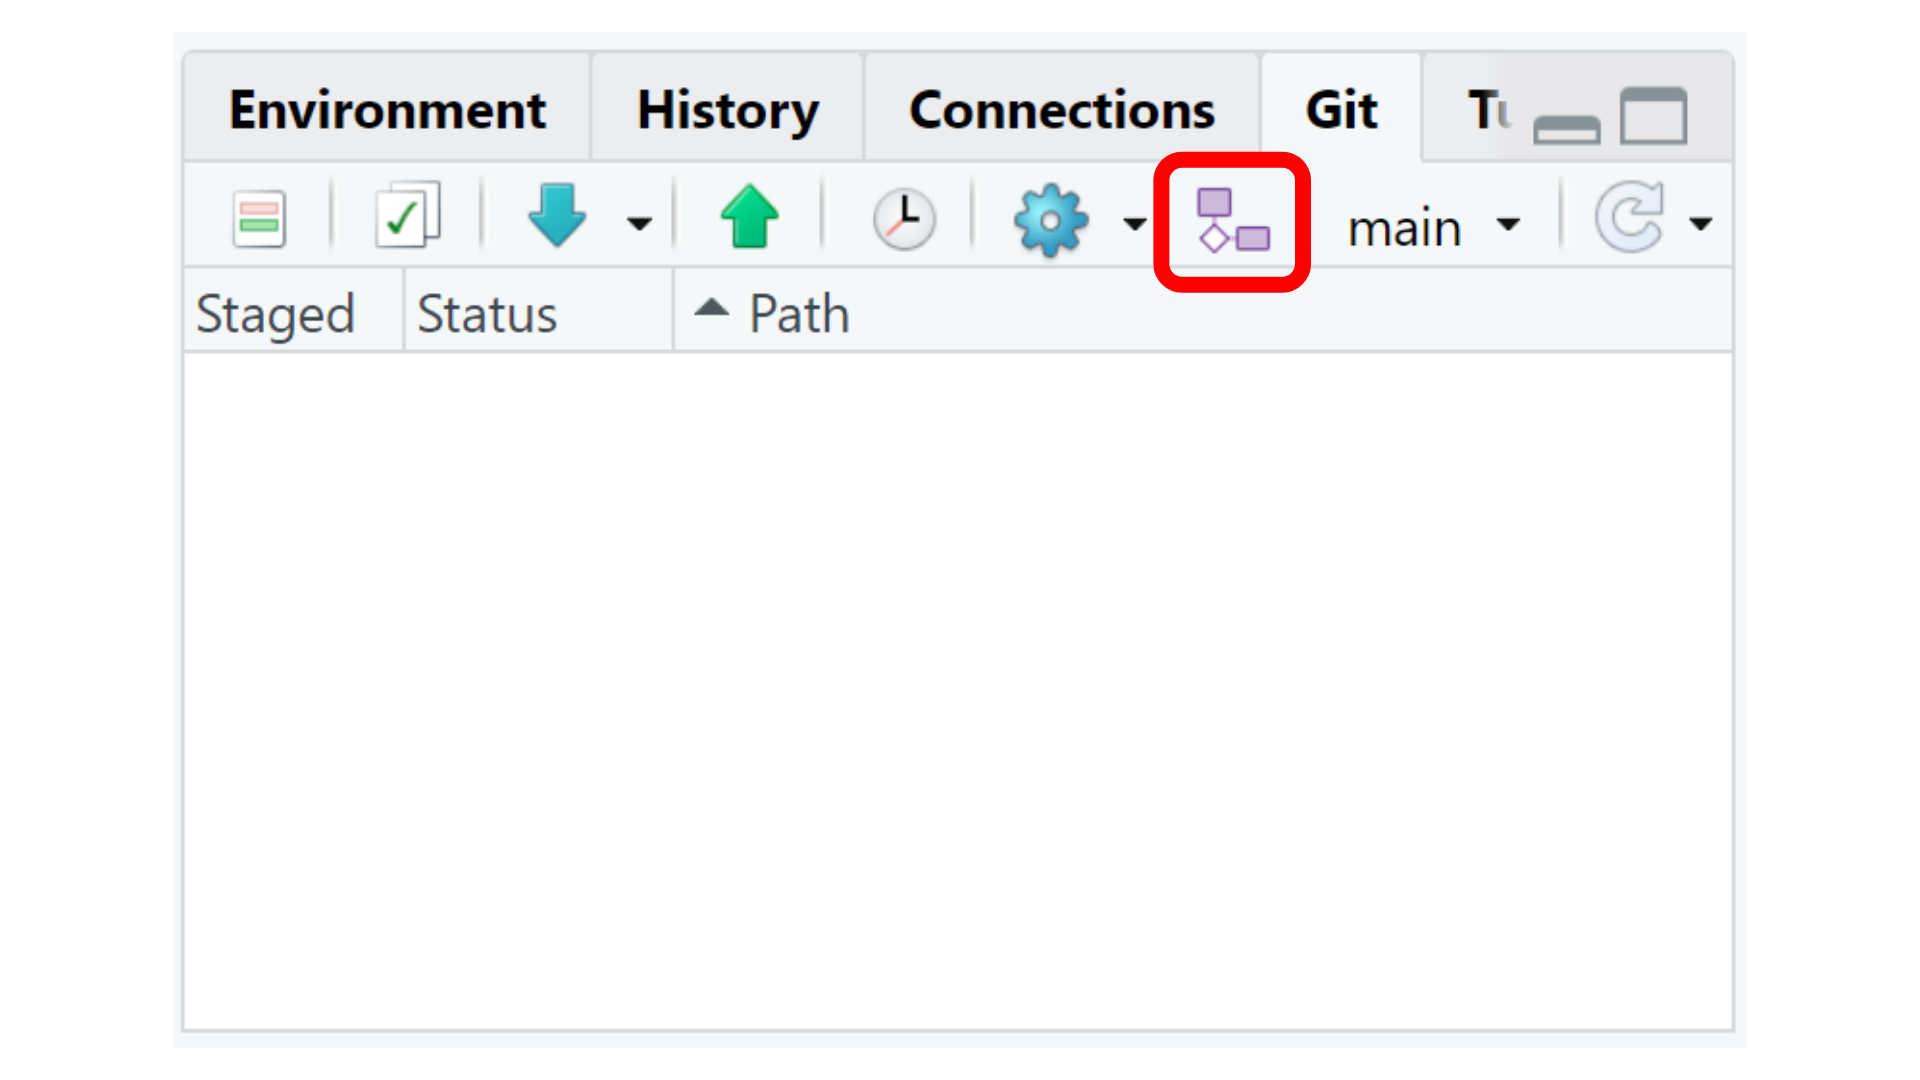
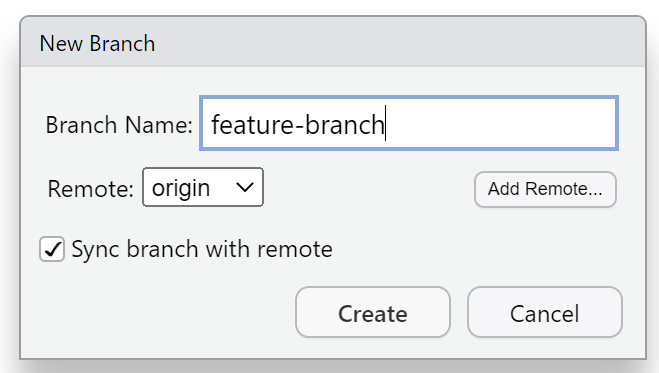
Create a branch
In the Git tab, in the right hand side you will find the name of your
current branch (e.g., main). Use the button in its left
hand side to create a branch.
You can call it feature-branch:
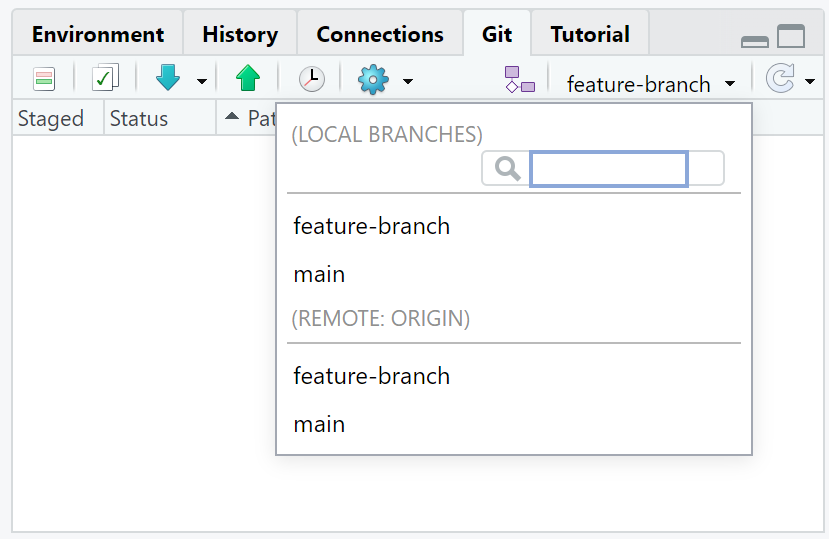
You are able to switch between different branches using the menu displayed when you click in the branch name:
Git is a Version control software optimized for plain-text files. This can register non-linear changes.
Checklist
Key characteristics of Version control systems are:
Keep the entire history of a file and inspect a file throughout its lifetime.
Tag a particular version so you can return to them easily.
Facilitates collaborations and makes contributions transparent.
Experiment with code and feature without breaking the main project
The best way to merge branches is on GitHub. We recommend you to read about how to create a Pull Request, and how to merge a Pull Request
Challenge
- Create a new directory within your project called
tests. - Modify the
.gitignoreso that thetestsdirectory is not version controlled.
This can be done in RStudio:
R
usethis::use_directory("tests")
Then open up the .gitignore file from the right-hand
panel of RStudio and add tests/ to the list of files to
ignore.
There are many more features in the RStudio Git menu, but these should be enough to get you started!
Key Points
- Using RStudio’s Git integration allows you to version control a project over time.
- Feature branches help you experiment with code without breaking the main project.